
Recently I walked you through the process of deploying InvoicePlane to an on-premise data center (see Deploy this powerful open-source invoicing system to your data center). Since then, that tool has become the go-to for all of my invoicing needs. It makes it very easy for you to create a client list, products/services, and generate professional-quality invoices to send to those for whom you provide service.
SEE: Kubernetes: A cheat sheet (free PDF) (TechRepublic)
Since my original setup, I was generating invoices, downloading them to my local machine, and then emailing them to the necessary contacts. I decided I wanted to cut out the middle man and email them directly from Invoice Plane. Fortunately, the developers added that feature to the application.
I’m going to show you how to configure Invoice Plane to use Google’s Gmail SMTP servers with Invoice Plane. Once you have this up and running, it’s just a matter of sending the invoices from within the app, thereby cutting out a step. At the end of the day, you’ll be glad for that simplified process.
What you’ll need
To make this work, you’ll need two things:
- A running instance of InvoicePlane that can reach the internet.
- A Google Account.
If you don’t want to opt to go the Google route for SMTP, you can either set up your Invoice Plane instance to also act as an SMTP server or you can opt to use an internal SMTP server that resides within your data center. For the sake of simplicity, I’ll demonstrate using Google’s SMTP servers.
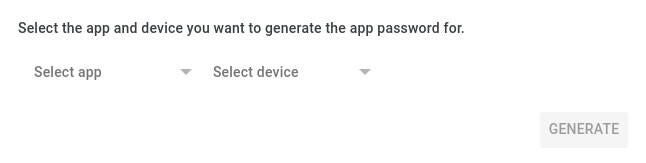
How to create a Google app password
If you use multi-factor authentication with your Google account (and you should), you’ll need to create an app password. To do that, go to the Google App Password site. From the Select App drop-down (Figure A), select Email. From the Select Device drop-down, select Other and then give it the name Invoice Plane. Click Generate and make sure to copy the 16 character password.
Figure A
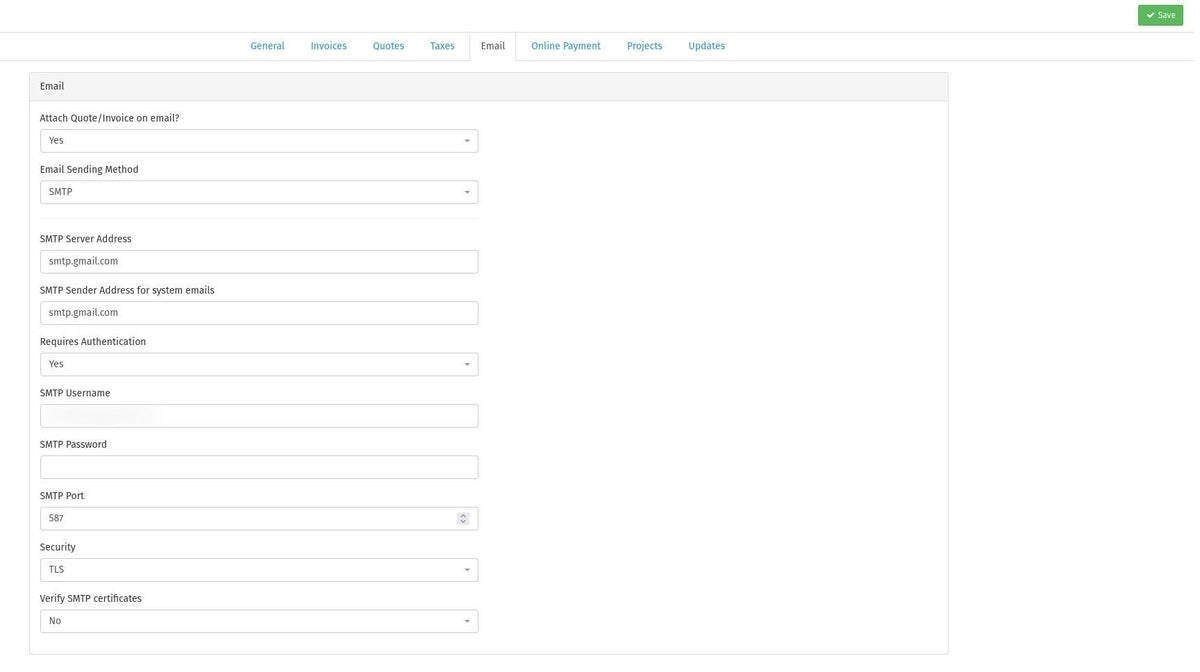
How to configure SMTP with InvoicePlane
With your app password at the ready, log into Invoice Plane as an admin user and click the Gear icon in the upper right corner of the window. In the resulting window, click the Email tab and select SMTP from the options. You’ll then need to fill out all of the required information for the SMTP server (Figure B). When using Google’s SMTP server, here are the details:
- SMTP Server Address: smtp.google.com
- SMTP Sender Address for system emails: smtp.google.com
- Requires authentication: yes
- SMTP Username: Your Gmail address
- SMTP Password: Your generated app password
- SMTP Port: 587
- Security: TLS
- Verify SMTP certificates: No
Figure B
Click Save at the top right corner of the window and you’re all set up to send email.
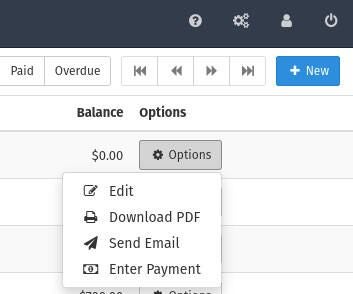
How to send an invoice from within the app
Select an invoice from Invoices | View Invoices. Click the associated Options button and then click Send Email (Figure C).
Figure C
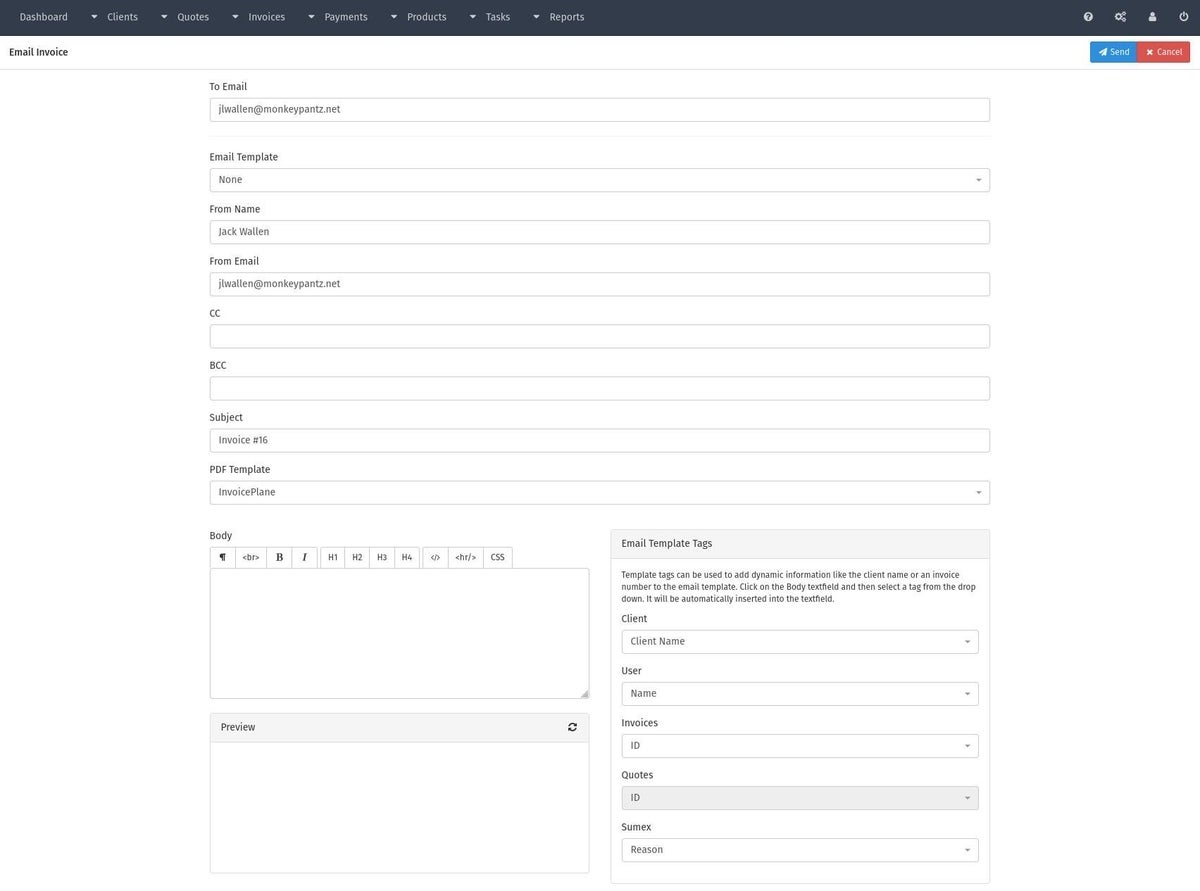
This action will open a template that you can customize for the email (Figure D).
Figure D
Once you’ve customized the email to your liking, click Send and the invoice will be delivered to your client. All you have to do now is wait for them to remit payment.
Enjoy this newfound (and simpler) workflow with InvoicePlane. If you’re a busy freelancer or small business like me, this application should very much be on your radar. Get it up and running, so you can take control of managing your invoices.
Subscribe to TechRepublic’s How To Make Tech Work on YouTube for all the latest tech advice for business pros from Jack Wallen.

Image: iStock
