
In order to capture a Photo taken from a PowerApp, we are going to take advantage of the Camera control to capture an image and pass that to a Flow which will save it to SharePoint on OneDrive. The process relies on the workflow expression Base64ToBinary() which we will call within the Flow to convert the image format received from PowerApps (base64) into the correct format to store in SharePoint or OneDrive (binary). Let’s get started.
Setup the Storage Location
As mentioned above OneDrive and SharePoint both have a Create File action that can be used and are pretty interchangeable. Using the use-case of a receipt up-loader I’m going to use SharePoint for this demo. We’ll just create a simple Library called “Receipts”.
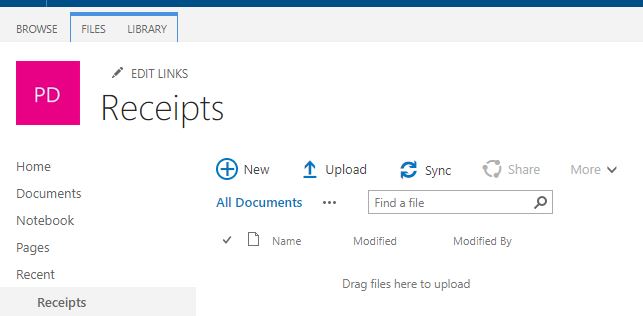
Library created to store receipts. The out-of-the-box fields will suffice.
Create the Flow
Next we will create the Flow that will handle the conversion. This Flow will get triggered from the PowerApp and will take a few different arguments needed to store the document.
NOTE: once you start requesting properties it is hard to undo with a PowerApps Trigger. It is best to get all your actions created first, see what you need, and then start asking for properties in the order that you would prefer.
Initial Steps
- Create a Flow from blank, and for the trigger use the PowerApps trigger from the PowerApps connector. We will later be able to trigger this within the App as a function call.
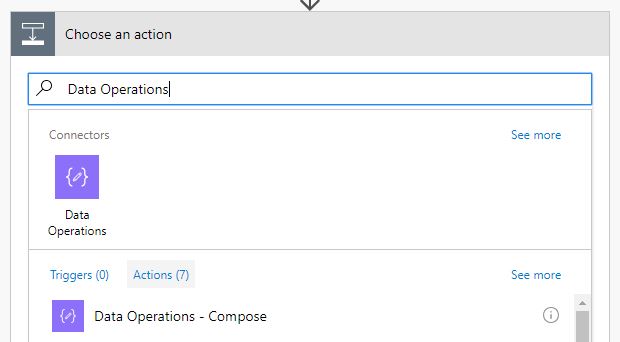
- The next step will be to convert the file data we get from the PowerApp into a usable object that Flow can handle. This is the Compose action that is apart of the “Data Operations” connector. For now, leave the Inputs property blank and we will come back to this in a moment.
Data Operations Compose Action – Used to create objects
- The third step is to select the Create File action for the respective platform you would like to use. Once you have selected your action, You can now ask for the File Name and the File Content properties.
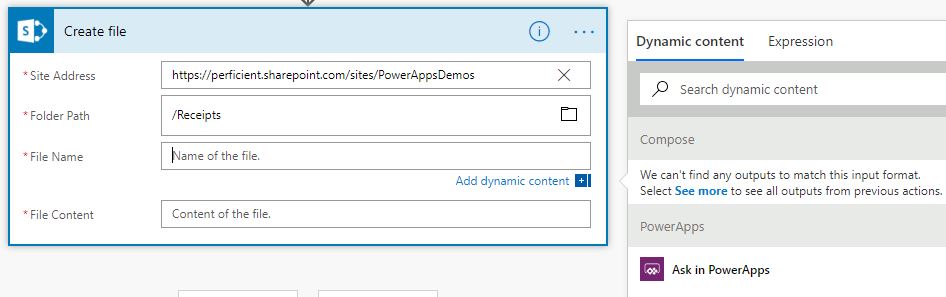
You can request any type of field be provided by the PowerApp
- After asking for both properties, You will see that they become available to use in the tool panel.
Pass the File Content Argument to the Compose action.
Base64ToBinary Magic
In order to store the image, we need to convert to binary so that the Create File action can properly store the file. this is where the Base64ToBinary() Workflow function comes in to play.
- First in the Expression panel, enter the function and have the cursor within the the parenthesis
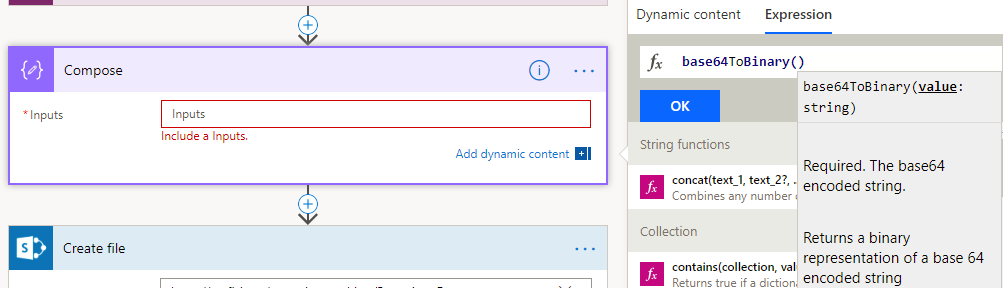
The function also provides intellisense for the parameters needed
- Then switch to the dynamic content panel and select the FileContent property we asked for earlier. the expression should read:
base64ToBinary(triggerBody()['name of file content variable'])NOTE: If you followed the instructions exactly, the name of the content property should be “CreateFile_FileContent”.Once you fill in the function (see screenshot below) press “OK”.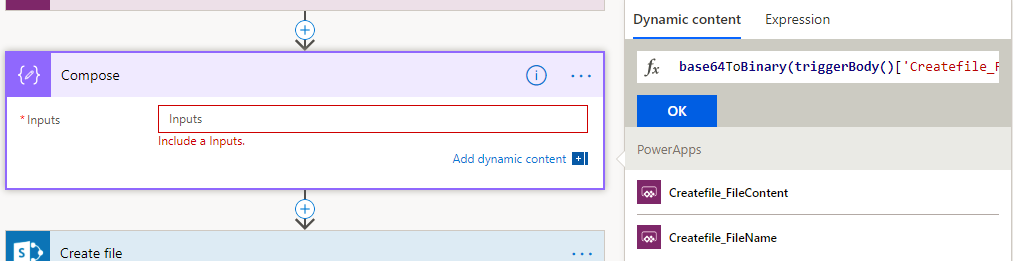
example of the formula in the tool panel before clicking “Ok”.
Final Flow
If you’ve followed the steps above your Flow should look similar to the screenshot below. Once it looks good, save, and we’re done with the Flow.
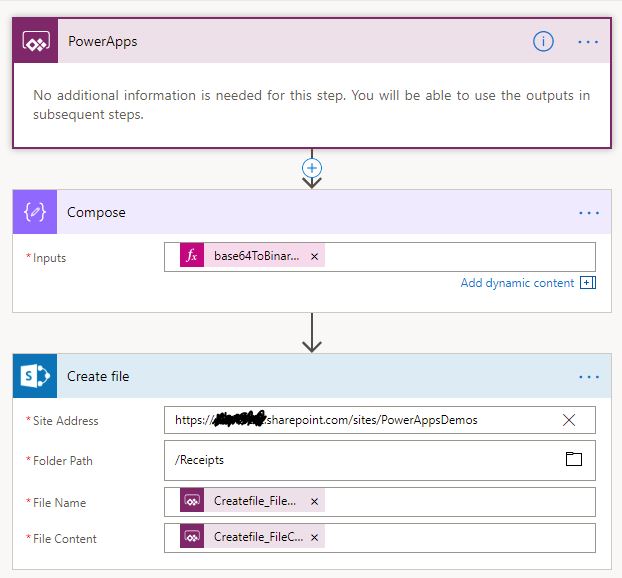
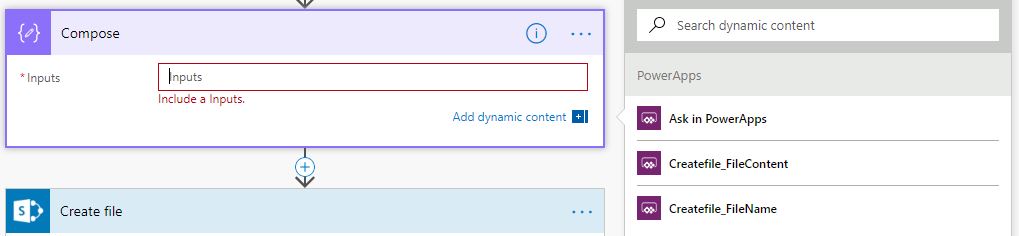
Make sure the Input for the Compose function has the “Fx” symbol and the “base64ToBinar…” text
IMPORTANT NOTE: Once you save and exit, if you come back into the flow, the Compose Inputs field might reset itself to be just the FileContent property. You will have to reset this to use the base64 function otherwise it will break when you save it again.
Build the PowerApp
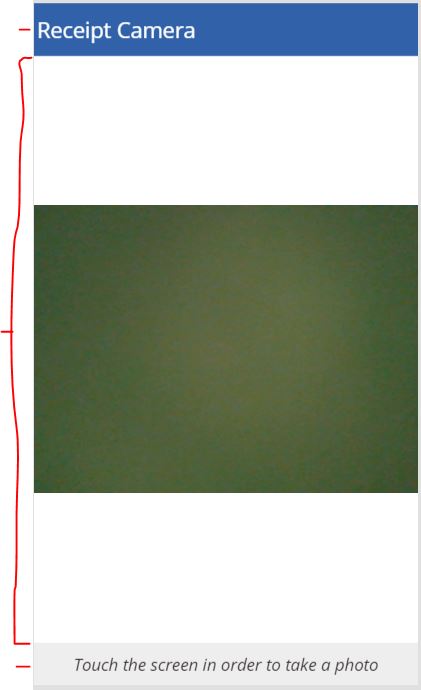 Now with calling the function from the PowerApp, we’ll keep it as simple as possible. Create from a blank template (tablet or mobile is fine) and on the page we’ll add a camera control. I’ve expanded the camera control to cover the whole mobile screen (besides for a header) to make it easy for the user to click. I’ve also added a label at the bottom of the screen to let user’s know to press the camera to take the photo.
NOTE: it is important to use the OnSelect event handler on the Camera control itself because otherwise the photo will not be correctly captured.
We don’t want the user to just automatically load the image without review, so we are going to create a User Experience so that the user can review the image first. To do this, we set the camera control’s OnSelect handler to: ClearCollect(receiptPhoto,Camera1.Photo);UpdateContext({receiptTaken:true})
This will store the camera’s photo in a collection called “receiptPhoto“, and also update a variable called “receiptTaken” to true. This variable controls the visibility of a second set of objects grouped together to display a copy of the image captured. Once this is true, a few components are used to display the preview.
Preview Panel Experience

In order to allow the user to review their photo, we are going to insert five components and group them. We will then need to configure their visibility property to be dynamic based on the variable receiptTaken. This will support the user being able to take a picture and then preview the image and have the chance to re-take it if not acceptable.
- Icons > Box – A box to cover the other content to focus the preview panel (think of a shadow behind a modal)
- note –
- Media > Image – An image component that is set to display the preview image. The image property will be set to:
First(receiptPhoto).Url - Text > Label – A label to present the generated file name. This can be generated a number of ways, but to keep it simple we set the Text property to:
"Receipt-"&Text(Today(),"[$-en-US]mm_dd_yyyy")&".png" - Text > Label – A second label to display the content string (this is the string version of the string in base64. This isn’t required but is useful for testing). We set the Text property to:
First(receiptPhoto).Url - Controls > Button – A “retake” button to rehide the preview panel and allow the user to retake a photo. The Onselect handler is:
UpdateContext({receiptTaken:false}) - Controls > Button – And finally the “Save to SharePoint button”. This button has a hefty function configured for it’s Onselect handler in place so let’s break it down more.
Using the Flow function to Save the Image
Now that we have built our Flow to do the Document conversion and storage, we can go back to the PowerApp to hook up the flow to our original submit button. In the PowerApps editor, under the Action tab select Flows. This will pull up a panel where you can see all your Flows with triggers set to PowerApps. Select the Save to SharePoint button, and then in the panel select the Flow you created earlier. By selecting the button first it will auto apply the Flow call to the OnSelect event handler. Depending on the order you setup your properties to ask for from PowerApps, your intellisense might be different, but the content property is the most important part to set:
General Formula:
ReceiptUploader.Run("Receipt-"&Text(Today(),"[$-en-US]mm_dd_yyyy")&".png", Substitute(First(receiptPhoto).Url,"data:image/png;base64,","")); Notify("Your receipt was saved",NotificationType.Success);Navigate(DetailScreen1,ScreenTransition.Fade)
FileContent_FileName Property
same as the label – "Receipt-"&Text(Today(),"[$-en-US]mm_dd_yyyy")&".png"
FileContent_FileContent: Property
Here we use the substitute function to remove the prefixed encoding details:
Substitute(First(receiptPhoto).Url,"data:image/png;base64,","")
At the end of the function, we set a simple notification to appear and navigate the user to another screen. We will end it here but another thing to handle would be a user navigating to this page should have the navigation function also update the receiptTaken variable to false to make sure the preview panel isn’t still displaying.
Make sure to save and publish your PowerApp. You are now ready for testing!
Ready for Testing
With the app saved, you can now go through testing the app. (my screenshots are prefixed with “134” instead of “Receipt”).

My ceiling (before the photo)
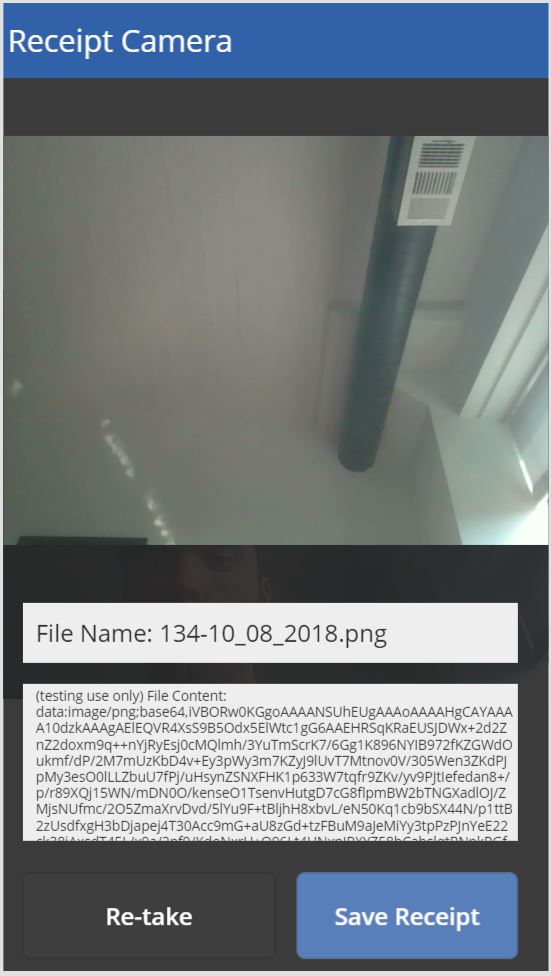
Preview panel of my ceiling
Once I hit “Save Receipt”, I get the Notification across the top of the screen.

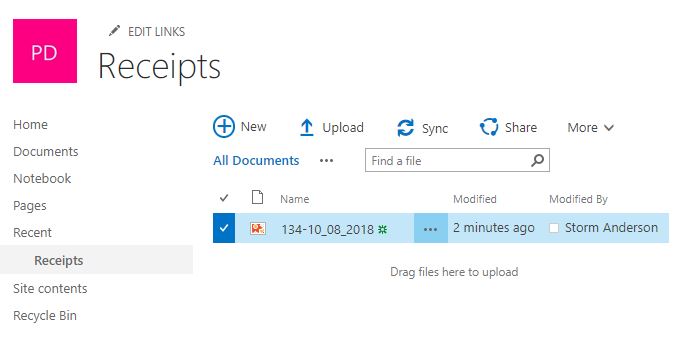
And finally in SharePoint you should see your receipt.
And we’re Done! Now with the basis built, this can be expanded to be integrated with any use-case (receipt uploader, Field Workers, etc.). The reference to this file could be stored in a separate tracking list from the Flow or the experience for the PowerApp could be to generate the name of the receipt based on other fields. PowerApps can’t read from document libraries yet but