This is the second article in our series on what makes FlexDeploy a seamless fit for Oracle Fusion Middleware users. In this blog article I will walk through the core components of FlexDeploy, which enable the basics of build and deployment automation. I will demonstrate how to build and deploy WebLogic configurations (datasource and EIS entries) across any number of environments. I will extend this SOA example using other functionality to enable an effective continuous delivery solution in the next four blog posts. All of these concepts apply to any FlexDeploy project type.
- FlexDeploy Loves Oracle Fusion Middleware: Overview
- FlexDeploy Loves Oracle Fusion Middleware: WebLogic Configuration Setup
- FlexDeploy Loves Oracle Fusion Middleware: MDS Setup
- FlexDeploy Loves Oracle Fusion Middleware: Service Bus Setup
- FlexDeploy Loves Oracle Fusion Middleware: SOA Setup
- FlexDeploy Loves Oracle Fusion Middleware: Continuous Integration and Issue Tracking
- FlexDeploy Loves Oracle Fusion Middleware: Test Automation
- FlexDeploy Loves Oracle Fusion Middleware: Release Pipelines
- FlexDeploy Loves Oracle Fusion Middleware: Integration with ServiceNow
WebLogic Configuration Files
The WebLogic configuration files are a set of files that contain the datasource and EIS properties that are required to create the WebLogic objects. These files require a specific format and provide the ability to have environment specific data such as connection information or passwords. All files will have property replacement run against them which allows passwords to be encrypted in FlexDeploy and replaced in the file when needed. The configuration files will be stored in an SCM.
Base Datasource (dsconfigurations.properties)
DSList=DB_DS

DB_DS.DataSourceType=Generic
DB_DS.ConnectionClass=oracle.jdbc.OracleDriver
DB_DS.DSName=dbquery
DB_DS.User=DEV_SOAINFRA
DB_DS.Targets=SOA_Cluster
DB_DS.JNDINames=jdbc/dbquery
DB_DS.MinCapacity=0
DB_DS.InitialCapacity=0
DB_DS.GlobalTransactionsProtocol=None
Development Environment Specific Datasource (DEV/dsconfigurations.properties)
DSList=DB_DS

DB_DS.URL=jdbc:oracle:thin:@//odblt02.flexagon:1523/SOAT01
DB_DS.Password=${{DS_PASSWORD}}
Base EIS (eisconfigurations.properties)
EISList=DB_EIS

DB_EIS.Adapter=DbAdapter
DB_EIS.JNDI=eis/DB/dbQuery
DB_EIS.properties.XADataSourceName=jdbc/dbquery
Workflows
Workflows are a sequence of operations to implement the build or deployment for a technology into a single environment. There are several different types, but here we will focus on the build workflow and the deploy workflow.
Workflows are highly re-usable as they are parameterized and executed in context of a project and the target environment through the use of project/environment properties defined in FlexDeploy.
A build workflow is responsible for collecting the source and packaging it into an artifact (configuration files), which is then versioned in FlexDeploy’s internal artifact repository. The deploy workflow is then responsible for taking a versioned artifact and deploying it into the target server.
Workflows, while powerful, are generally very simple since they are task oriented. They are also simplified by making use of out of box FlexDeploy plugins, which understand the underlying technologies and provide functions to perform the heavy lifting.
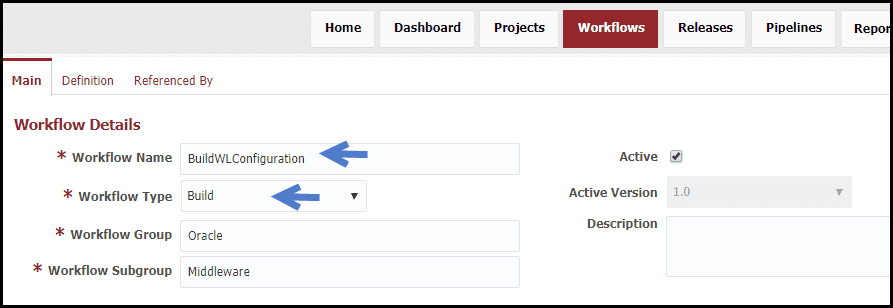
Build Workflow
The build workflow uses:
- An out of box child workflow (SCM-ExportSource) that will extract the code from configuration details on the project, such as location and SCM Type.
- The saveArtifacts operations from the Flexagon File plugin with default configuration.
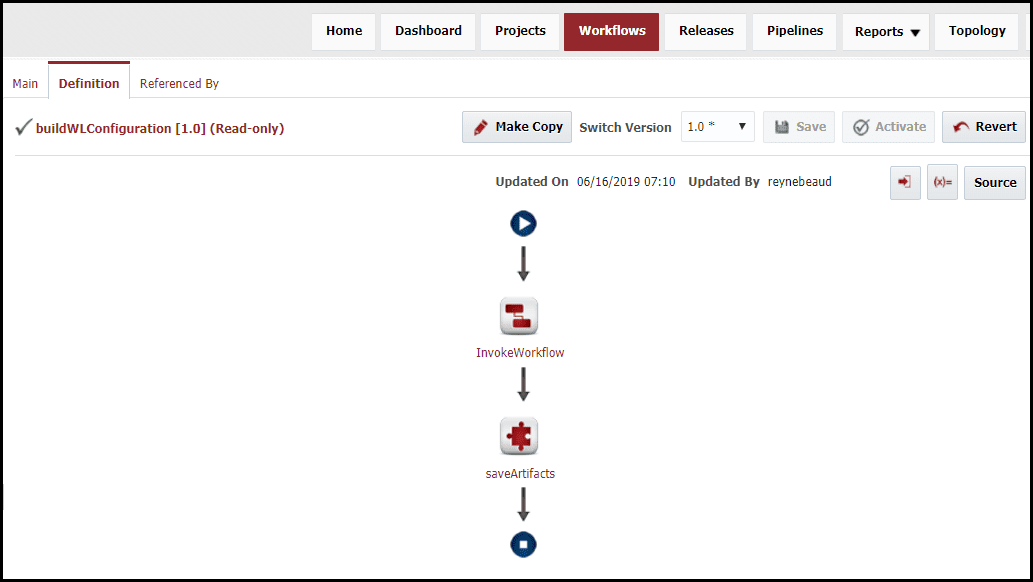
Deploy Workflow
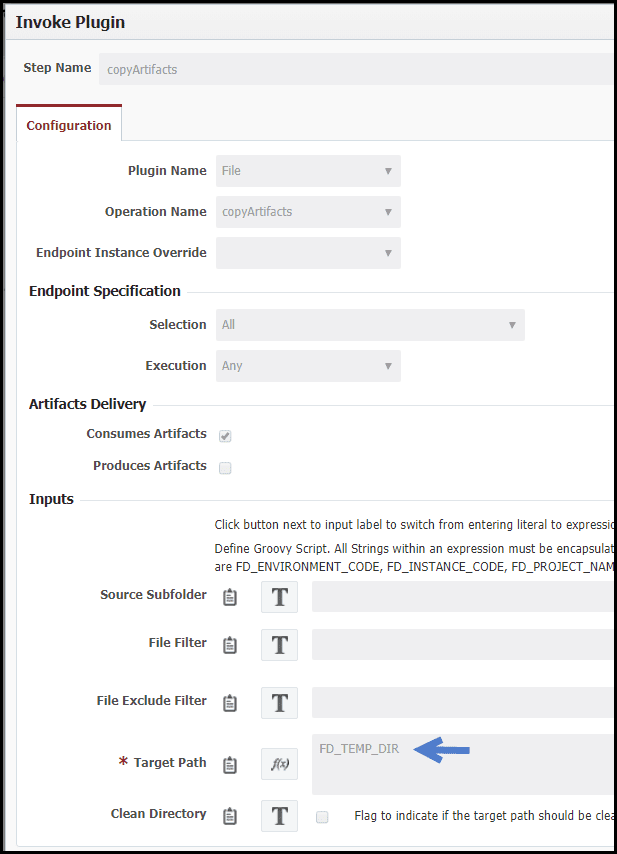
The deploy workflow uses the createOrUpdateDataSources and createOrUpdateEISEntries operations from the Oracle WebLogic plugin with default configuration and the copyArtifacts from the Flexagon File plugin. In addition, a property was created to match the one in the datasource configuration file above.

The artifacts are copied from the artifacts to the temp directory. All property replacement and execution occur from the temp directory.
Unless we later want to add logic to implement specific use cases or add test calls, we would never need to revisit the workflows again for WebLogic configuration. Do not confuse a workflow with the orchestration of deploying across a series of environments. That is what is called a pipeline in FlexDeploy, and will be covered in another blog article in the series.
Topology
The topology defines the physical and logical architecture, environment specific properties, and connections to other tools. The logical architecture is defined by environments and instances. Examples of environments would be Development, QA, and Production. These are logical in that they are not directly bound to any technology. An instance is specific to a technology, but not any specific environment. For example, if you have a single SOA server, which has physical installations in many environments, this is represented by a single logical FlexDeploy instance. If you have, for example, separate SOA installation stacks for critical and non-critical services, these would be represented by two instances.
Environment
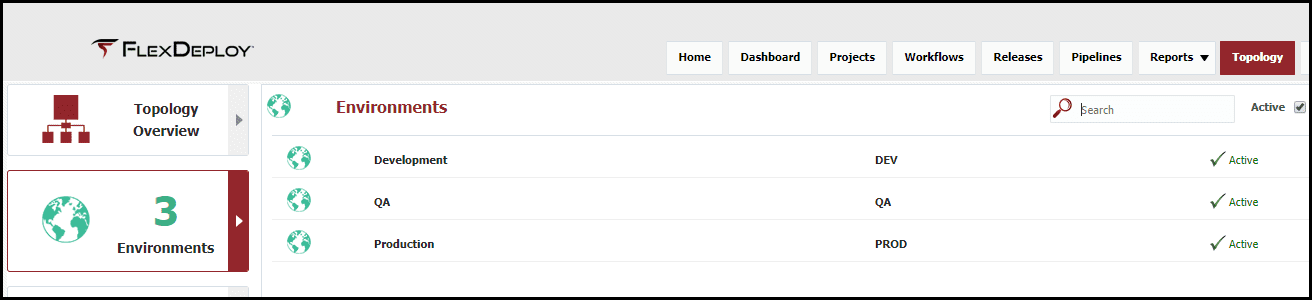
For this blog article I have created four logical environments. The environments are simply a name without any additional configuration, other than to indicate which builds will be performed in “Development”, and the other environments are for deployments only.
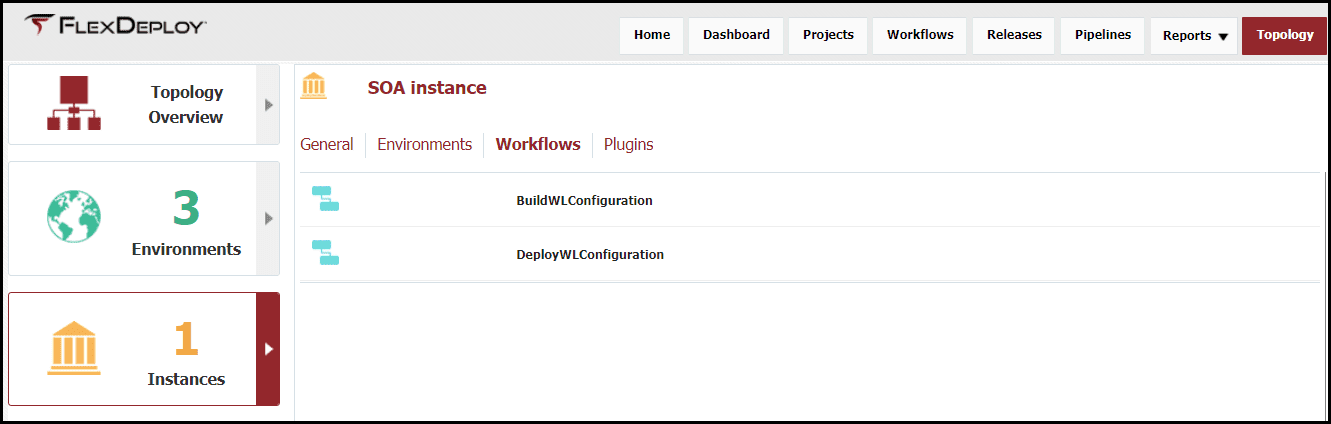
Instance
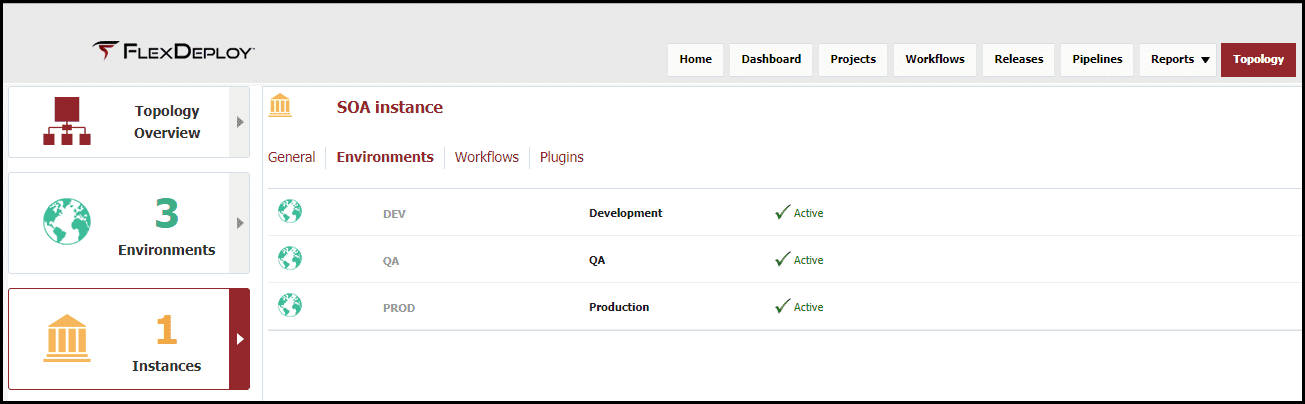
One logical instance, simply called “SOA”, has been created in the previous article. WebLogic configurations utilizes the WebLogic server of the SOA installation, since thus we can utilize the same instance for MDS, Service Bus and SOA. Additional configuration will be required on the SOA instance to add the additional WebLogic configuration workflows.
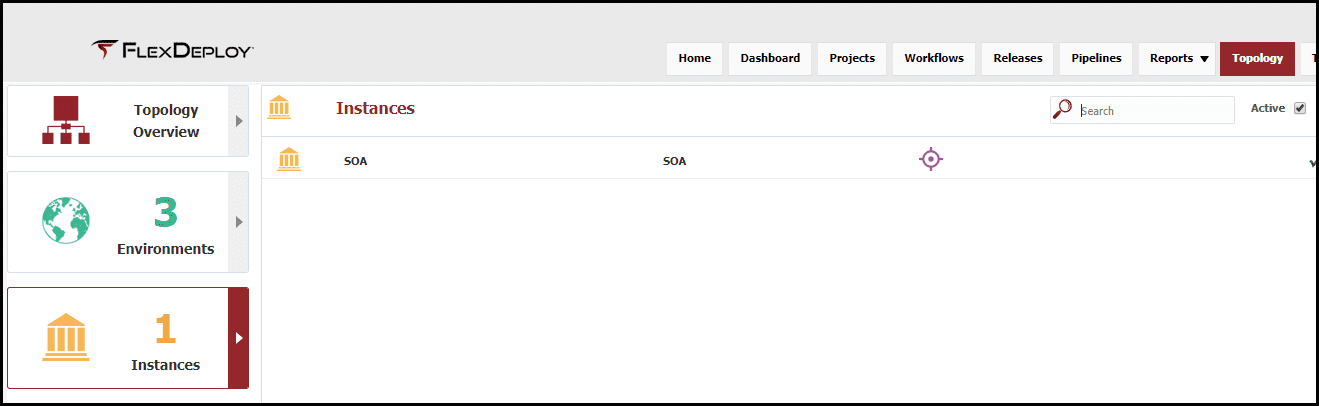
This instance has been associated with the three environments where I have SOA installations.
And I have indicated that build and deploy workflows for WebLogic configuration will be executed on this instance.
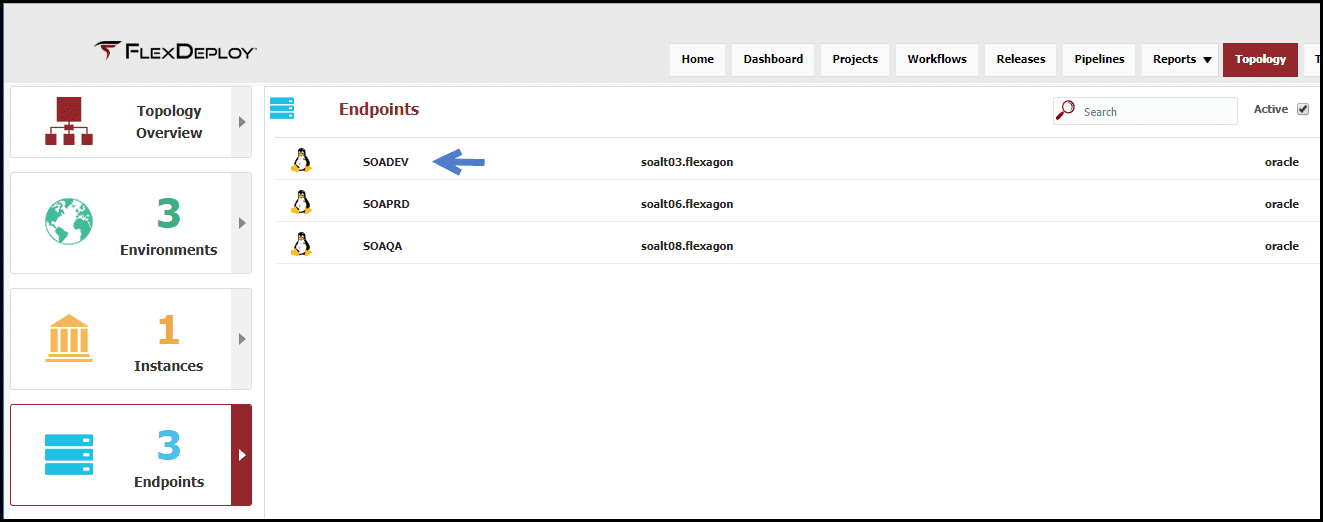
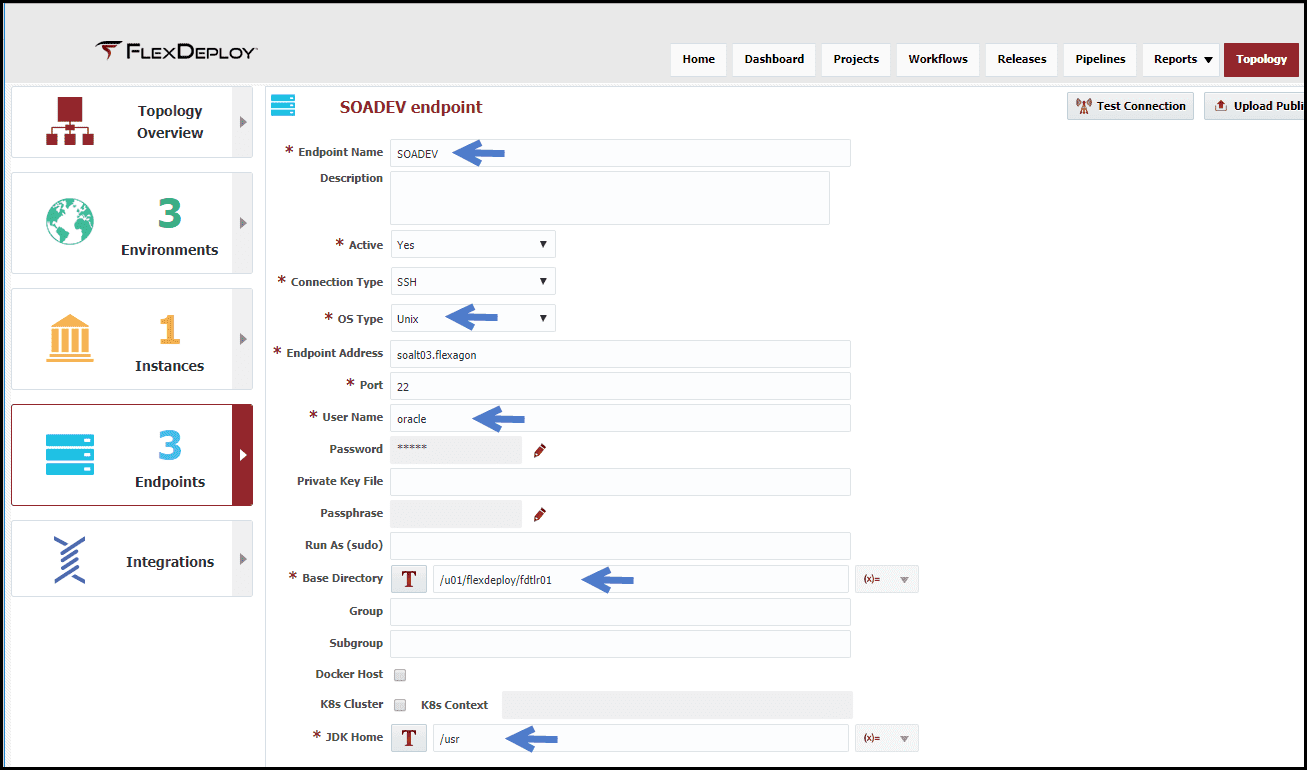
Endpoint
Now we will define the physical architecture, which is represented by what are called endpoints. An endpoint is an SSH connection to a physical server. The definition of the endpoint, in addition to a name, includes the host address, credentials (password, or SSH keys), a directory that resides on the host which can be used by FlexDeploy at runtime, and the location of the JDK installed on that server.
Topology Overview
Lastly, the logical architecture must be mapped to our physical architecture. Here, in the “Topology Overview“, since I mapped the SOA instance to the three environments, a configuration matrix is formed.
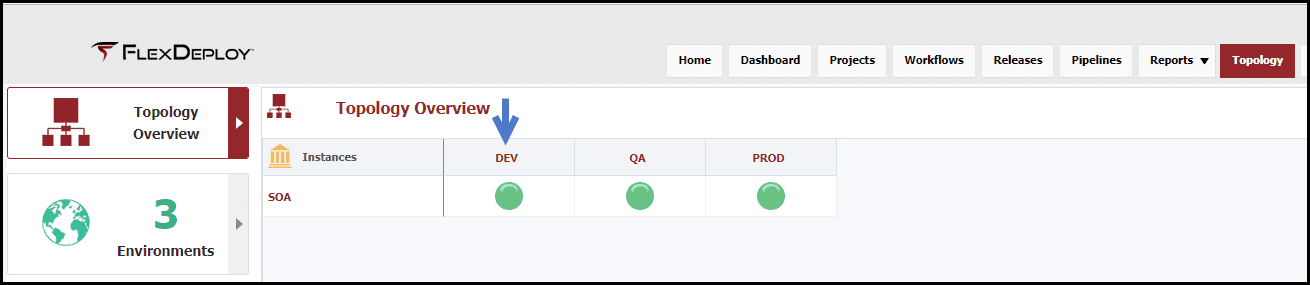
By clicking on the balloon for each environment I can bind it to the associated physical endpoint(s) and provide values for environment specific properties. Here I have indicated that SOA in Development has a single endpoint called “SOADEV”.
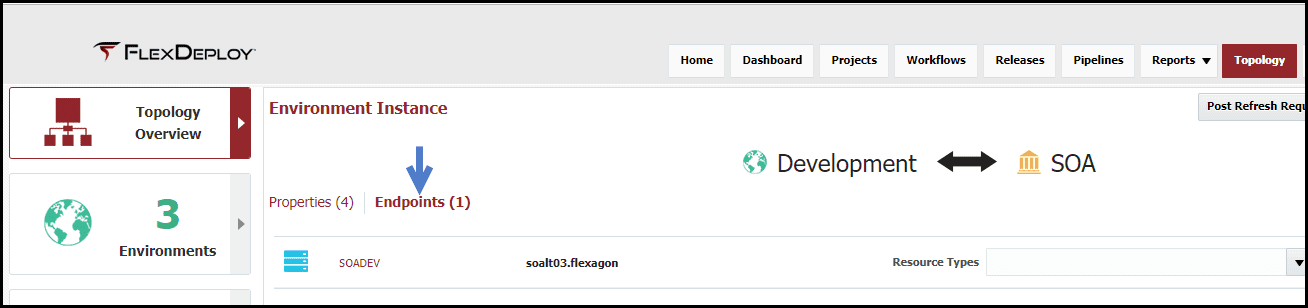
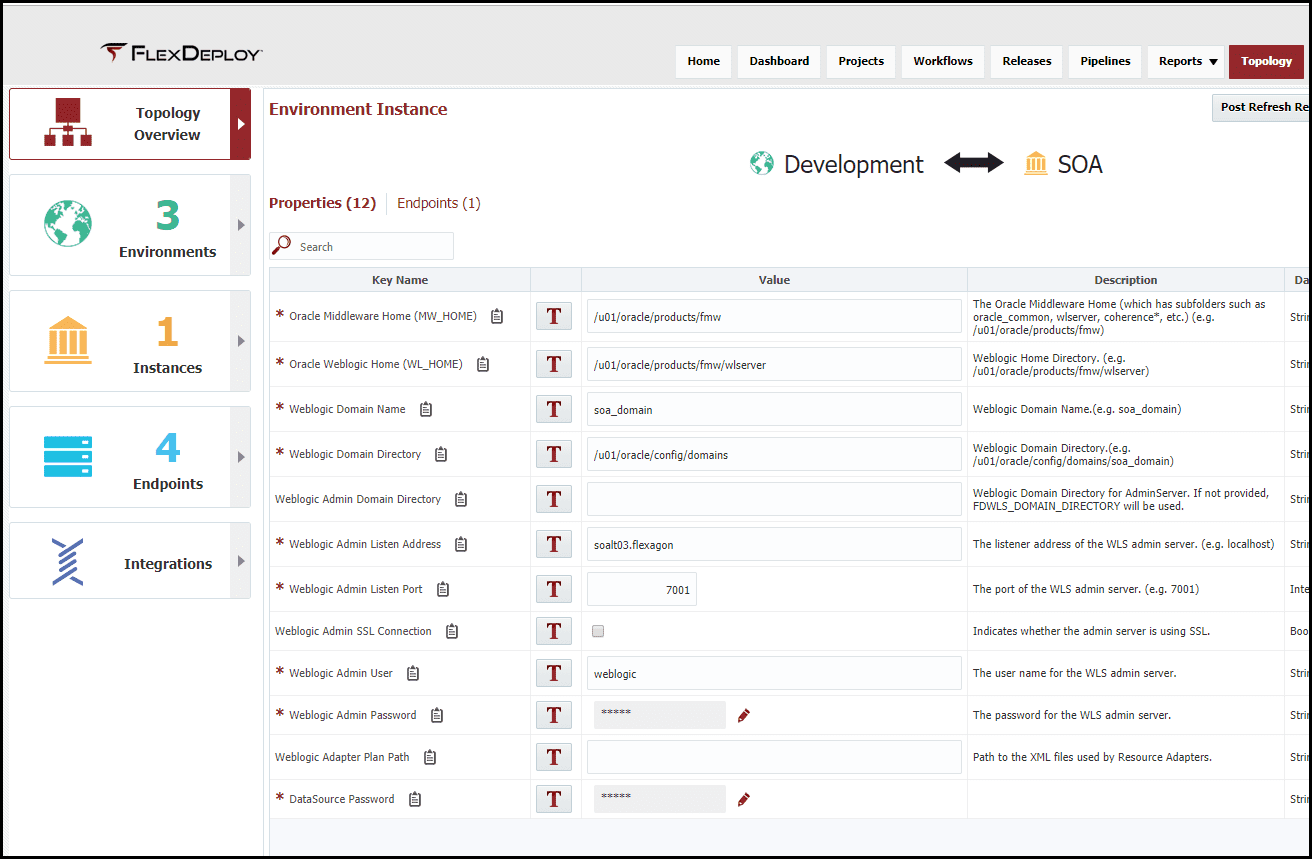
Since I mapped the SOA instance to the build and deploy workflows we created, the required and optional environment specific properties appear. I provided the values for these properties, as applicable for my Development SOA installation. I have completed the same endpoint mappings and property value configuration of the SOA instance for QA and Production.
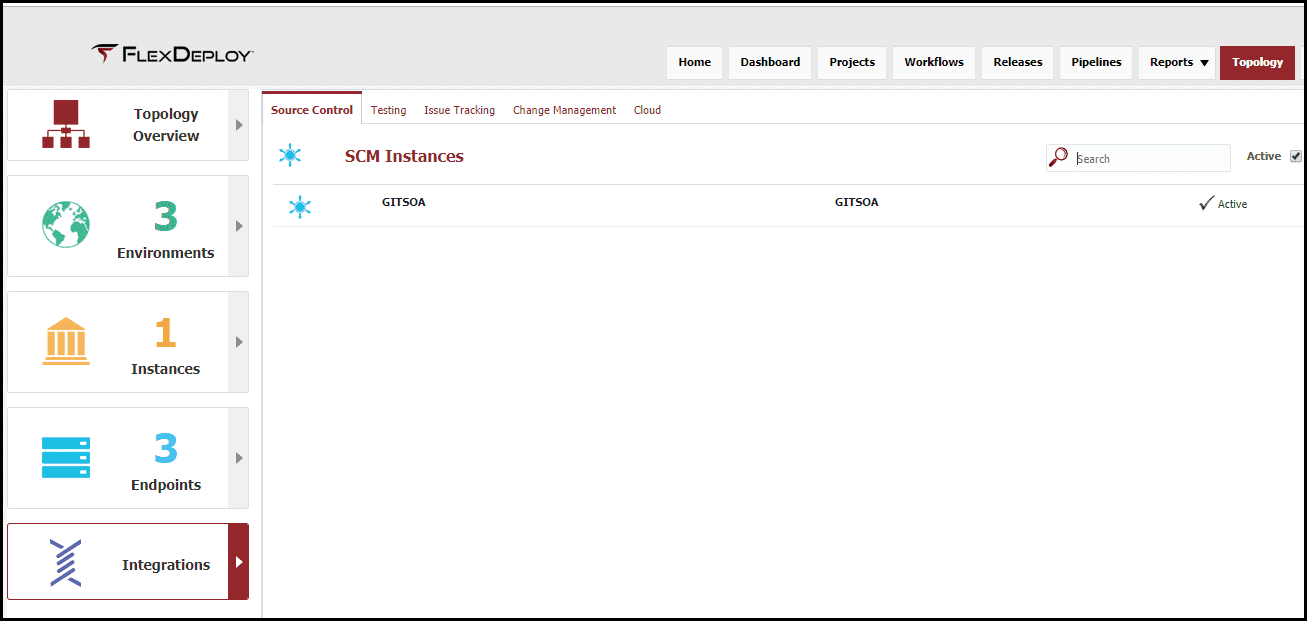
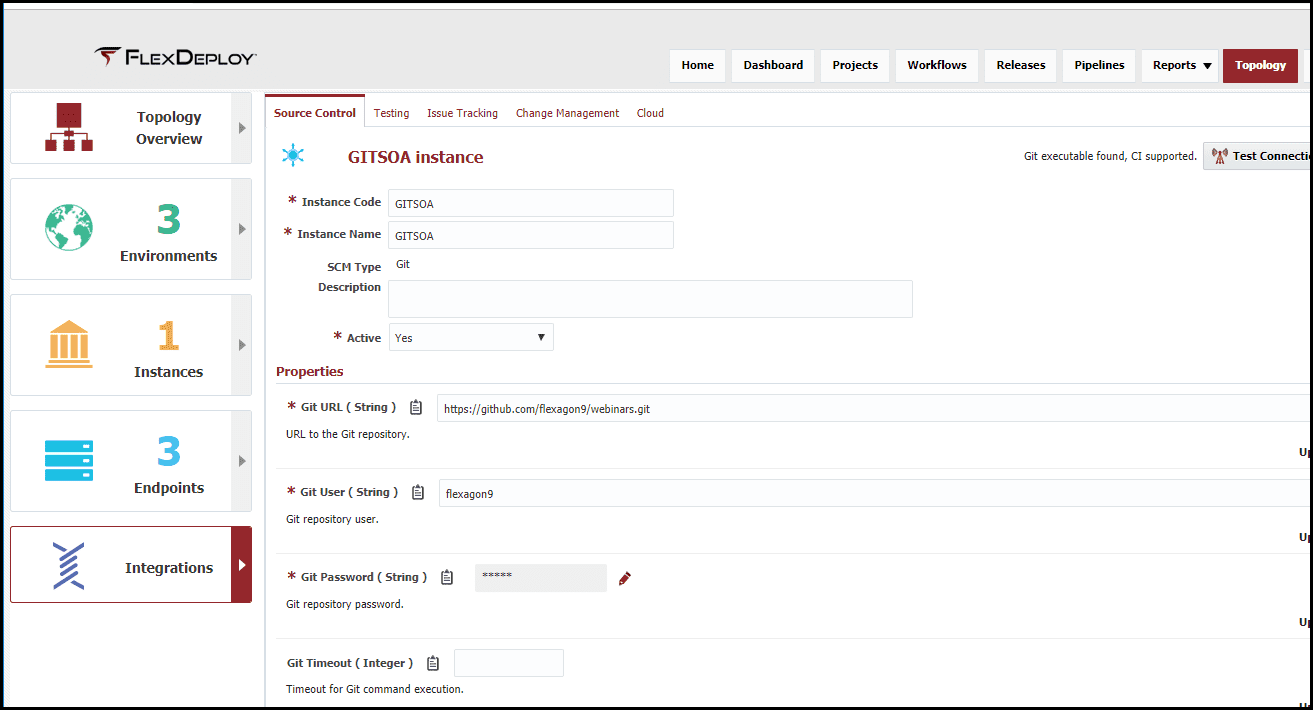
SCM Instance
Finally, I will define a connection to my source control system. For this blog article I am using GitHub to host my WebLogic configuration files. A connection has been created to the repository, defined by a URL and the credentials.
That concludes the topology configuration. I will later add additional workflows to this configuration and that will add additional properties that will need to be configured.
Projects
The next step in the configuration is to define one or more projects, which will be bound to the workflows, an instance, and a SCM. There can be one to many projects for WebLogic configuration.
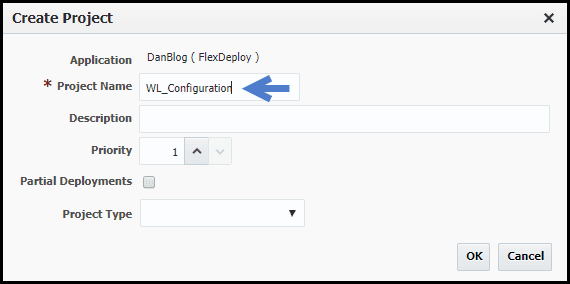
For this blog article I have created one project to manage the datasource and EIS entry. When creating the project, I gave it a name of “WL_Configuration” and made it a standard project.
After creating the project, I have set the following configuration on the configuration tab.

The SCM type is set to “Git”, but there are options available for all popular source control systems. I have bound the workflows I created for the WebLogic Configuration, and bound the Build Instance and Deploy Instance as “SOA”. Notice that the environment is not provided here, as the particular environment will be specified during the build and deployment requests.
Under the SCM Configuration, the Git Instance that was created in topology is selected. The SCM properties are specific to the SCM type, and the values are expressions implemented in the Groovy scripting language. Back to these in a moment.
The streams correlate to the branches in the Git repository the project will be built from. In this example, a master branch was created to manage the code, but additional streams for other branches can be added as required.
Now back to the SCM instance properties. The Branch Name Script is set to use the “StreamName” variable. This will resolve to the stream that is selected in the build request. The other property to pay attention to is the Sparse Checkout Folders Script. This is the path relative to the repository where the source is located for this project. For this example, my source is located in the “WL_Configuration” folder within the configured Git repository. To simplify configuration, and not have to change it for each project, a Groovy script was used: “ProjectName”. When the project is built, the value of “ProjectName” will resolve accordingly at runtime.
Adhoc Build & Deployments
Now that we have completed the configuration, we are ready to execute build and deployments. To do this, we switch to the green “Execution” tab, and click on the “Build” button.
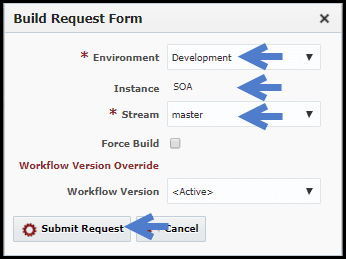
Note that I only have one build environment, and one stream, so they are pre-selected. Click “Submit Request” to initiate the build request. We now see the build request and its execution being processed.
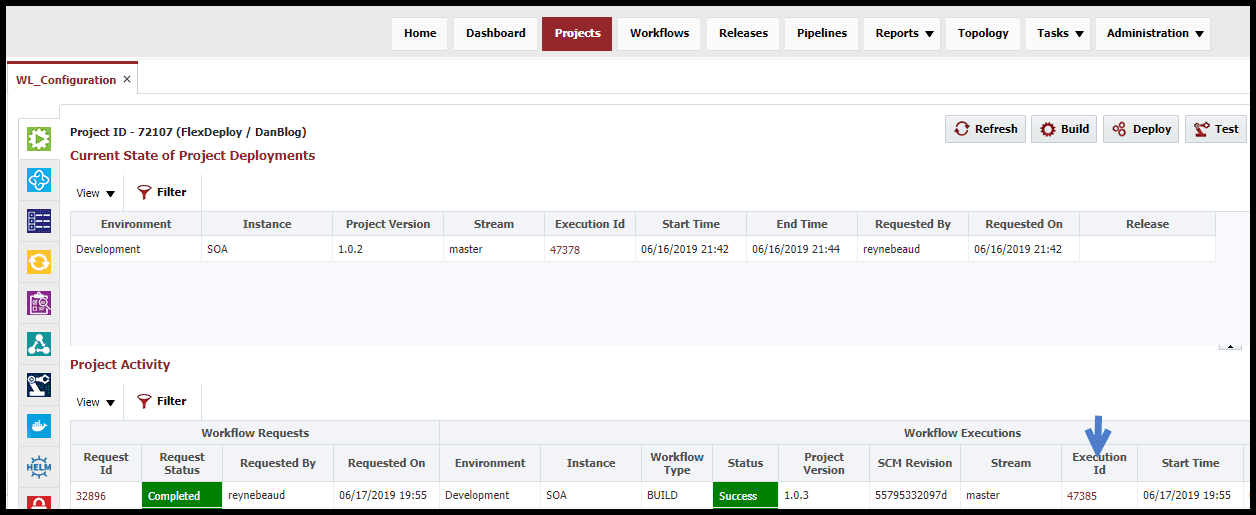
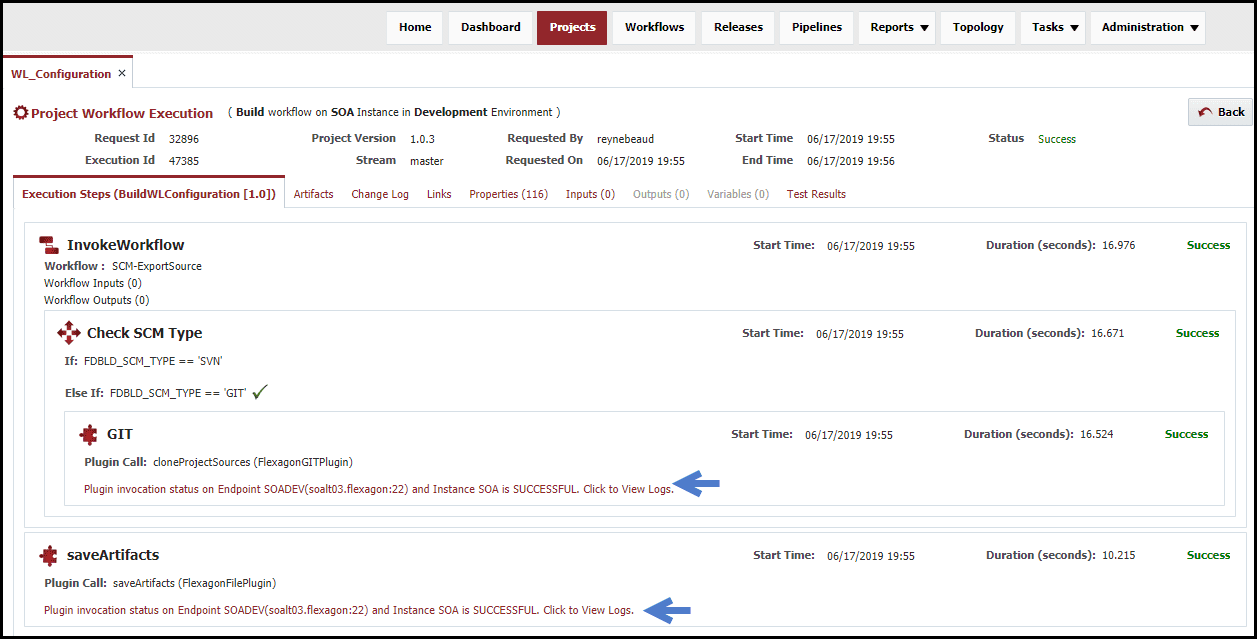
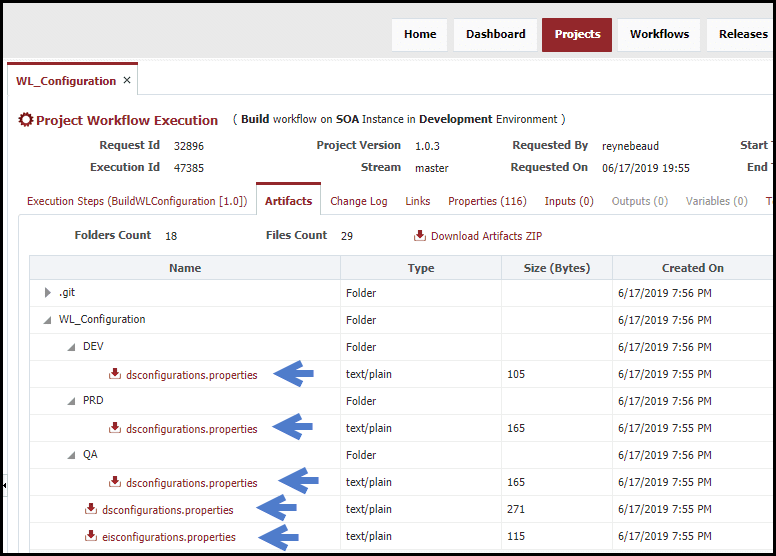
By clicking on the execution id, the execution of the build workflow can be viewed. Each step of the build workflow will be displayed. The link below each step will show the logs for the step.
Once the build is complete the generated artifact will be available on the Artifacts tab. The resulting artifact is versioned in the artifact repository using the generated Project Version number.
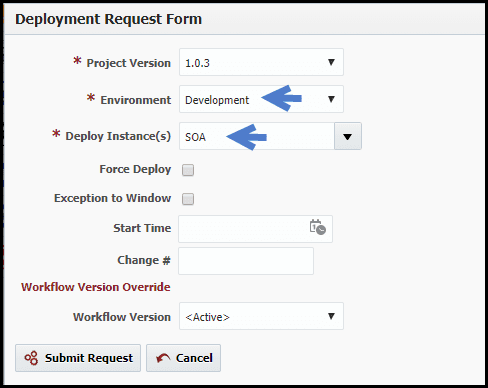
Going back to the main execution screen a deployment request can be submitted to deploy the project version into one or more environments. Click on the “Deploy” button. This will launch the deployment request form for the previous build request. Here the target environment is selected and the request is submitted. Now we see the deployment request and its corresponding execution.
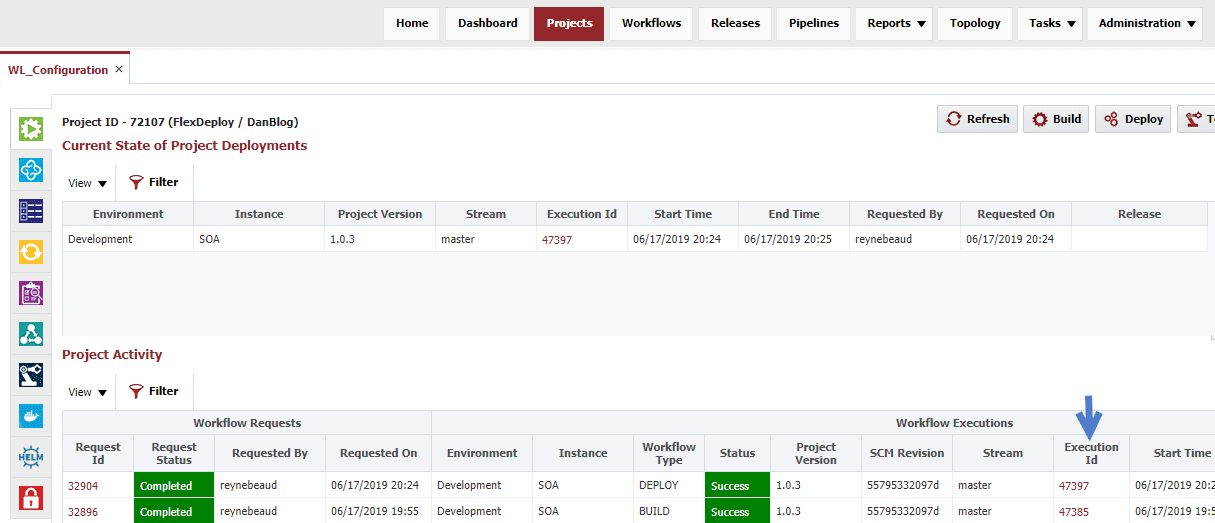
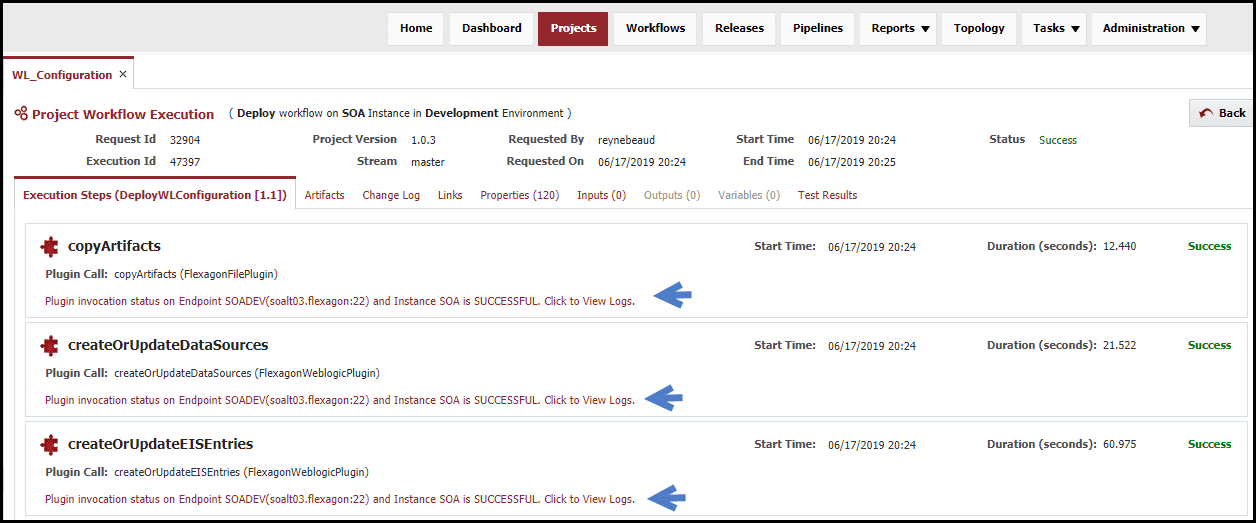
When drilling into the execution we see the steps of the deployment workflow and see that the workflow execution itself is successful. Again, we can drill into the logs for the deployment to see the deployment command that was executed and the resulting output. Click on the “Deploy” button and select another environment to deploy objects to the next environment.
Conclusion
In this blog article, the steps were shown on how to configure FlexDeploy as an automation solution for building and deploying WebLogic configurations across various environments. Configuration included one time setup for workflows, topology, and projects. The core setup positions us for making adhoc requests to assemble source changes from Git into a configuration artifact, and deploy that artifact into any environment. In the next blog article in the series, MDS setup will be added to the solution.