Let’s learn MDE Network Protection Policy Deployment using Intune. You can easily enable Microsoft Defender Network Protection using Intune. We have covered several articles about Microsoft Defender integration with Intune; Onboarding Intune managed devices into Microsoft Defender using Intune policies, etc.
Microsoft Defender Network Protection is a feature of Microsoft Defender Antivirus that helps you to protect devices from accessing malicious domains and IP addresses. The Network Protection policy allows you to configure settings related to network protection, such as blocking inbound and outbound connections, blocking specific IPs or domains, and enabling network firewall rules.
Network protection helps protect devices from Internet-based events. Network protection is an essential attack surface reduction capability crucial in safeguarding devices from internet-based threats. By enabling network protection, you create an additional layer of defense that helps prevent employees from accessing dangerous domains through various applications.
With network protection in place, potentially harmful domains hosting phishing scams, exploit-hosting sites, and other malicious content are effectively blocked. This proactive measure protects employees from inadvertently exposing themselves or the organization to online threats.
- Microsoft Defender for Endpoint Portal Walkthrough
- Latest Microsoft Defender Antivirus Configuration Policy Settings in Intune
How to Configure Defender Network Protection Policy on a Windows Device?
You can use Intune Antivirus template to configure Defender Network Protection Policy on a Windows Device and deploy the Microsoft Defender network protection policy.
What are Intune Security Policies?
Intune Security Policies refer to the set of configuration settings and rules that you can define and enforce on devices managed through Microsoft Intune, and it also helps you to secure the managed devices.
MDE Network Protection Policy Deployment using Intune – Video
The video series on Microsoft Defender Network Protection Policy Deployment using Intune provides comprehensive insights into the features, configuration, and deployment of this powerful security capability.
- It covers all the essential aspects of Microsoft Defender Network Protection, including enabling the feature and leveraging Intune for seamless implementation.
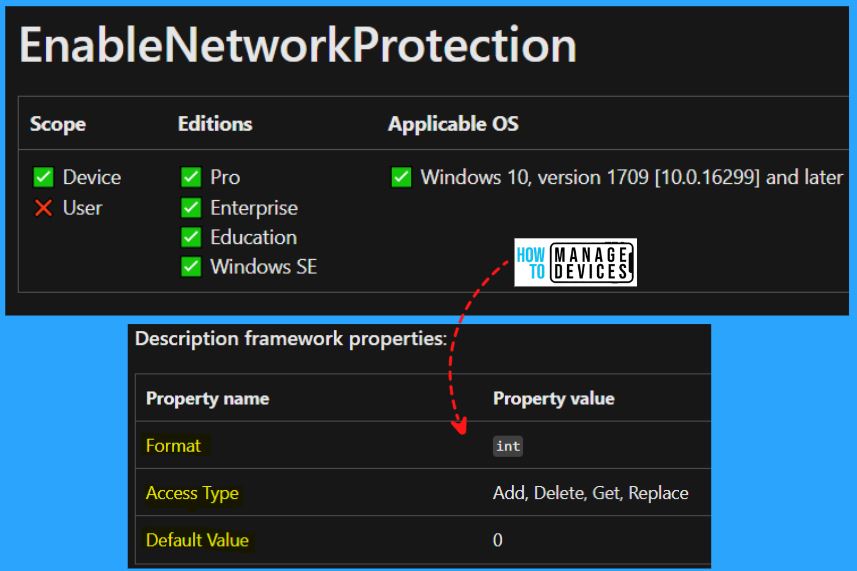
Windows CSP Details EnableNetworkProtection
Let’s see Windows CSP Details for EnableNetworkProtection. You can enable or disable Microsoft Defender Exploit Guard network protection to safeguard your organization’s employees from accessing dangerous domains hosting phishing scams, exploit-hosting sites, and other malicious content on the internet.
| Allow Value | Description |
|---|---|
| 0 (Default) | Disabled. |
| 1 | Enabled (block mode). |
| 2 | Enabled (audit mode). |
CSP URI – ./Device/Vendor/MSFT/Policy/Config/Defender/EnableNetworkProtection
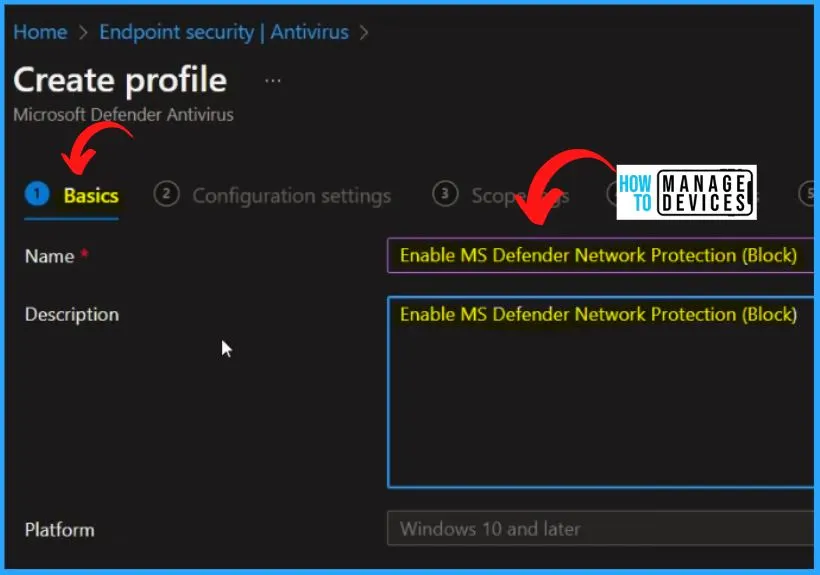
Enable MS Defender Network Protection (Block)
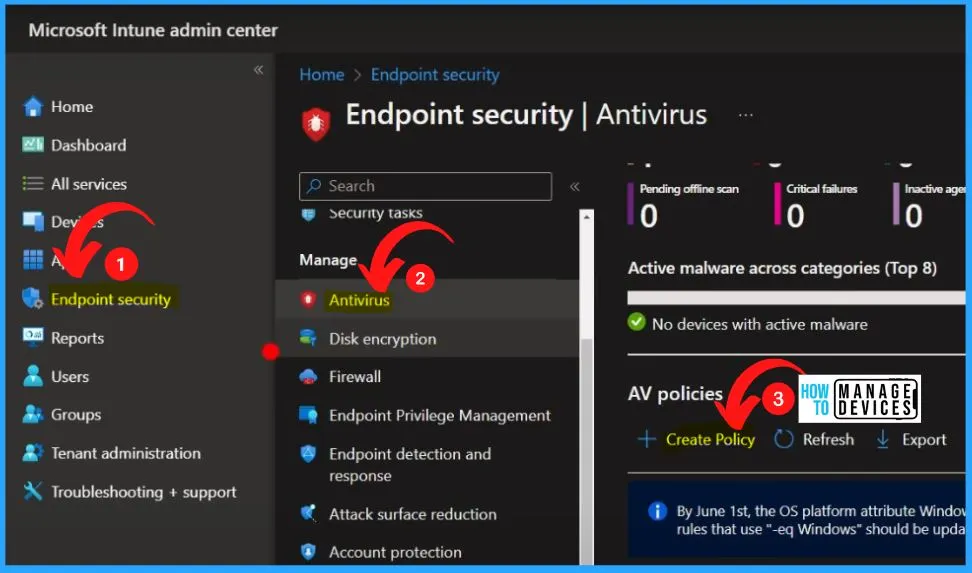
Sign in to the Intune Admin Center portal and select the Endpoint security on the left side of the Microsoft Intune admin center. Endpoint security is the comprehensive approach to safeguarding devices such as desktops, laptops, mobile phones, and tablets against many malicious threats and cyberattacks.
- Select Antivirus from Endpoint Security
- Select Create Policy from the below window
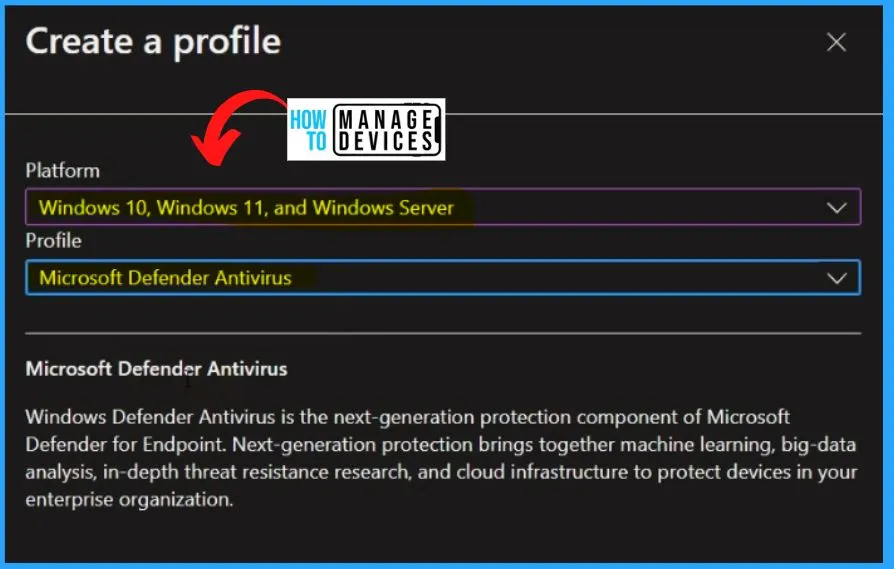
Windows Defender Antivirus is the next-generation protection component of Microsoft Defender for Endpoint. Next-generation protection combines machine learning,big-data analysis, in-depth threat resistance research, and cloud infrastructure to protect devices in your enterprise organization.
- Select the Platform as Windows 10, Windows 11, and Windows Server
- Select Profile as Microsoft Defender Antivirus
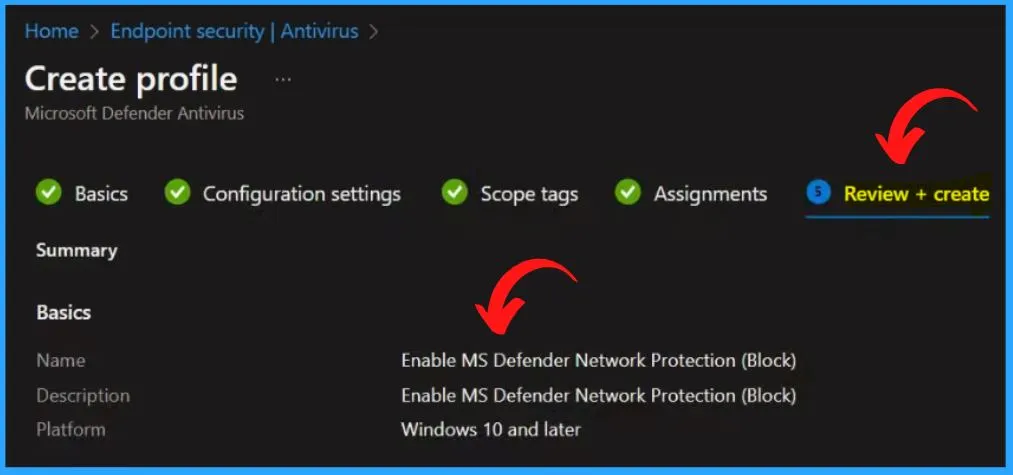
Select the Name and Description on the Basic tab as Enable MS Defender Network Protection ( Block). The Platform is automatically selected as Windows 10 and later.
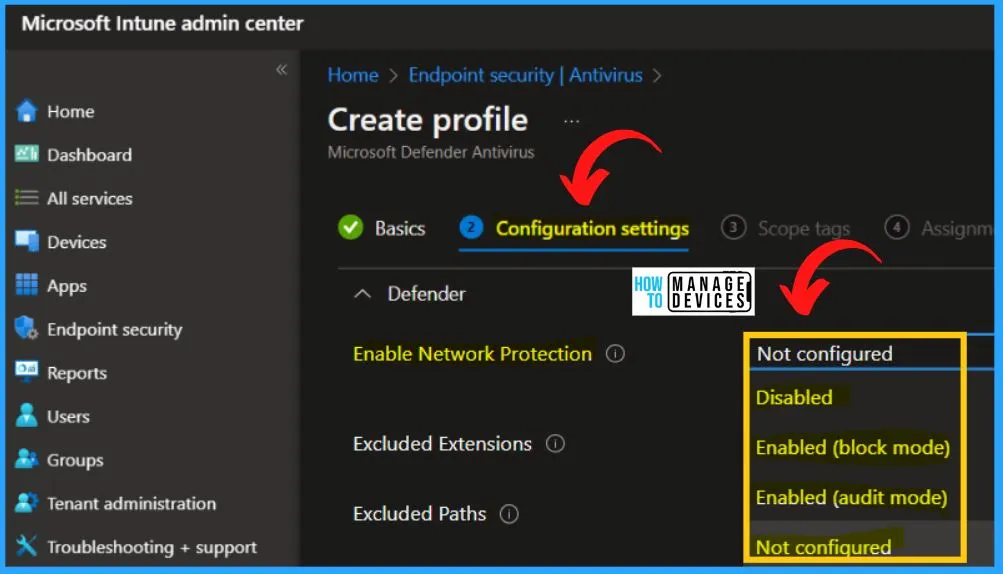
Configuration settings are an important step for the Deployment of a Network Protection Policy using Intune. Expand the Defender dropdown arrow and search for Network protection. By default, the Network protection is Not configured means Disabled.
| Policy Name | Description |
|---|---|
| Enable Network Protection | This policy allows you to turn network protection on (block/audit) or off. Network protection protects employees using any app from accessing phishing scams, exploit-hosting sites, and malicious content on the Internet. This includes preventing third-party browsers from connecting to dangerous sites. The value type is an integer. If you enable this setting, network protection is turned on, and employees can’t turn it off. Its behavior can be controlled by the following options: Block and Audit. If you enable this policy with the Block option, users/apps will be blocked from connecting to dangerous domains. You will be able to see this activity in Windows Defender Security Center. If you enable this policy with the Audit option, users/apps will not be blocked from connecting to dangerous domains. However, you will still see this activity in Windows Defender Security Center. If you disable this policy, users/apps will not be blocked from connecting to dangerous domains. You will not see any network activity in Windows Defender Security Center. If you do not configure this policy, network blocking will be disabled by default. |
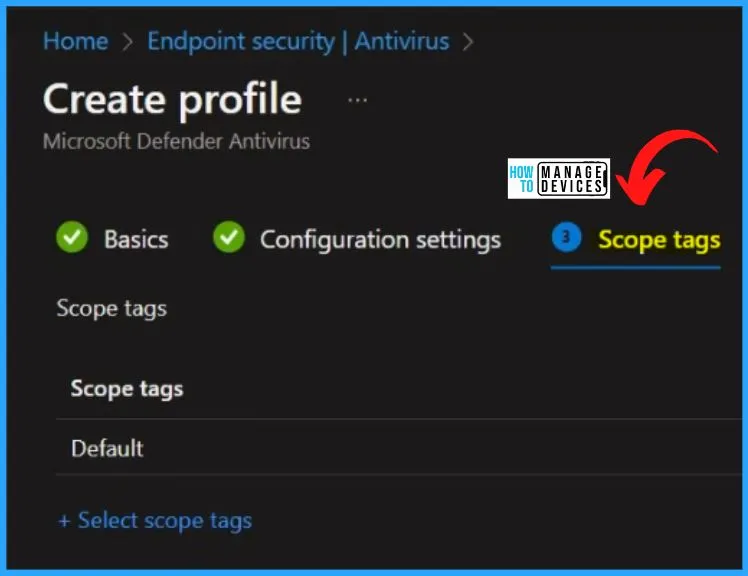
The below settings window shows the scope tag section. If you don’t select a scope tag, then the Default scope tag is automatically selected. These scope tags allow you to apply settings selectively to devices, users, or other entities within defined categories.
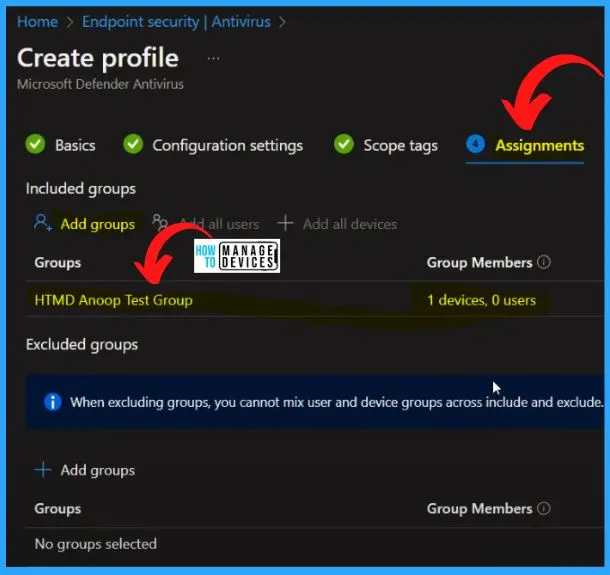
In the Assignments section of Intune, you can include or exclude specific groups for a policy or resource. Click the “Add Groups” button below to add a specific group. Here we are adding HTMD Anoop Test Group. You can easily exclude groups by clicking the Add group button from Excluded groups.
The “Review + Create” tab offers a comprehensive overview, allowing you to verify and confirm all the specified information before finalizing the creation. It summarizes the item’s attributes, ensuring everything aligns with your intended configuration.
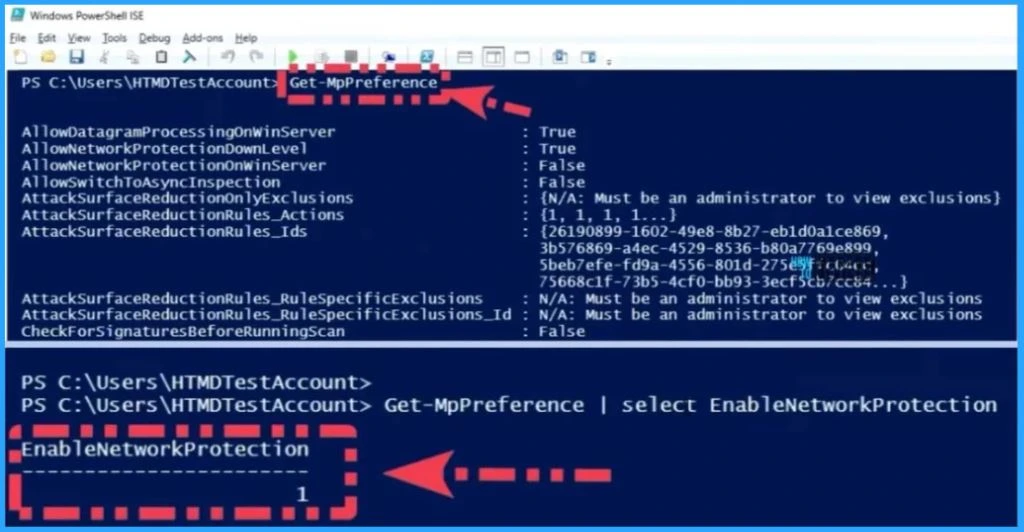
Use PowerShell Command to Check the Results
Once you create the policy and deploy it to the devices, you can easily check it using a PowerShell command. You can use the command line called MpPreference and select EnableNetworkProtection, as you can see from the below window.
- EnableNetworkProtection the Value is 1
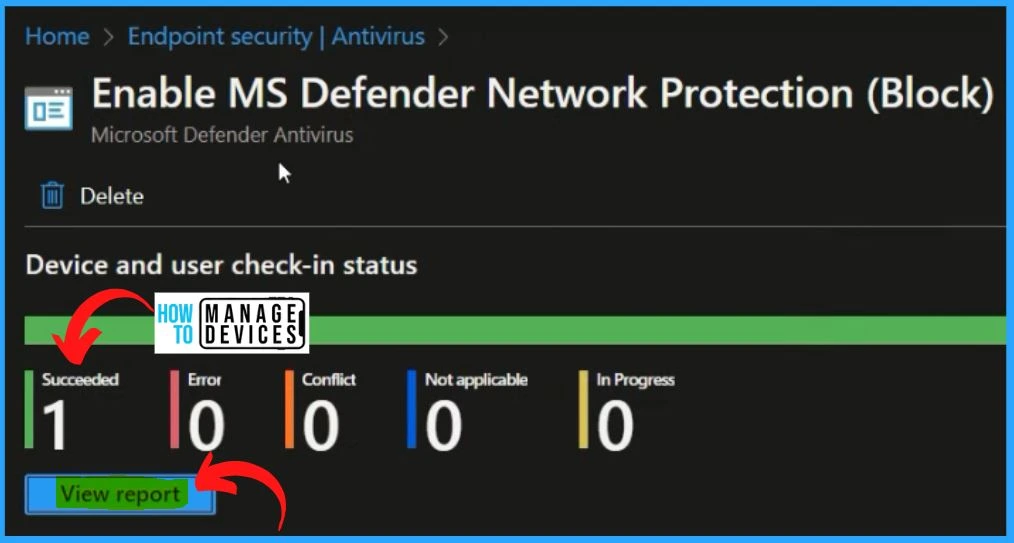
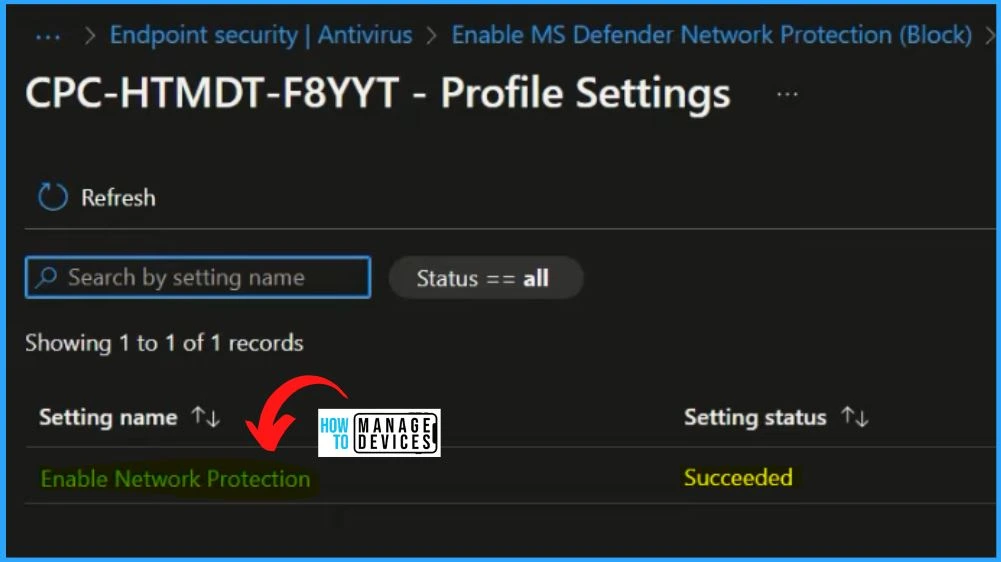
The Intune portal shows that one device has succeeded, and you can see the details information by clicking the View Report button below.
In the below-displayed window, you will see 2 sets of information regarding the settings: the settings name and the setting status. The settings name, “Enable Network Protection,” is a clear identifier for the configuration or policy implemented.
- The setting status, denoted as “Succeeded,” signifies that the implementation of the “Enable Network Protection” settings has been completed successfully.
Author
About Author – Vidya is a computer enthusiast. She is here to share quick tips and tricks with Windows 11 or Windows 10 users. She loves writing on Windows 11 and related technologies. She is also keen to find solutions and write about day-to-day tech problems.

