This post will help in understanding and setting Enable Windows NTP Server Policy Using Intune. Here we are going to implement this policy using Intune’s Configuration Profiles. This policy’s main aspect is to provide hands-on experience in configuring and setting the Enable Windows NTP Server Policy Using Intune.
Enable Windows NTP Server Policy option enables you to determine the status of the Windows NTP Server. Enabling this policy allows your computer to respond to NTP requests from other devices. If you choose to disable or leave this policy unconfigured, your computer will be unable to respond to NTP requests from other devices.
The Windows NTP Server (Network Time Protocol) is a critical component that helps synchronize the time on your computer with time servers on the internet. This synchronization is essential for maintaining accurate time and ensuring proper functionality of various system processes and applications.
When you enable this policy setting, you are essentially allowing your Windows computer to act as an NTP server. This means that other devices on your network or the internet can request time information from your computer. Your computer will respond to these requests and provide them with accurate time data.
If you choose to disable or do not configure this policy setting, your computer will not function as an NTP server. It will not respond to NTP requests from other devices. This setting is typically used when you don’t want your computer to serve as a time source for other devices or when you want to rely on external time servers for time synchronization.

- Enable Windows NTP Client Using Intune
- Turn Off Cloud Consumer Account State Content Policy using Intune
Windows CSP Details W32TIME_POLICY_ENABLE_NTPSERVER
We will see Windows CSP Details for this Policy setting W32TIME_POLICY_ENABLE_NTPSERVER. The choice of whether to enable or disable the Windows NTP Server policy setting depends on your specific requirements and network configuration. If your computer needs to provide time synchronization services to other devices, enabling it is necessary. However, in most cases, particularly for personal or small-scale network setups, you may rely on external NTP servers to keep your computer’s time accurate.
CSP URI – ./Device/Vendor/MSFT/Policy/Config/ADMX_W32Time/W32TIME_POLICY_ENABLE_NTPSERVER

Enable Windows NTP Server Policy using Intune
To Enable Windows NTP Server Policy Using Intune, follow the steps stated below:
- Sign in to the Intune Admin Center portal https://intune.microsoft.com/.
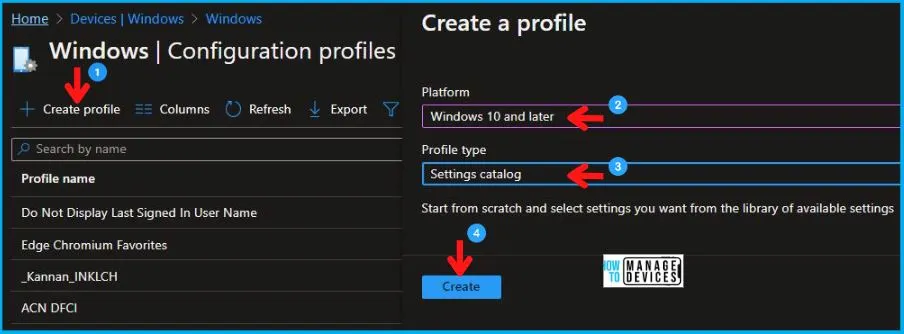
- Select Devices > Windows > Configuration profiles > Create a profile.
In Create Profile, I select Windows 10 and later in Platform, and select Profile Type as Settings catalog. Click on the Create button.
| Platform | Profile Type |
|---|---|
| Windows 10 and later | Settings Catalog |
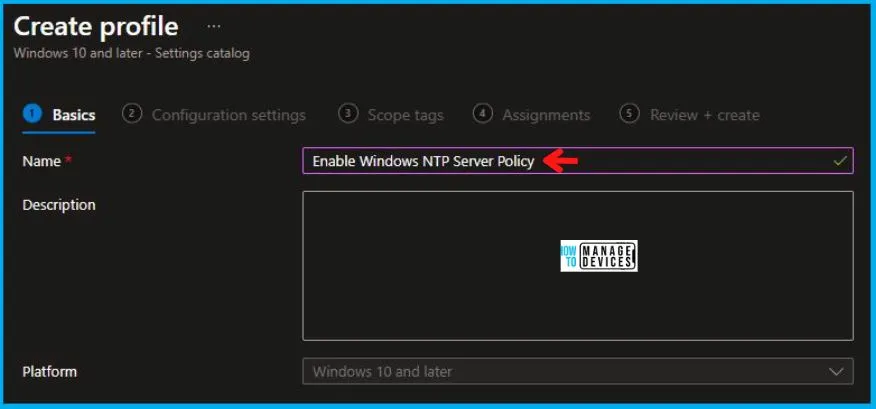
On the Basics tab pane, I provide a name for the policy as “Enable Windows NTP Server Policy.” Optionally, if you want, you can enter a policy description and proceed by selecting “Next.”
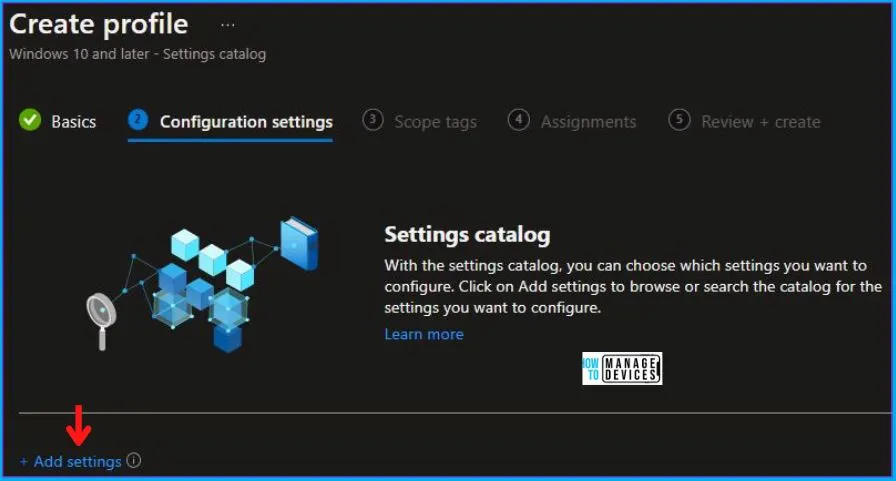
Now in Configuration Settings, click Add Settings to browse or search the catalog for the settings I want to configure.
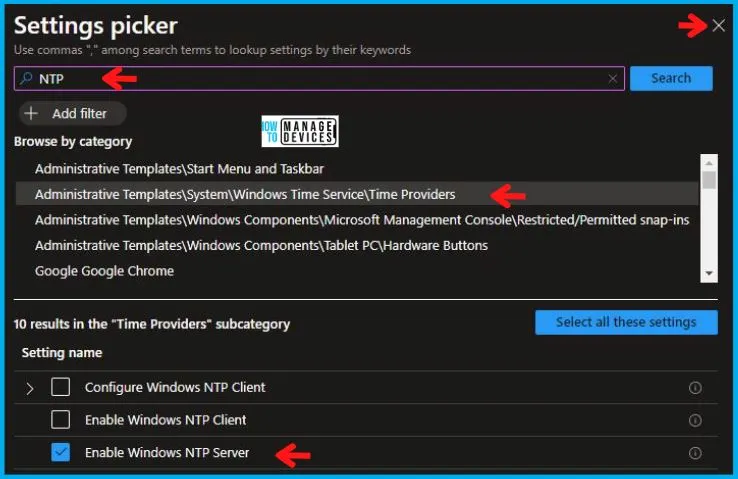
In the Settings Picker windows, I searched for the keyword NTP, I found the category Administrative Templates\System\Windows Time Service\Time Providers and selected this.
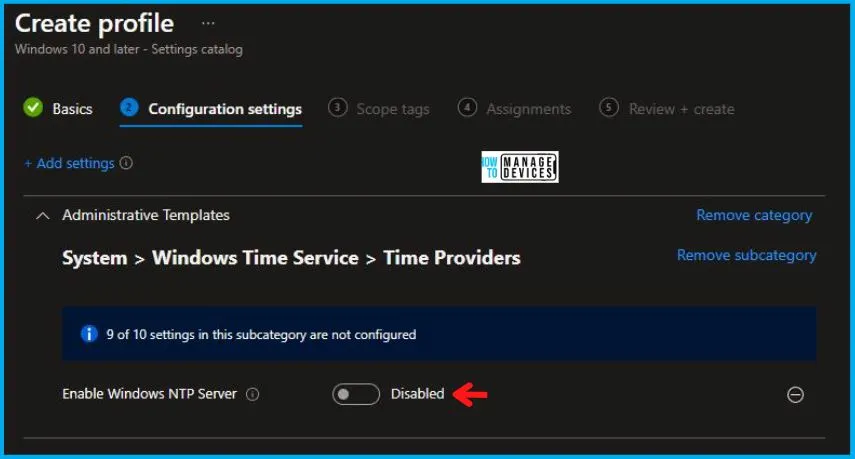
When I select that option as stated above, I see the sub-category Enable Windows NTP Server. After selecting that, click the cross mark at the right-hand corner, as shown below.
I kept the Enable Windows NTP Server as Disabled and clicked on Next to continue.
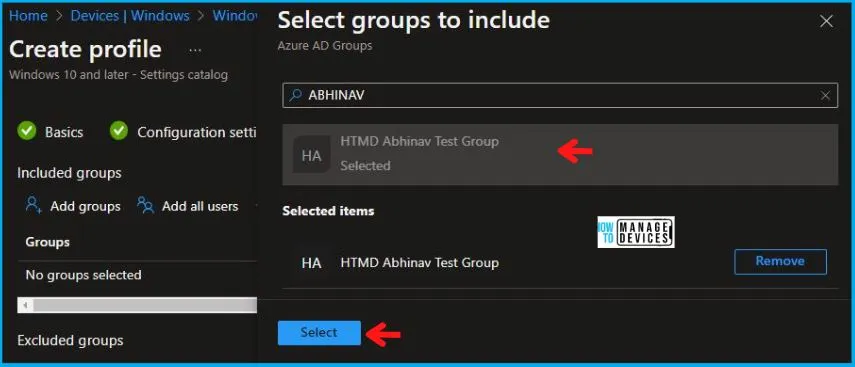
Using Scope tags, you can assign a tag to filter the profile to specific IT groups. One can add scope tags (if required) and click Next to continue. Now in Assignments, in Included Groups, you need to click on Add Groups, choose Select Groups to include one or more groups, and click Next to continue.
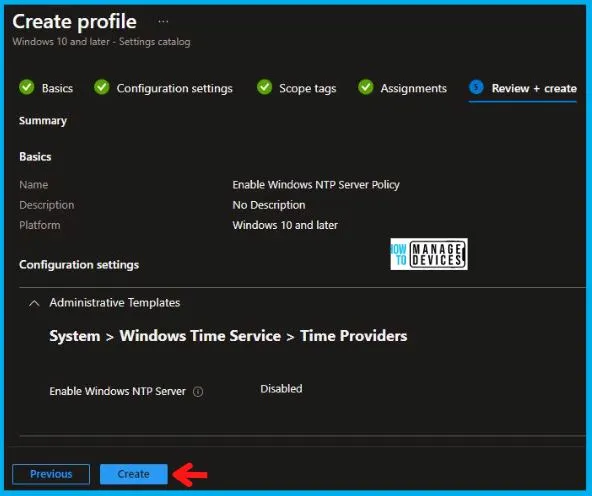
In the Review + Create tab, I review settings. After clicking on Create, changes are saved, and the profile is assigned.
Upon successfully creating the “Enable Windows NTP Server Policy,“ notification will appear in the top right-hand corner, confirming the action. You can also verify the policy’s existence by navigating to the Configuration Profiles list, where it will be prominently displayed.
Your groups will receive your profile settings when the devices check in with the Intune service. The Policy applies to the device.
Intune Report for Enable Windows NTP Server Policy
From the Intune Portal, you can view the Intune settings catalog profile report, which provides an overview of device configuration policies and deployment status.
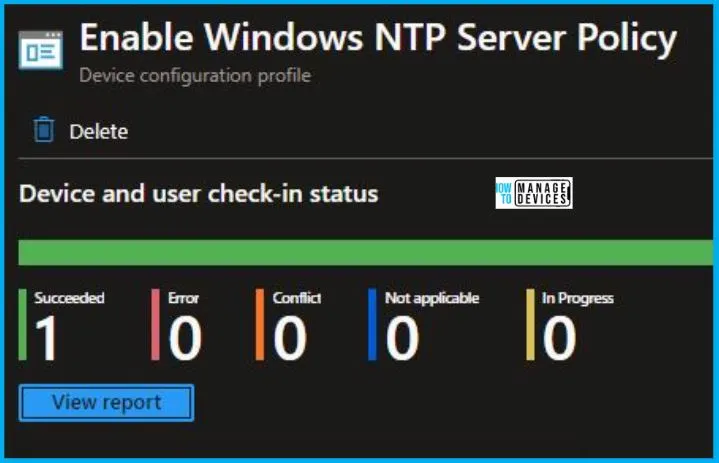
To track the assignment of the policy, you need to select the relevant policy from the Configuration Profiles list. Reviewing the device and user check-in status lets you determine if the policy has been successfully applied. If you require more detailed information, you can click on “View Report” to access additional insights.
Intune MDM Event Log
To verify the successful implementation of String or integer policies on Windows 10 or 11 devices through Intune, you can leverage event IDs 813 and 814. These event IDs provide valuable insights into the application status of the policy as well as the specific value assigned to the policy on those devices. In the case of this particular policy, the value is a String and is linked to the event ID 814.
By analyzing these event IDs, you can gain a clear understanding of the policy’s application status and the corresponding value associated with it on the devices in question.
To confirm this, you can check the Event log path – Applications and Services Logs – Microsoft – Windows – Devicemanagement-Enterprise-Diagnostics-Provider – Admin.
MDM PolicyManager: Set policy string, Policy: (

