Exciting News! Enhanced Security With Windows 365 Customer Lockbox. Windows 365 has released its latest feature, Customer Lockbox, which aims to boost user security measures.
It is excellent news that all organizations with a Microsoft 365 E5 or Office 365 E5 subscription can access the Windows 365 Customer Lockbox feature. This unique security tool allows you to control who can access your Cloud PCs.
Customer Lockbox helps you prevent access to your files without your permission. This adds an extra layer of protection, giving you more control over your data and maintaining your privacy.
Customer Lockbox is a security feature provided by Windows 365. It controls who can access content stored in Cloud PCs and ensures that Microsoft support engineers cannot access your files without explicit approval.

- FIX Cloud PC Gateway Connection Error | Windows 365
- Learn How to Resize Cloud PC Windows 365
- Create a Filter Rule for Windows 365 Cloud PCs using Intune
- Windows 365 Cloud PC Hybrid Azure AD Join Vs Azure AD Join
- Windows 365 Cloud PC Azure AD Joined Provisioning Process
Is Customer Lockbox Included in Microsoft 365 or Office 365 E5 Subscriptions?
Customer Lockbox is included in Microsoft 365 or Office 365 E5 subscriptions. You can get Customer Lockbox using other plans with Information Protection and Compliance or an Advanced Compliance add-on.
Enhanced Security With Windows 365 Customer Lockbox
Windows 365 introduces a Customer Lockbox for Enhanced Security. For example, when Microsoft support engineers need to access your content to resolve an issue, they must request access from you as the final step in the approval workflow. You can approve or deny the request for your organization, giving you direct access to your content.
Step-by-Step Guide for Using Windows 365 Customer Lockbox
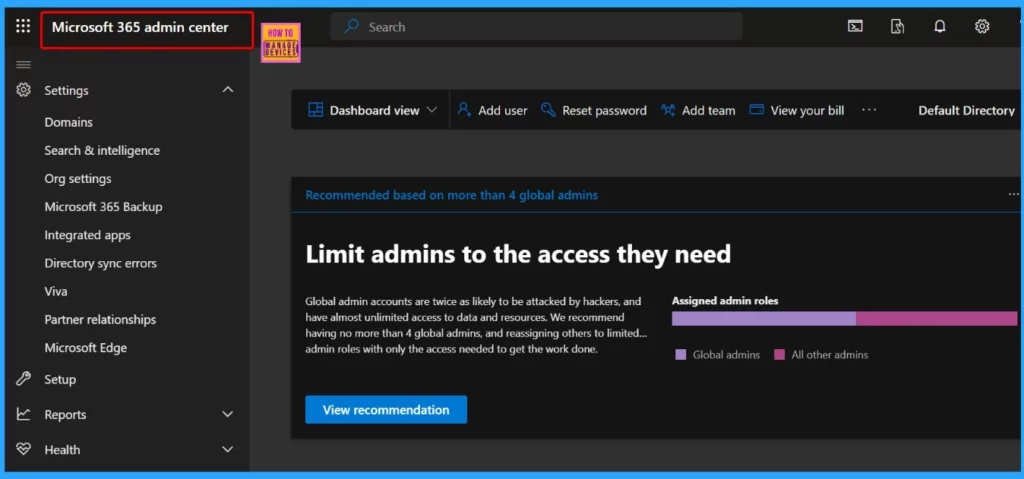
Let’s discuss the Step-by-Step Guide for Using Windows 365 Customer Lockbox. First, you must Turn on Customer Lockbox controls in the Microsoft 365 admin center. After activating Customer Lockbox, Microsoft has to ask your organization for permission before they can look at any of your tenants’ stuff.
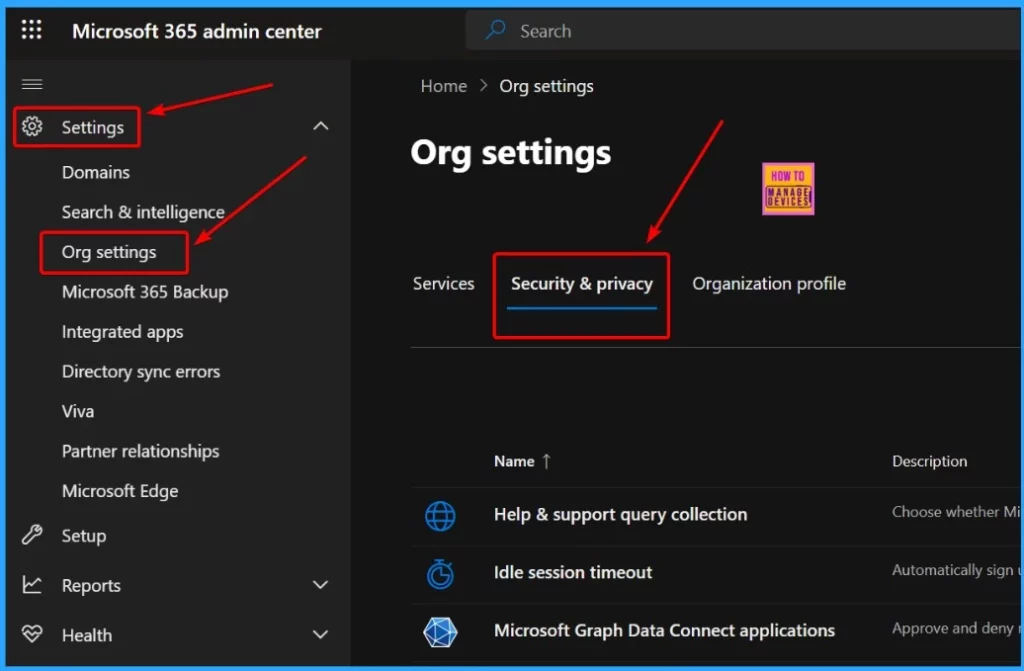
The following steps will help you to show how to turn on Customer Lockbox controls in the Microsoft 365 admin. Log in to https://admin.microsoft.com/ using an account with global administrator rights.
- Go to “Settings” > “Org Settings” > “Security & Privacy“.
- Turn on the Customer Lockbox.
- Save your changes.

After choosing Customer Lockbox, you will see a new column on the right side. Tick the box that says “Require approval for all data access requests,” and then click the Save button at the bottom of that column. This action activates the feature.

How to Approve or Deny a Customer Lockbox Request
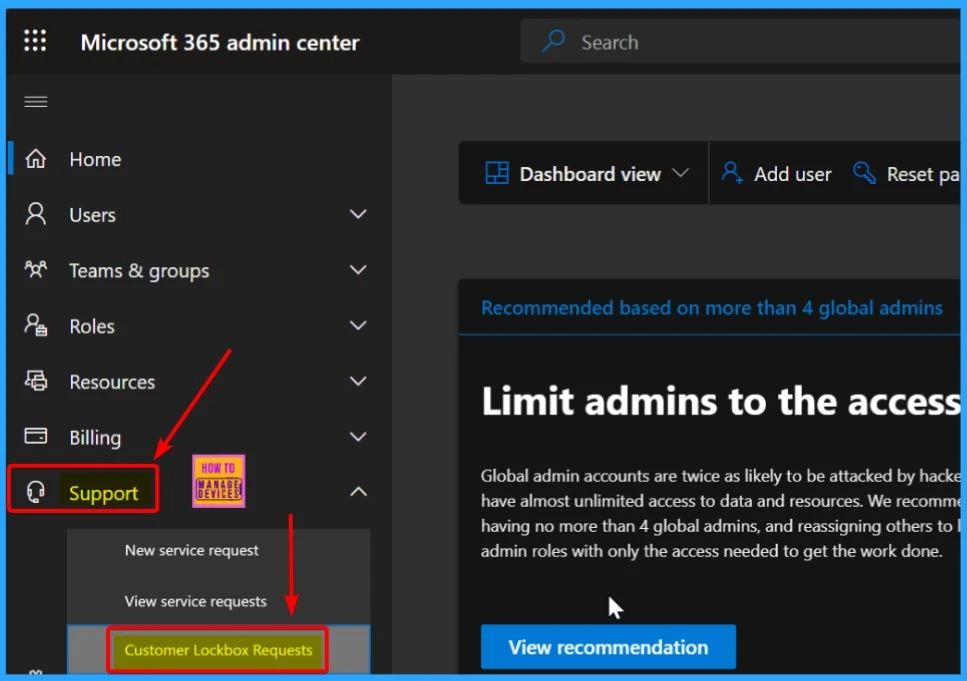
If you have a work or school account with either the Global Administrator or Customer Lockbox access role, you can log in to https://admin.microsoft.com/. Once logged in, navigate to the Support section and select Customer Lockbox Requests.
This will allow you to manage and monitor any requests related to Customer Lockbox access.
Customer Lockbox Requests
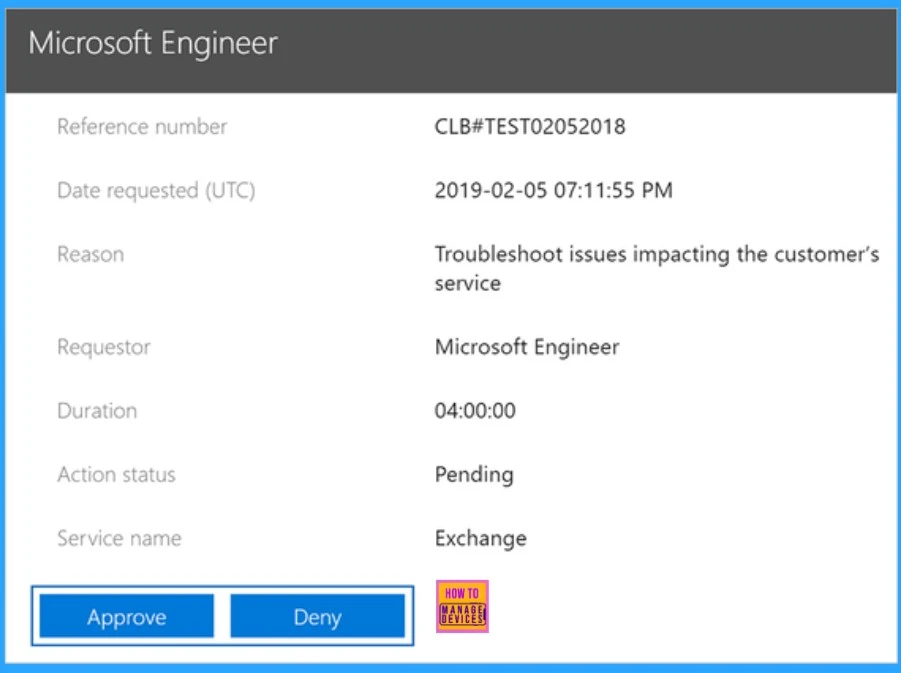
The screenshot below helps you show the Customer Lockbox requests. This list shows when someone has asked for access to your data. The request page also shows the Reference number, Data requested, Requestor, and Action status.

Click on the Customer Lockbox request you want to respond to, then decide whether to Approve or Deny it. If you’re going to Approve the request, click the Approve button; otherwise, select the Deny button.
| Request Details | Description |
|---|---|
| Reference number | CLB#TEST02052018 |
| Date requested (UTC) | 2019-02-05 07:11:55 PM |
| Reason | Troubleshoot issues impacting the customer’s service |
| Requestor | Microsoft Engineer |
| Duration | 04:00:00 |
| Action status | Pending |
| Service name | Exchange |
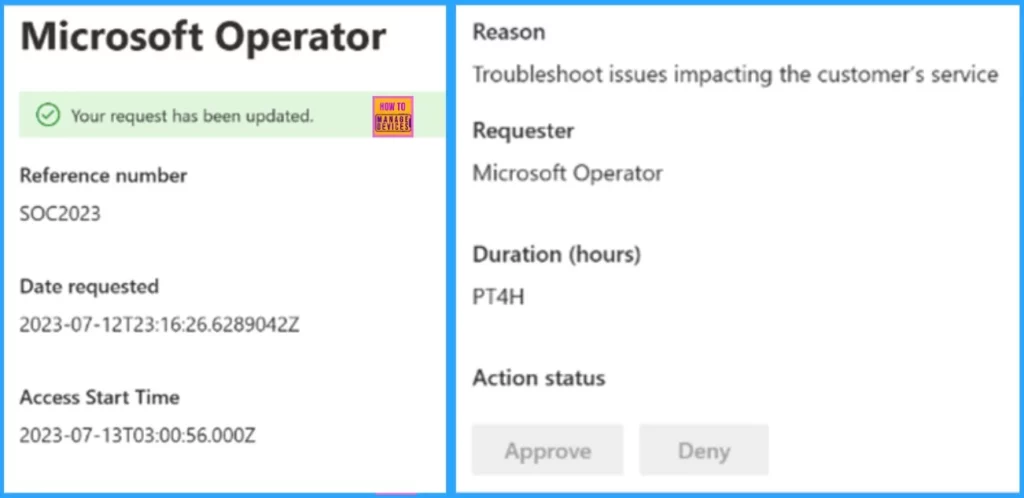
After Approving the request, a green confirmation message about the approval of the Customer Lockbox request will be displayed. The screenshot below helps you see this confirmation message.
The request updated window also helps you show the Reference number, Date requested, Access start time, Reasons, required, Duration, and Action status.
Audit
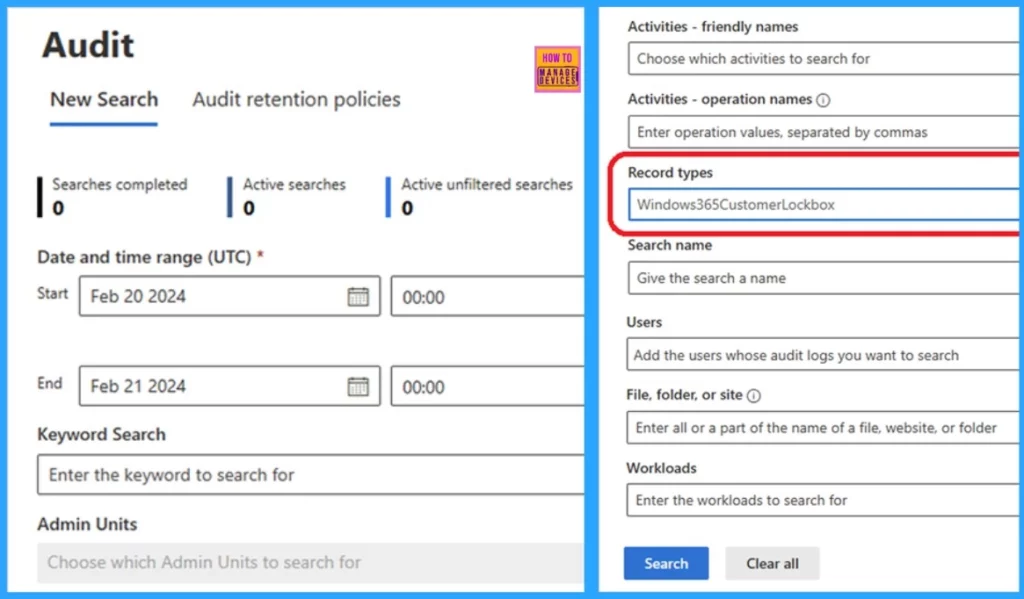
After the just-in-time (JIT) access time ends, the troubleshooting ticket is marked as done. To see what happened during that time, go to compliance.microsoft.com. Click on “Audit” in the Solutions section on the Left side of Microsoft Purview.
- Here, you can see a record of all the actions taken during the session.
- If you want Windows 365 details, go to Record types and choose “Windows365CustomerLockbox“.
- This helps you keep track of everything done during the JIT access period.
We are on WhatsApp now. To get the latest step-by-step guides, news, and updates, Join our Channel. Click here. HTMD WhatsApp.
Author
About the Author: Vidya is a computer enthusiast. She is here to share quick tips and tricks with Windows 11 or Windows 10 users. She loves writing about Windows 11 and related technologies. She is also keen to find solutions and write about day-to-day tech problems.


