Have you ever sent a document with numbered lists to your home account or to a co-worker and noticed that the lists don’t look the same on another system? That’s because Microsoft Word’s numbered list feature stores properties locally. That means you can’t control how Word renders numbered lists on other systems. In many cases, it won’t matter, but occasionally, the differences will cause flow errors that you can’t resolve.
In this tutorial, I’ll show you a way around this problem by creating a custom list style. Then you can access this custom list style from Word’s Multilevel List dropdown in the Paragraph group as you would a pre-built list style. A custom list style goes with the document, so the list(s) will look exactly the way you want when opened elsewhere.
SEE: Windows, Linux, and Mac commands everyone needs to know (free PDF) (TechRepublic)
I’m using Microsoft 365 desktop on a Windows 10 64-bit system, but you can use older versions. You can’t create custom list styles in Word for the web. However, a custom list style will show up in the library if the document has one. There’s no demonstration file: You won’t need one.
Why build a custom list in Word?
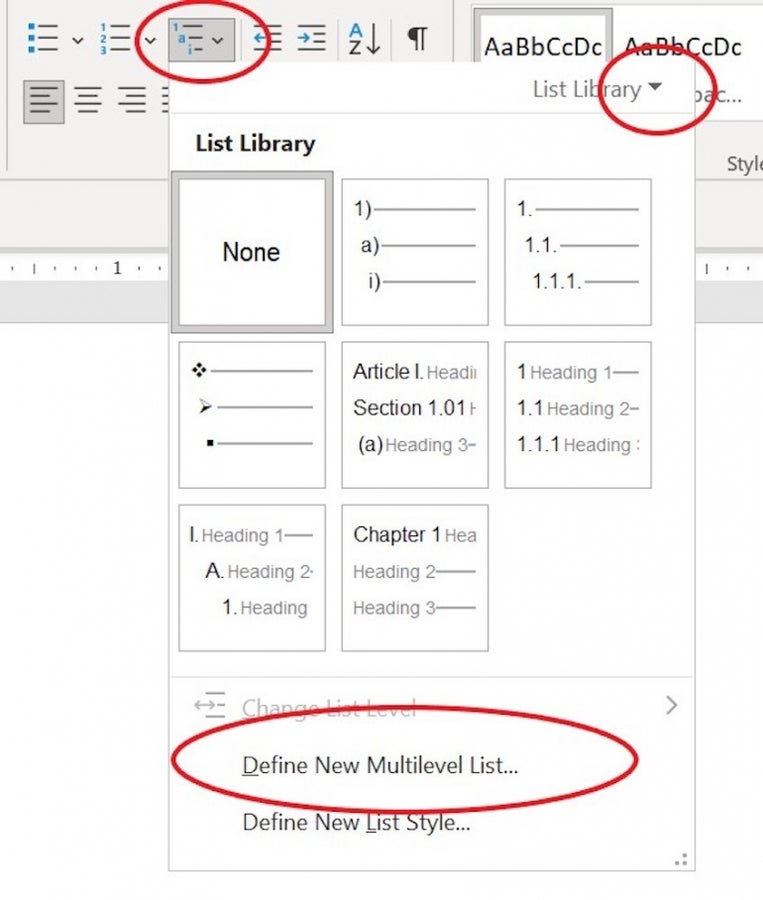
Microsoft Word comes with several pre-built list styles out of the box. Most of us use these lists a lot — I know that I do. Figure A shows the gallery of pre-built choices. When working with a single document that you don’t plan to distribute electronically, these lists are adequate.
Figure A
If you’re going to distribute the document electronically, meaning other viewers will open it on their own systems, consider creating a list style and applying it. Word stores list properties locally and the default list on a viewer’s system is likely to be different than yours. Sometimes the difference will be subtle and won’t matter. On the other hand, the viewer’s system could seriously distort a list.
Another problem is that Word’s pre-built lists are notorious for breaking, especially in long documents. You might never see it, but when it happens, you rarely can fix it. Everything happens behind the scenes, and you don’t have access to what Word is doing. My best advice is to start over.
A custom list is one that you design yourself. You control how many levels the lists support (up to nine), the font, the font size, the color, indentions and much more. After creating your custom list, it will be available in the Numbering gallery and free from pre-built lists problems.
Before we move on, notice the circle in Figure A in the top-right corner — List Library. This dropdown filters the lists available in the gallery. If you build a custom list and it doesn’t show up in the gallery, check this filtering option to make sure the filter allows custom lists.
You might be wondering about the two options at the bottom of the dropdown: Define New Multilevel List and Define New List Style. The truth is, there is little difference between the results when you apply either. However, a style is a bit superior because you can name it, share it, modify it and even delete it.
It’s important to remember that lists are a paragraph format, and the paragraph marks determine the beginning and ending of a paragraph. That means that each item in your numbered list is a paragraph. In a nutshell, numbering is a paragraph formatting, but paragraphs are in lists because a list comprises multiple paragraphs — the list items.
We’re going to create a custom list style because it’s easier to control. If you create a new list format, that list will be available in the List Library, but you can’t do anything to it once it’s in play. If it doesn’t work out, you must start over. You can, however, remove it from the List Library.
How to build a custom list in Microsoft Word
A custom list is easy to build and access once you’re done. If you’re building a template, users will have no idea they’re not using a pre-built list. Let’s build a two-level custom list, with the following properties:
- Level 1 heading will use Calibri Bold, 13 font size, with no indentation or coloring.
- Level 2 heading will use Calibri Normal, 12 font size, with a half-inch indentation and no coloring.
It’s a simple list on purpose so we can focus on the steps rather than aesthetics. Now, let’s build the list style as follows:
- On the Home tab, click Multilevel List.
- At the bottom of the dropdown, choose Define New List Style.
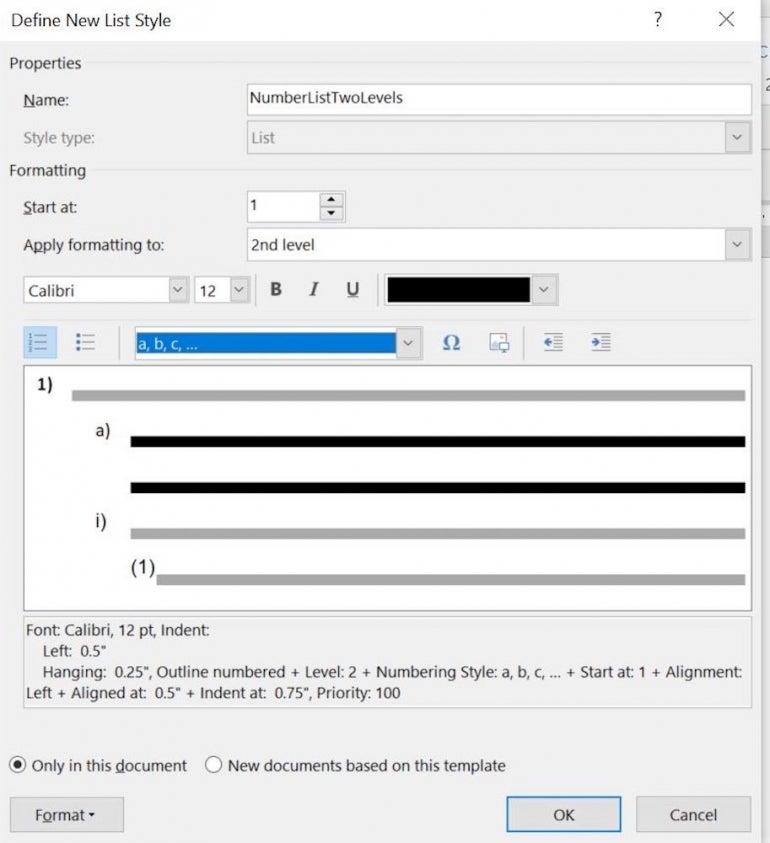
- Name the custom list style NumberListTwoLevels. Leave the Start At and Apply Formatting To settings as 1 and 1st level, respectively. The numbered list will begin with the number 1 and you’re formatting level one.
- Choose Calibri as the font, Bold from the style, and 14 from the Size dropdown (Figure B). You’ve set up the formatting for level 1 numbering.
- Now let’s format level two. From the Apply Formatting To dropdown choose 2nd level, change the style to Normal and the size to 12. Click the Indent tool just below the font settings to indent the second level one-half inch, which is the default (Figure C).
- Before clicking OK, decide whether you want this custom list style to be available in all new documents or only the current document. For this exercise, choose the latter (the default), but you can add a custom list style to the underlying template, Normal. If you do so, Word might ask if you want to save changes made to Normal when you close the document. Be sure to confirm the save.
- Click OK.
Figure B

Figure C
Now that you’ve added a custom list style, let’s use it.
How to use a custom list style in Word
Word automatically adds your custom list style to the numbering list interface. To access it, click the Multilevel List dropdown. If you don’t see it, remember the filtering dropdown that we discussed earlier and change it. However, a custom list style should always be visible.
Figure D shows NumberListTwoLevels in the dropdown. Click it and start entering data. Figure E shows the custom list style applied.
Figure D
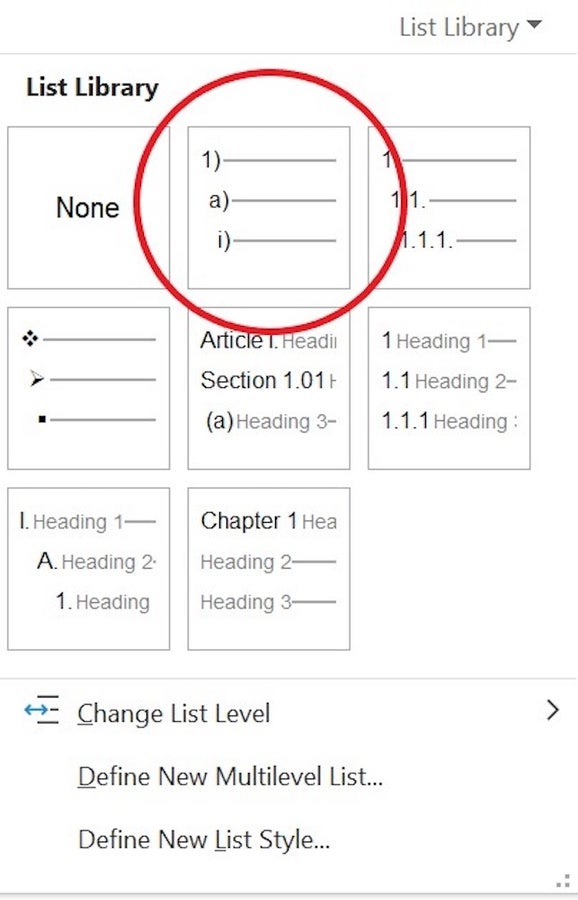
Figure E
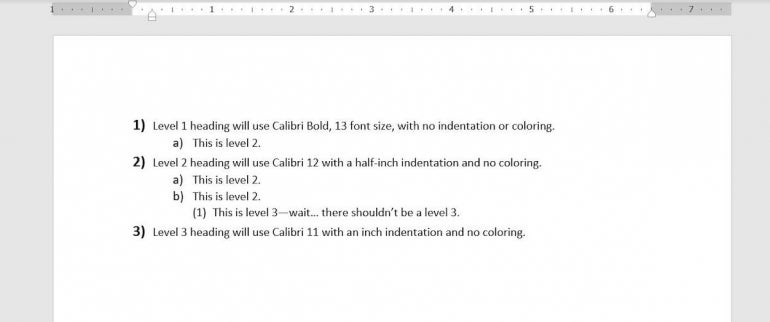
The first thing you might notice is that all the formatting applies to only the numbers. Remember, we create a custom numbered list style, so the style formats only the numbers. This is consistent with Word’s pre-built list styles.
Are you surprised to see a third level? Word supports nine levels, and we only formatted the first two. If you add more levels to the actual list, Word applies the default formatting for those levels. But what if you want to change something?
How to modify a custom list style in Word
One of the huge benefits of using a list style is that you can modify it. However, in the case of custom list styles, you can’t access it through Word’s Styles pane. For better or worse, when you apply the new list style, the Styles pane will default to the default Paragraph List when the custom list style is in use. However, you can apply it using the Apply Styles pane:
- Click the More button for the Styles gallery in the Styles group, and choose Apply Styles from the dropdown.
- Press Ctrl + Shift + S.
Either way displays the Apply Styles pane shown in Figure F.
Figure F
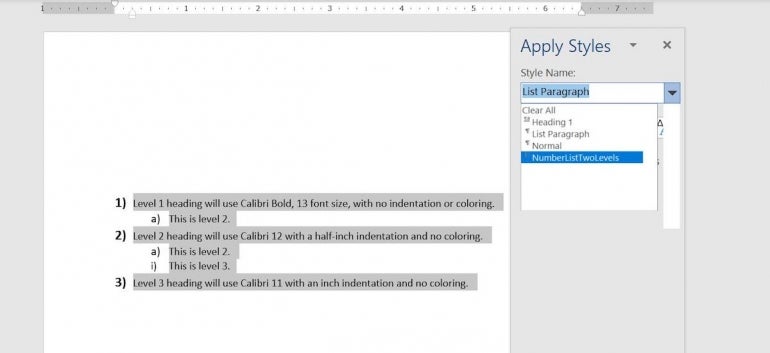
As you can see, it still displays Paragraph List as the style. Click the dropdown and you’ll see the new custom list style, NumberListTwoLevels. Click it and you’ll notice that there’s no change to the list. However, you can’t modify the style this way.
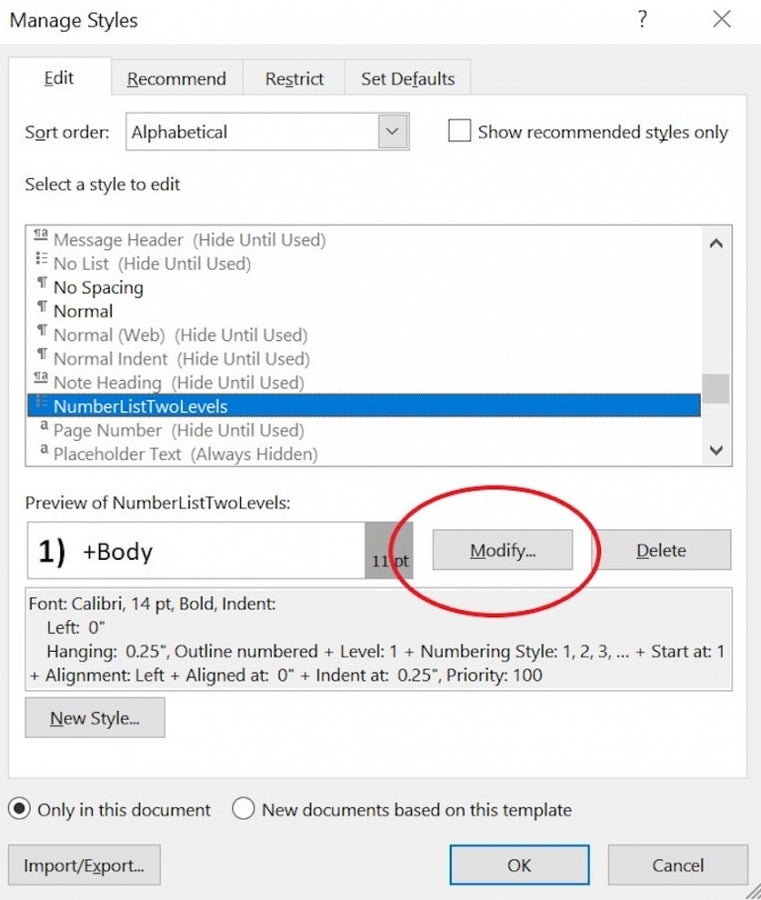
In the Styles pane, click Manage Styles at the bottom. In the resulting dialog box, choose Alphabetical as the sort order and thumb down until you find NumberListTwoLevels, as shown in Figure G. Click Modify and Word will display the earlier dialog (Figure B).
Now you can format the third or any other level. After making changes, every instance of NumberListTwoLevels will update accordingly.
Figure G
Save the custom list style technique for complex numbered lists and templates and documents that you share with others. Using a custom list style is the only way to ensure that the list formatting doesn’t change a bit from one system to another.
Stay tuned
If you’re numbering section headings, don’t use a custom list style. In a future article, I’ll show you how to create a custom paragraph style with numbering.