
OpenStack has become the de facto standard in private cloud server platforms. If you’ve ever considered spinning up OpenStack, you know that it is not only an administrative challenge, but it also requires considerable hardware–to the tune of around five servers. However, if you have a powerful enough virtual machine, you can run OpenStack on a single Ubuntu Server.
SEE: How Mark Shuttleworth became the first African in space and launched a software revolution (TechRepublic PDF download)
The requirements
- Virtual machine on a real ESXi/KVM/Xen/etc. hypervisor, or a bare metal server with virtualization support
- 14 GB of RAM (minimum)
- 100 GB of hard disk space (minimum)
- An updated Ubuntu 16.04 LTS server
Update and install dependencies
First, you must update Ubuntu. Open a terminal window and issue the commands:
sudo apt-get update
âsudo apt-get upgrade
Once those commands have completed, you’ll need to install git. To do this, issue the command:
sudo apt-get install git
Allow that installation to complete.
Clone devstack
We’re going to use git to clone devstack. To do this, go back to your terminal window and issue the following two commands:
cd /
âsudo git clone https://git.openstack.org/openstack-dev/devstack master
Next, we have to copy the sample configuration file and set a password to be used for automated deployment. To complete this task, issue the following commands:
cd devstack
âsudo cp samples/local.conf local.conf
Now we must set the automated deployment password. Open the local.conf file with the command:
sudo nano local.conf
Search for the password variable section and ensure it reflects the following (YOURPASSWORD is the actual password you want to use):
ADMIN_PASSWORD=YOURPASSWORD
âMYSQL_PASSWORD=$ADMIN_PASSWORD
âRABBIT_PASSWORD=$ADMIN_PASSWORD
âSERVICE_PASSWORD=$ADMIN_PASSWORD
Create a user and start the installation
It’s time to run a few scripts. The first script will create a new user for devstack. The command to run this script is:
sudo /devstack/tools/create-stack-user.sh
Once the script completes, you’ll need to change the permissions of the devstack folder with the command:
sudo chown -R stack:stack /devstack
It’s time to run the installation script–this must be run as the stack user by first issuing the command sudo su stack. After you change to the stack user, kick off the install with the command /devstack/stack.sh. This command will take at least 30 minutes to complete.
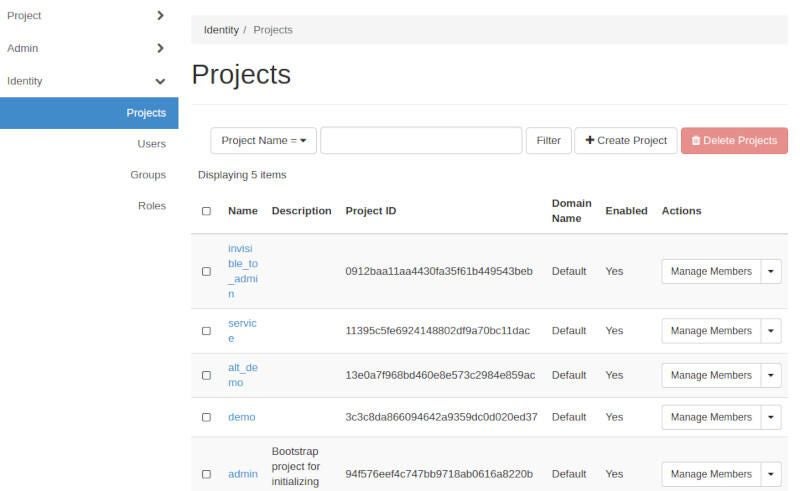
When the command finally completes, you will be given an IP address (the address of the server), as well as two usernames (the admin password was created in the local.conf file). Open a browser, point it to http://SERVER_IP_ADDRESS/dashboard, and log in with the given credentials. You will be presented with the OpenStack Dashboard (Figure A).
Figure A
Congratulations! You’re ready to create and deploy.
