Let’s look at the Guidelines for setting up Kiosk in Windows 11. Kiosk mode on Windows 11 is a feature that converts a traditional device into a single-purpose device that runs only one application. A common application of Kiosk mode is locking down a Windows device when it is being used in a public setting.
Many users typically use this feature to set up a computer as a Kiosk machine for guests to access the Internet, fill out applications, or convert devices into digital signs to demo products or promote business. For example, the Kiosk setup is used to lock down a point-of-sale (POS) application to prevent customers or board employees from leaving the application and browsing other apps.
It also prevents users from closing essential tools. Similarly, computers in a retail store can be configured to run in Kiosk mode to provide customers access to a demonstrated application while locking down all other applications.
Using Kiosk mode, the computer signs automatically and launches only one application in full-screen mode using a restricted user account that does not allow anyone access to the desktop, change settings, or switch different applications.

- Best Guide for Multi-App Kiosk Mode for Corporate-Owned Devices in Intune
- Intune Shared Device Mode for Android and iOS Devices
What is Kiosk?
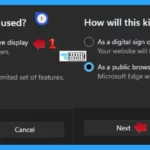
Kiosk mode is a Windows Operating System (OS) feature that allows a device to run only specified applications. It configures Windows 11 for a single-purpose device that runs only one (or two) application(s). In Windows 11, kiosk mode is also referred to as Assigned Access. So, if a user such as an administrator wants the device to allow only one application to run, they can do so using kiosk mode. Users use this feature to set up a computer as a kiosk for guests to access the Internet, fill out a form, or convert a device into a digital sign to demo products or promote business.
How to Setting Up Kiosk in Windows 11
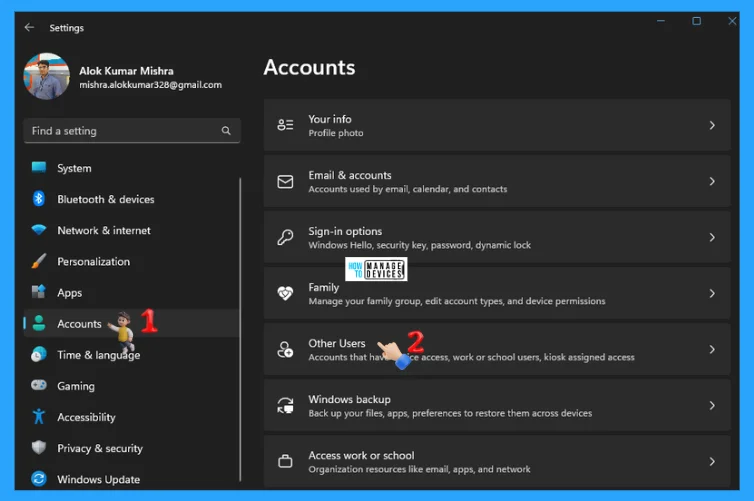
Now let’s discuss the detailed step-by-step guidelines for setting up a KIOSK in Windows 11. To perform this, press Win Key + I to open the Settings Window or click on the Windows key, and then double click on setting to open the Settings window.
When the Settings window opens, click on the Accounts option on the left panel. The suboptions of the Accounts setting open in the right panel. Now, click on Other Users to open it.
NOTE! The kiosk feature is not supported in the Windows 10/11 Home edition, and the user must have the Administrative privilege to set up a kiosk account.
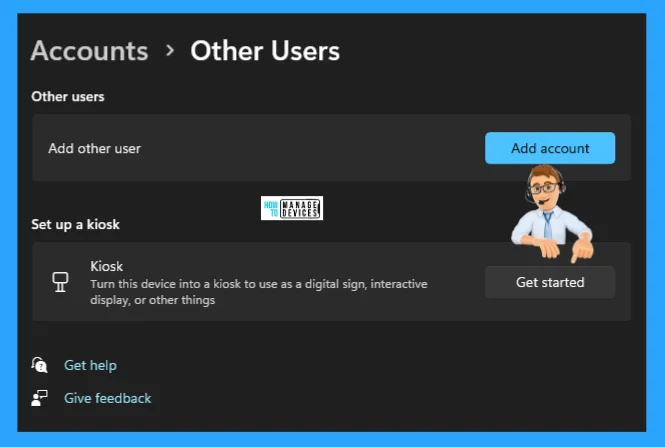
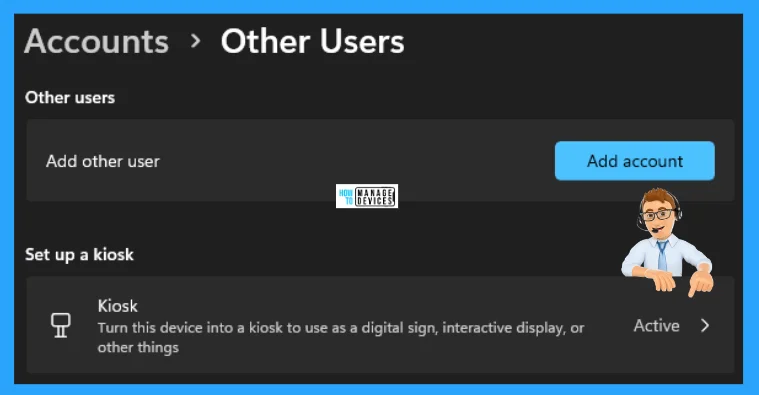
The Other Users window offers two options: Add another user (Add account) and set up a kiosk. Click on the Get Started button to turn this device into a kiosk, which can also be used as a digital sign, interactive display, or other device.
NOTE! To enable Kiosk mode, check the User Account Control (UAC) is turned ON.
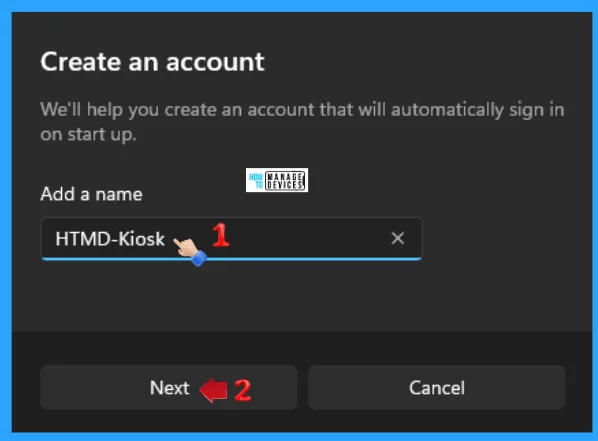
The Get Started button, when clicked, will move to another pop-up showing Create an account. It will help you create an account that will automatically sign in on start-up. You can provide a name and click Next to continue, as shown in the image below. If you have any local account earlier, then there is an option to add the account as a kiosk.
NOTE! You cannot select a Microsoft account or an Administrator account.
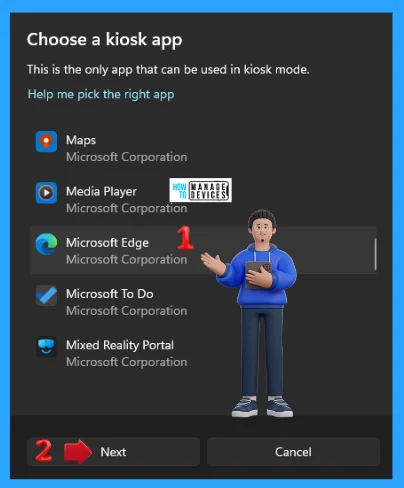
Now, another pop-up appears as Chose a Kiosk app. This is the only app that can be used in kiosk mode. You can select the app you want on the kiosk screen and click Next to continue. The Microsoft Edge app is selected here, as shown in the image below.
NOTE! Kiosk mode is not supported over a Remote Desktop Connection. Kiosk users must sign in on the physical device that is set up as a kiosk. Apps that run in kiosk mode cannot use copy and paste.
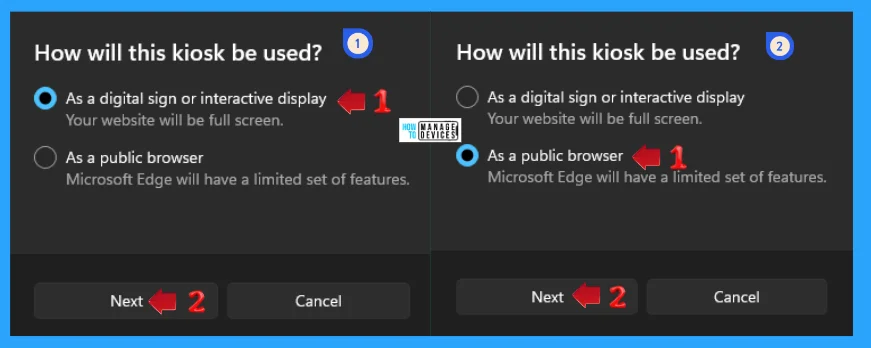
The next pop-up is, How will this kiosk be used, the set-up of the kiosk is used can be defined here from the two options listed below and shown in the image. Select one option from the two, then click Next to continue.
- As a digital sign or interactive display: Your website will be full screen.
- As a public browser: Microsoft Edge will have limited features.
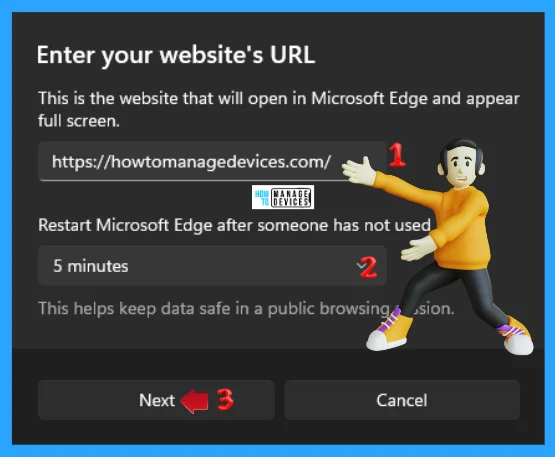
The next window is to Enter your website’s URL. This is the website that will open in Microsoft Edge and appear full screen, paste or type the URL in the textbox in no.1. Restart Microsoft Edge after someone has not used it, and select the duration; the default duration is 5 minutes in no.2. This helps keep data safe in a public browsing session. Then click Next to continue.
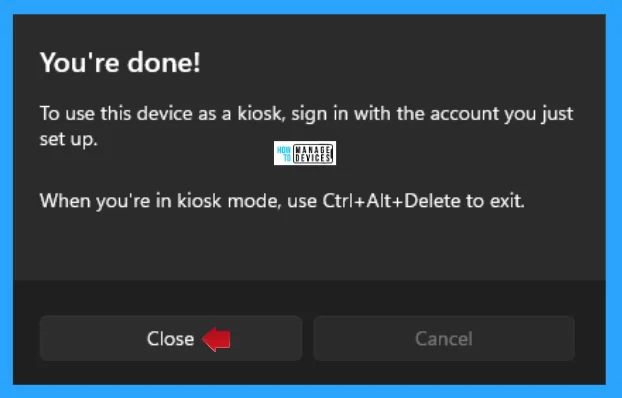
You are done with the next pop-up for setting up a kiosk in Windows 11. To use this device as a kiosk, sign in with the account you just set up. When you are in kiosk mode, use Ctrl+Alt+Delete to exit. Now click on the Close button to shut the dialogue box.
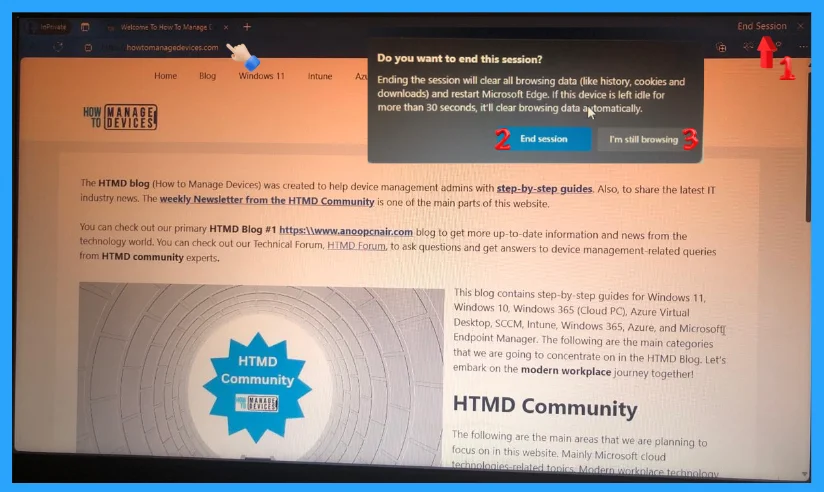
Now restart your device to open the kiosk mode app. As the image below shows, the kiosk mode window opens, and the entered URL is open to serve. If you click on the End Session button means ending the session will clear all browsing data (like history, cookies and downloads) and restart Microsoft Edge. If this device is idle for more than 30 seconds, it will clear browsing data automatically.
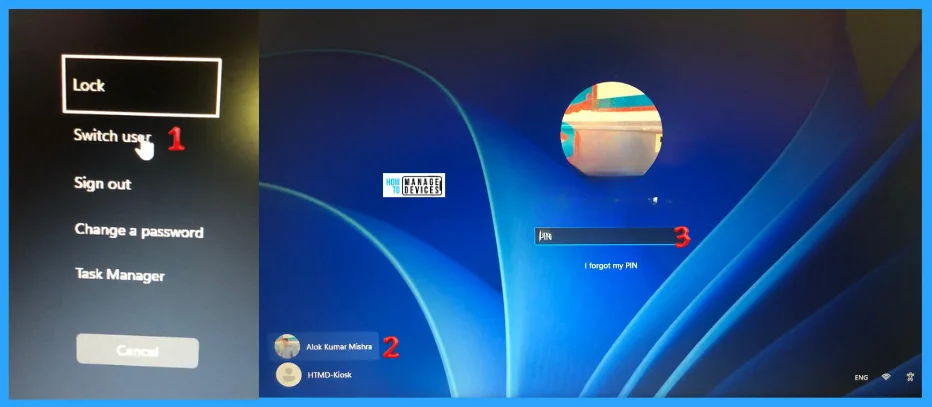
To exit the kiosk mode, use Ctrl+Alt+Delete, then select the Switch User option. The log-in screen opens with the existing user accounts. Select your user account and enter your password to open it.
How to Customize and Remove Kiosk Set-Up
A user can customize the kiosk mode settings by opening the Settings app by pressing Win Key + I, then clicking on Accounts, and again clicking on Other Users under Accounts. Then click on the kiosk option.
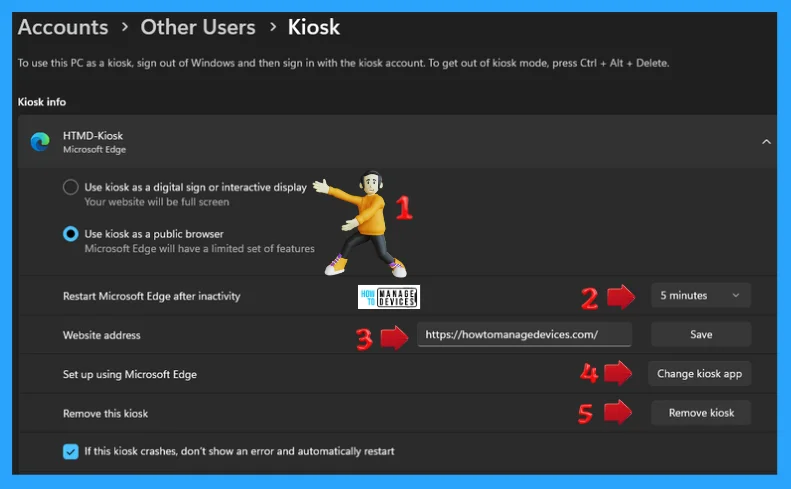
This kiosk mode allows users to customize it according to their requirements. If the user wants to delete the kiosk account, they can do so with a click. The details are listed below.
- Here, you can change the options for the kiosk.
- With this setting, you can change the timer option of the kiosk mode.
- You can change the website address as per your requirements.
- You can change the application you want on your kiosk screen in this setting.
- This option lets the user remove the kiosk and click the Remove kiosk button.
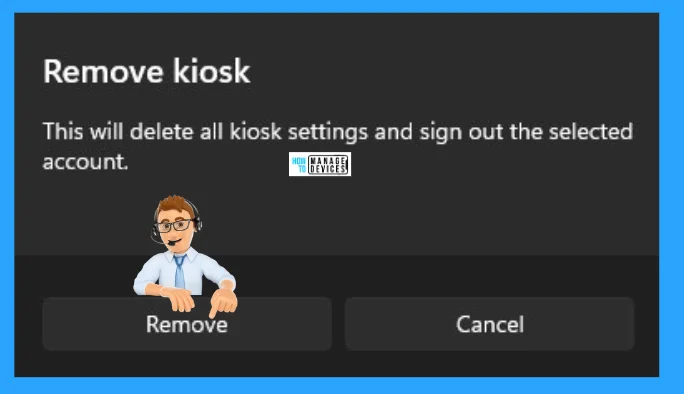
Remove Kiosk will delete all kiosk settings and sign out of the selected account. This dialogue appears after the Remove Kiosk button is pressed. Now click on Remove to delete the kiosk account or Cancel to stay on it.
I hope the information on Guidelines for setting up a Kiosk in Windows 11 is helpful. Please follow us on the HTMD Community and visit our website, HTMD Forum, if you like our content. Suggest improvements, if any, and we’d love to know which topic you want us to explore next.
We are on WhatsApp. To get the latest step-by-step guides and news updates, Join our Channel. Click here – HTMD WhatsApp.
Author
Alok is a Master of Computer Applications (MCA) graduate. He loves writing on Windows 11 and related technologies. He likes to share his knowledge, quick tips, and tricks with Windows 11 or Windows 10 with the community.

