
Image: Microsoft
In an era when millions of employees in the global workforce have been compelled to work from remote locations as a safety precaution, the ability to establish readily accessible cloud-based virtual machines has been vital. Platforms like Microsoft’s Windows Virtual Desktop, administered through Microsoft Azure, can give employees access to consistently configured and significantly more secure virtual workstations, eliminating the need for personal devices.
SEE: Managing the multicloud (ZDNet/TechRepublic special feature) | Download the free PDF version (TechRepublic)
Businesses already subscribing to Microsoft 365 or Windows Enterprise have access to Windows Virtual Desktop at no additional charge per user. Once an enterprise establishes an administrative level Microsoft Azure account, they can use the Portal to create a virtual machine for each of their users. However, there are a number of steps to follow to complete the process.
This how-to tutorial shows you how to create a Windows Virtual Desktop using the Microsoft Azure Portal.
How to create a Windows Virtual Desktop in Microsoft Azure
Before you can take any steps toward creating a Windows Virtual Desktop you have to first establish an administrative account for Microsoft Azure. Those credentials will allow you to use the Azure Portal to allocate resources for your virtual machines and provide the framework for allowing access to those instances to your employees.
Creating a Windows Virtual Desktop in Azure requires four distinct steps:
- Create a host pool of virtual machines.
- Create application groups.
- Create workspaces.
- Designate users.
Host pools are a collection (or just one) of identical VMs that exist as part of the Windows Virtual Desktop Environment. Each host pool can contain an application group which provides the tools users will have access to once logged into the VMs.
SEE: Top cloud providers in 2020: AWS, Microsoft Azure, and Google Cloud, hybrid, SaaS players (TechRepublic)
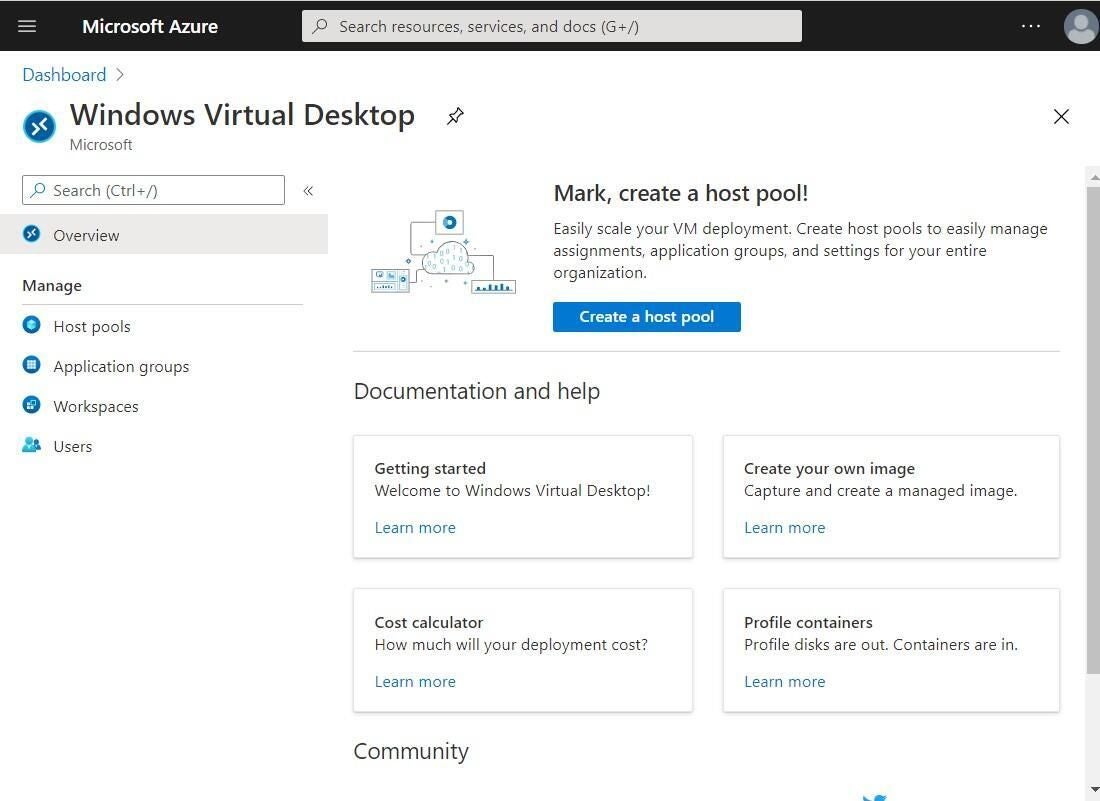
Log in to the Azure Portal with administrative credentials and use the search box to navigate to Windows Virtual Desktop, as shown in Figure A. Click the Create a host pool button to get started.
Figure A
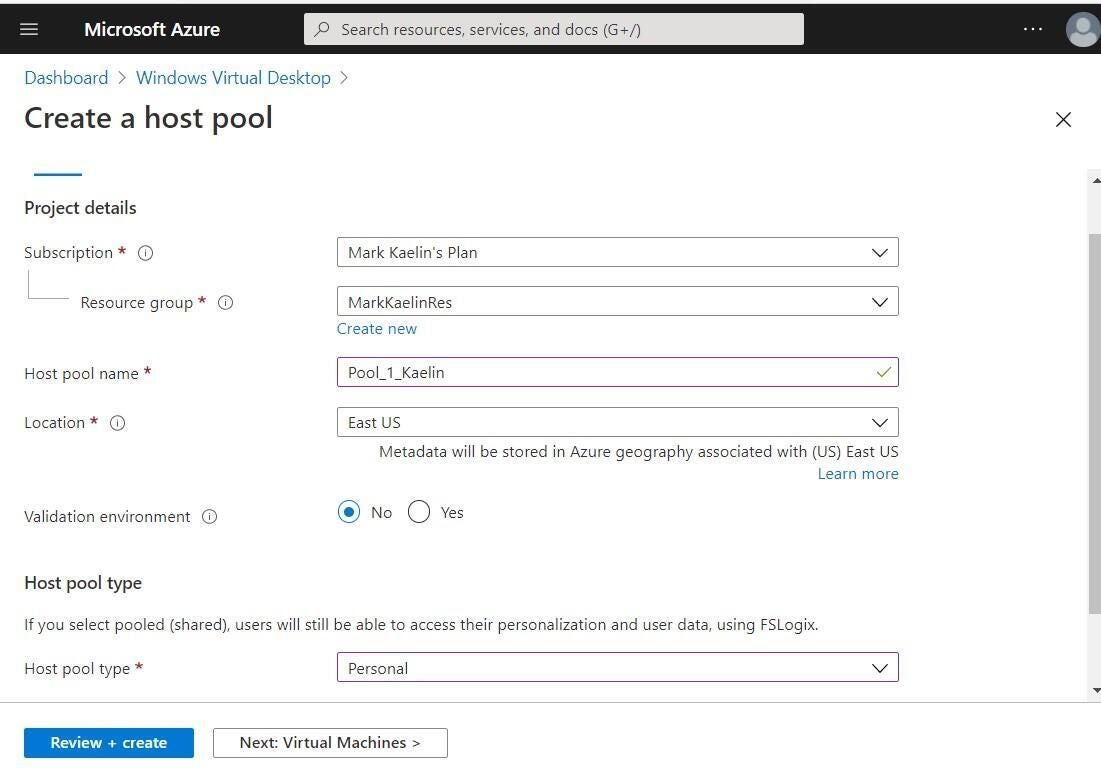
Under the Basic tab (Figure B) you will enter common virtual machine details like name, resources, and location. If you have created virtual machines in Azure before, this should be familiar. Many of the default answers will work just fine. Click the Virtual Machines button to move to the next tab.
Figure B
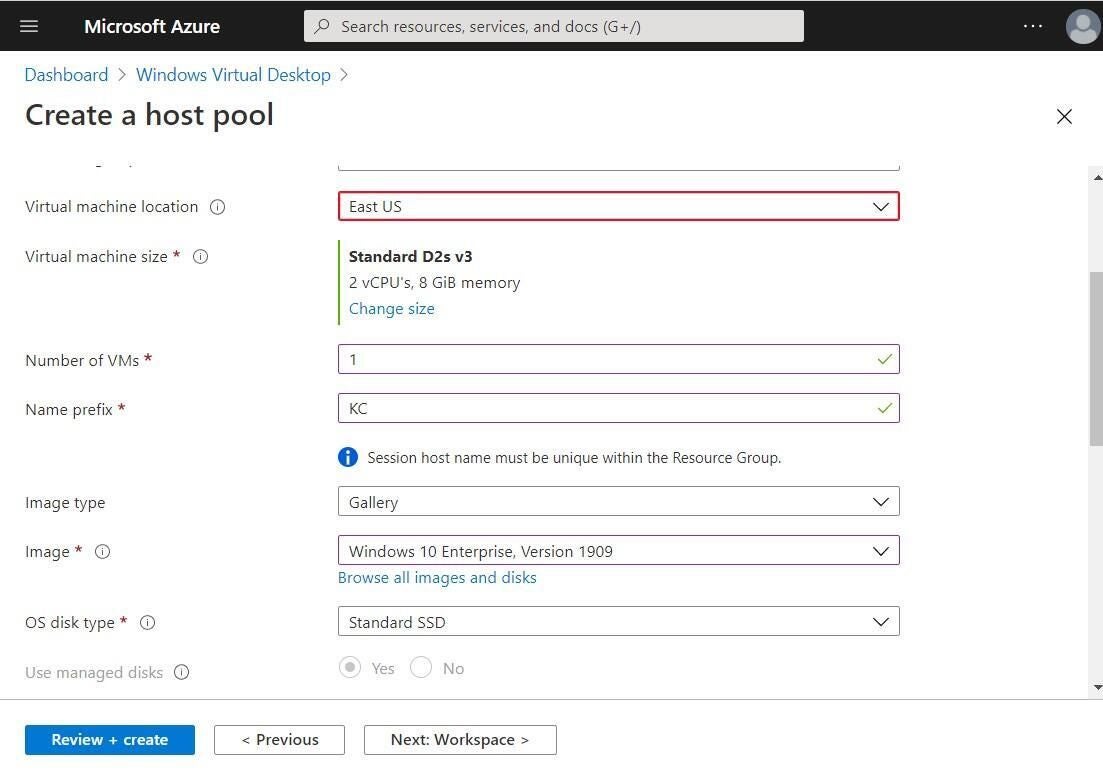
From the Virtual Machines tab (Figure C), you can change the default configuration of your VMs, confirm the number of instances to allocate, pick an operating system, give your pool of instances a valid name, choose a virtual network, and pick your security protocols.
Figure C
Click the Review + create button and then the Create button to create your host pool.
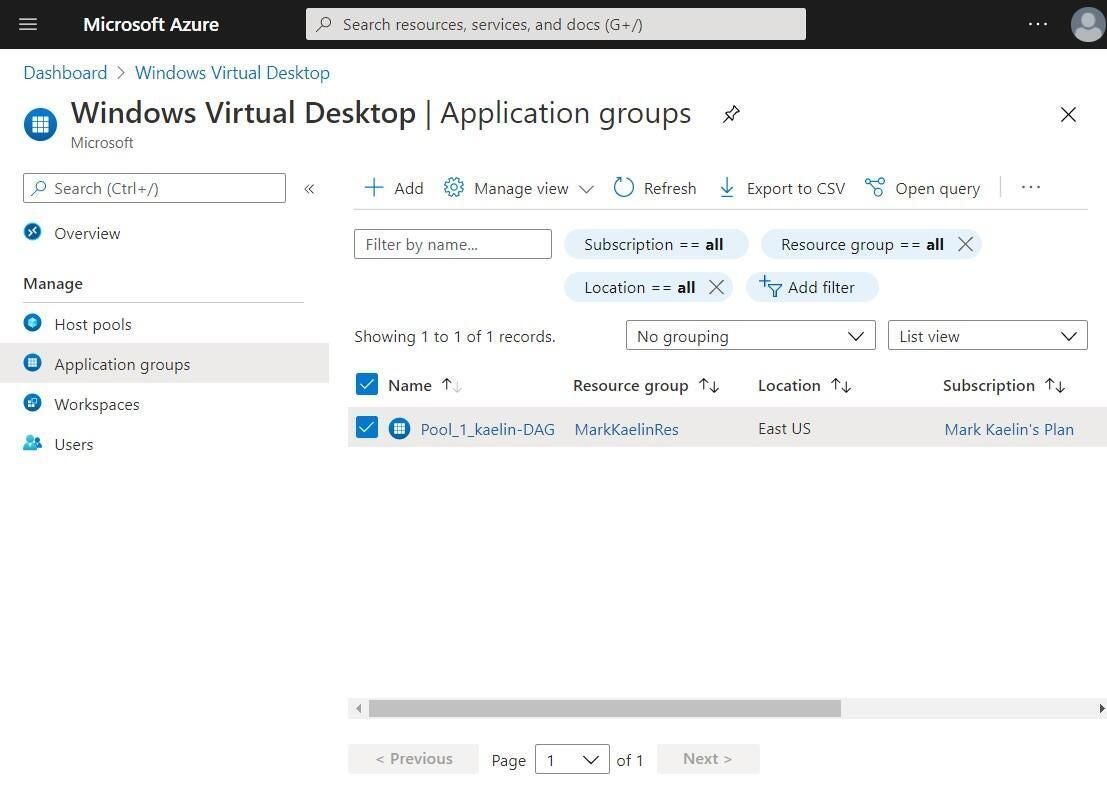
Back on the Windows Virtual Desktop dashboard, click the Applications group tab in the navigation pane and then click the Create application group button. On the next screen (Figure D), you will see your host pool and the associated application group. In our example, we used the default desktop application group, but depending on your configuration choices you may have to make additional selections.
Figure D
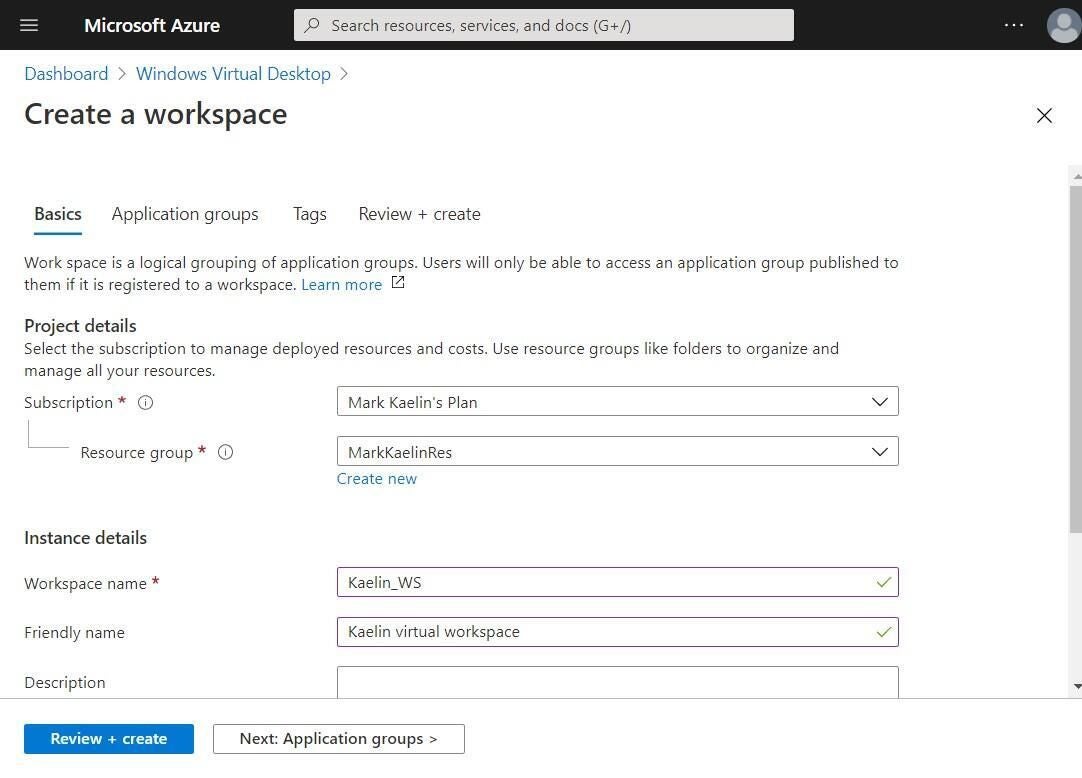
Back on the Windows Virtual Desktop dashboard, click the Workspaces tab on the navigation bar and fill in naming details on the Basics tab (Figure E).
Figure E
Under the Application groups tab (Figure F), register your application group to your Workspace and then click the Review + Create button and then the Create button to complete your Workspace selections.
Figure F

Lastly, back on the Windows Virtual Desktop dashboard, select the Users tab from the navigation bar and search for users who will have access to your virtual desktops. When you find an appropriate user, click the name and choose the Assignments tab, as shown in Figure G.
Figure G
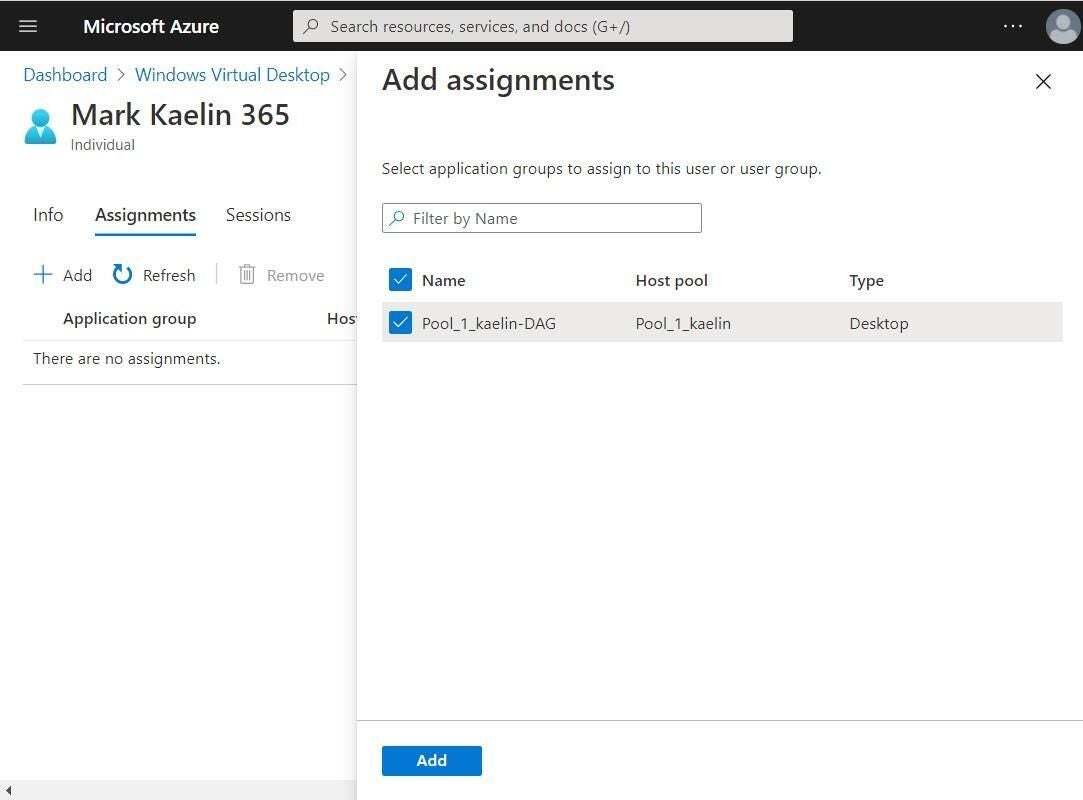
Click the Add+ button and assign the appropriate application group to that user.
To access the virtual instance you have just established, users will have to download and install the Remote Windows Desktop Client and follow the connection prompts to enter their login credentials.
