Let’s learn HP System Event Utility and how to Install and use it. HP System Utility is a software program developed by HP for HP devices, and it plays a vital role in special Function Key management for laptops and Desktops.
The System event utility is preinstalled on HP devices; this utility is an essential part of HP devices. With this software, you can ensure the System’s hardware-related actions. It enhances the functionality and user experience through this software.
This software provides customized control options and notifications for various system events. It’s free software, allowing a user-friendly experience for HP devices. This software helps you to manage, optimize and maintain your System.
This article will give you complete information regarding the HP System event utility and how to install and use it. This software offers numerous advantages to the users through the functionality of the software, and it allows the ability to customize the behaviour of special function keys.
What are the Advantages of HP System Event Utility?

HP System Event utility provides a centralized interface for managing system events in HP devices. This software enables the customization and control of special system events. The HP System Event Utility has many advantages for users, which are given below.
1. It helps you to identify the Hardware issues and errors on HP devices
2. It allows customized function key Configuration to the users
3. This utility provides additional options for controlling the specific features of the HP Device
4. It is a user-friendly tool
5. It gives you additional functions through the functional keys and hotkeys
HP System Event Utility | Install and Use
HP system event utility plays an important role in HP devices; this software allows you the best function key experience and enables the customization and control of special events and functions of HP Hardware.
This software runs in the background and allows function keys and hotkeys to the System, and the System will recognize and respond to the function keys. This software checks the health of your system component in hardware diagnostics.
Download HP System Event Utility
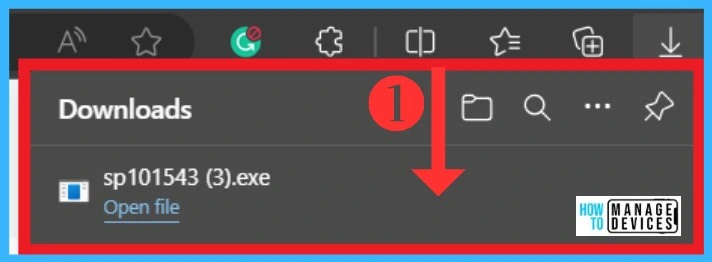
Download the HP System Event Utility from https://ftp.hp.com/pub/softpaq/sp101501-102000/sp101543.exe You can easily download it from the link. The screenshot below shows the procedure.
Installing HP System Event Utility
After the downloading section, you have to click on the downloaded file. After clicking, you will get a window called ”User Account Control”. You have two options: Yes or No, and click on the Yes option. After clicking the Yes option, you will get another window called HP System Event Utility.
The HP System Event Utility window contains information regarding the utility version, and you will get a small description of the software. In this area, it clearly said that it allows function keys for supporting your System, like if you are pressing the Fn+ESC Key to view system information. The screenshot below shows the system utility procedures.
- Click on the Next option.

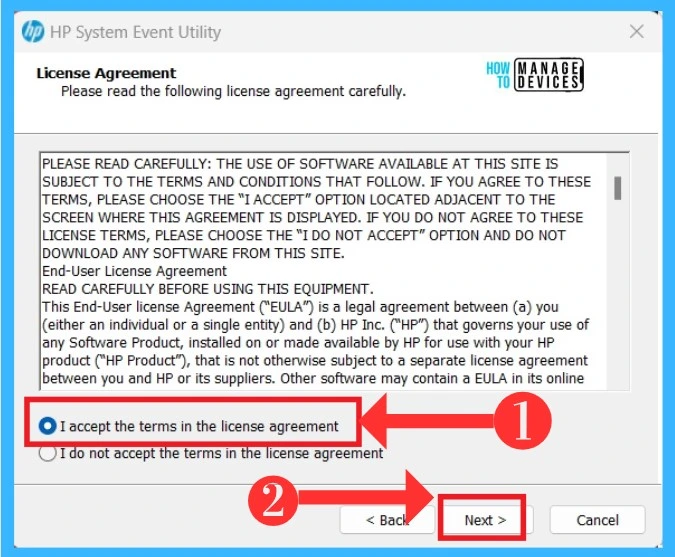
After clicking the Next option on the HP System Event Utility window, you will get another procedure window called Licence Agreement. In that window containing many licence agreement policies, after reading the agreement, you can click on the ”I accept the terms in the licence agreement’‘ option and click on the Next option.
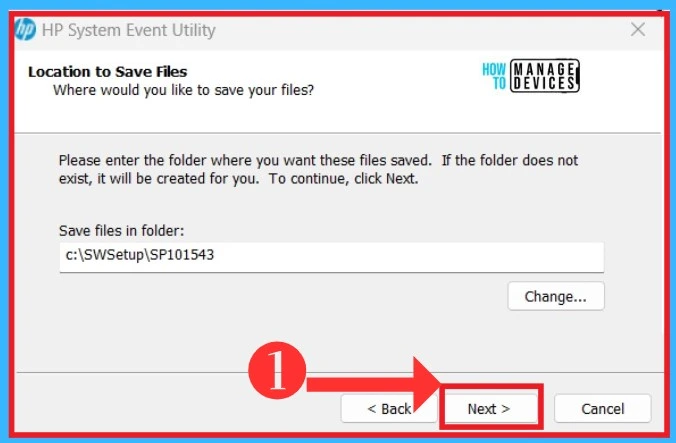
In another window, you will get an option to choose a location to save the file. You can easily do so if you have to change the file-saving location in this window. Here, it shows the C drive by default. If you want to change that, click the change option. If you don’t need any changes, click on the Next option.
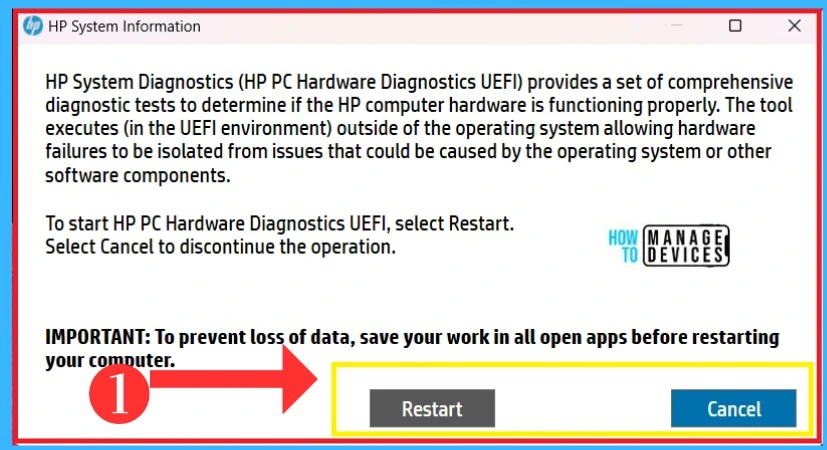
After clicking, you will get the last procedure window containing information regarding the HP System Diagnostics. The system diagnostic is very important for every device. This tool will execute outside of the Operating System, allowing hardware failure to isolate issues that happened by the system or software components.
If you want to do system diagnostics, save all your currently doing files to prevent data loss. After saving, you can click on the Start option or Click on the Cancel option.
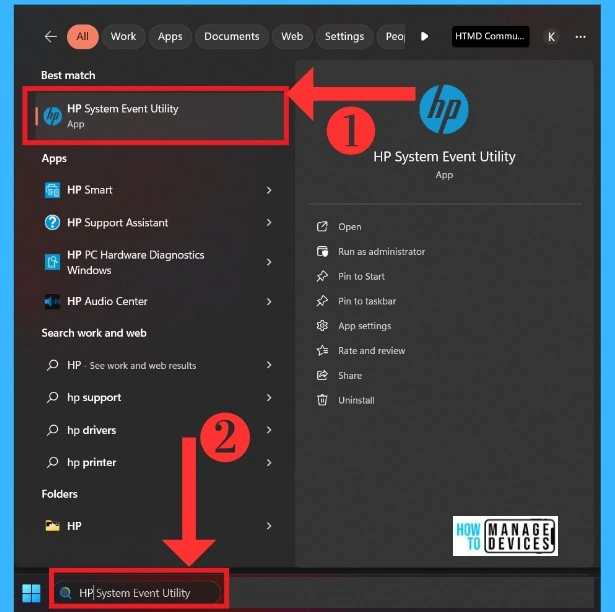
If you skip the diagnostic process at that time, you can easily search the HP system event utility from the Search option near the Start Menu. The screenshot below will help you to search HP system utility in the search box.
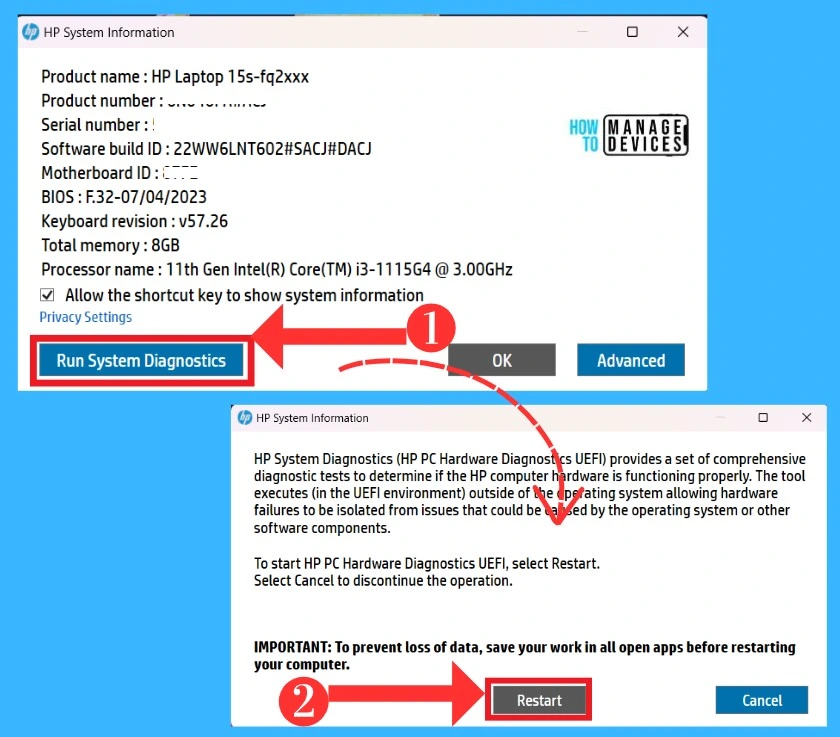
After searching, you will get the HP system utility event window that contains a lot of information about your system. There is an option for System Diagnostics. Click on the Run System Diagnost; then you will get another window, as I showed in the above screenshot, and click on the Restart option.
HP PC Hardware Diagnostics
HP Hardware Diagnostics checks the health of all your system components. When you click the Restart option, it will start diagnosing your PC. This process examines the configuration of the special keys, checking all the issues and errors and verifying the functionality, and it also checks all the system components.
Now, Let’s start the System Diagnostics; first, click the Restart option in the screenshot above. Before you click on the restart option, make sure you are saving your currently used files.
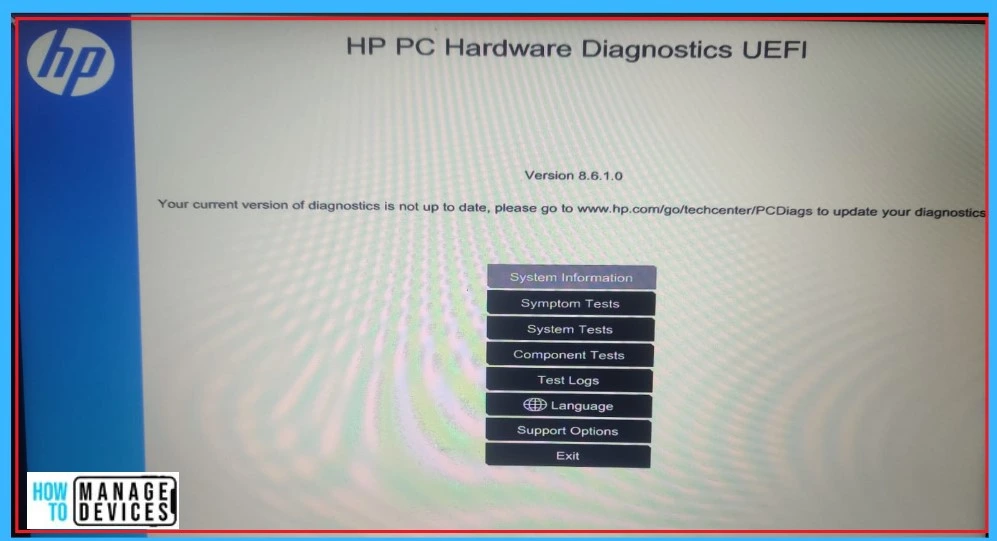
In the first step, it shows the version details and gives the information about your current version of the diagnostic that is not up to date, and it gives you the site details for checking updation. The below list and screenshot will help you.
- A. System Information
- B. Symptom Test
- C. System Test
- D. Component Tests
- E. Test Logs
- F. Language
- G. Support Options
A. System Information
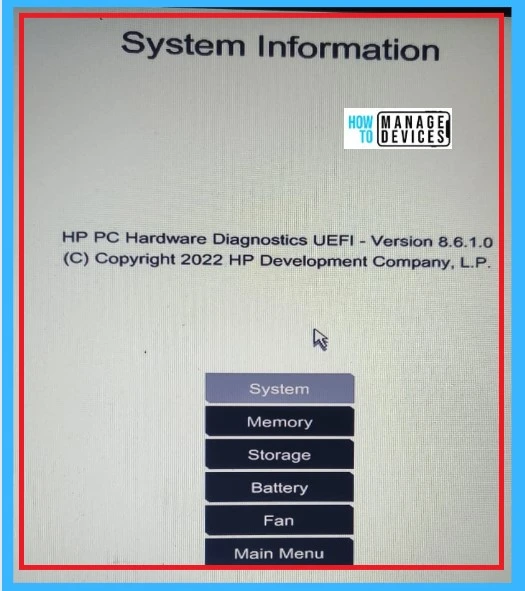
When you click on the System information, you will get the details of your system version, and you can get other system information like memory and storage, battery, etc. The screenshot below shows the System information.
- System
- Memory
- Storage
- Battery
- Fan
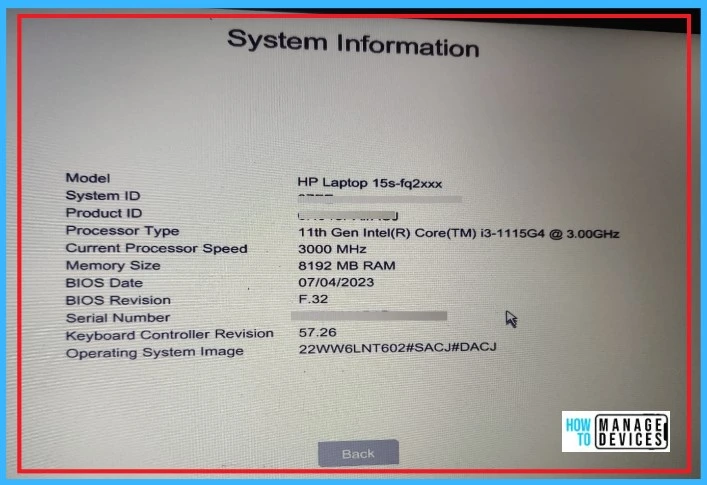
1. System
In the System information window, you will get another option like System. When you click on that, you will get the complete details about your System model, Product ID, Processor type, etc. The below screenshot will help you.
2. Memory
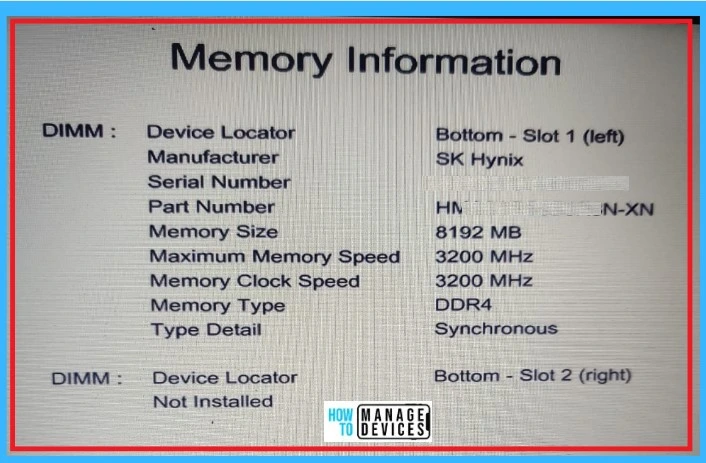
In Memory information, you will get all the information about Memory. In this section, you can see the memory details, size, maximum Memory speed, etc. You can click on the ESC button to exit this window. The screenshot below shows the memory information window.
3. Storage
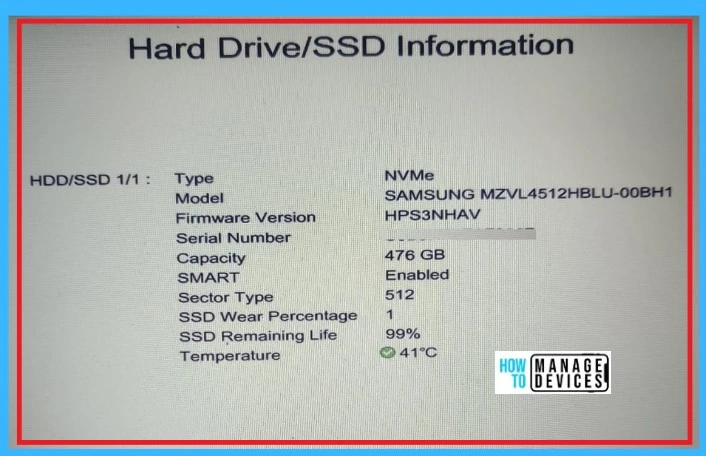
The Storage section is all about the storage information of Hard drives and SSD information like Model name, capacity, sector type, etc. The below screenshot shows the storage information.
4. Battery
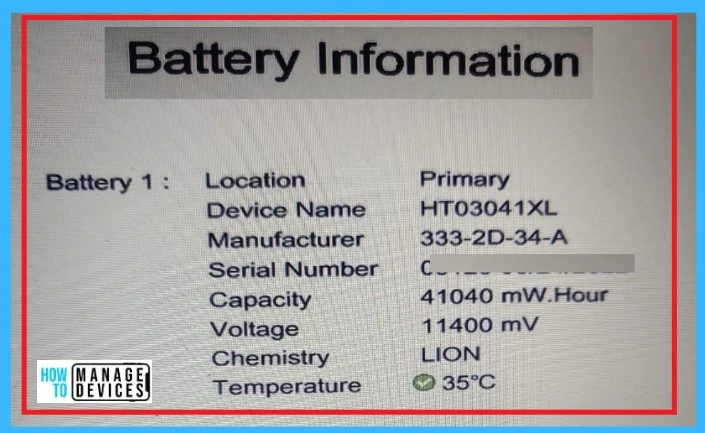
The Battery section also gives you complete information regarding Battery information. In the battery section, you can see the battery 1 location, Device name, Manufacturer details, voltage information, etc. The screenshot below shows the battery information.
5. Fan
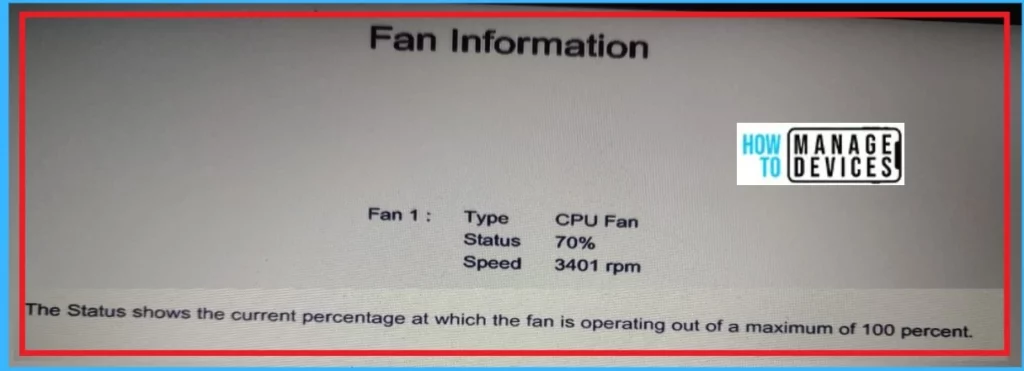
In Fan information, you can get Fan 1 type details, speed details, etc., which says that the status shows the current percentage at which the fan operates out of a maximum of 100 per cent. The screenshot below shows the Fan information.
B. Symptom Test
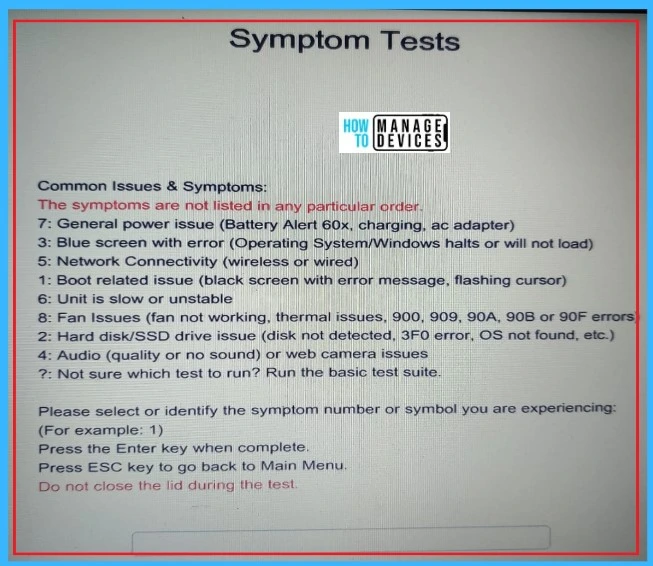
The Symptom test will give you many symptoms on the list. If you have any symptoms on your device, you can select the Symptom list number (1) and press the enter key. If you want to cancel, you can click on the Escape key.
C. System Test
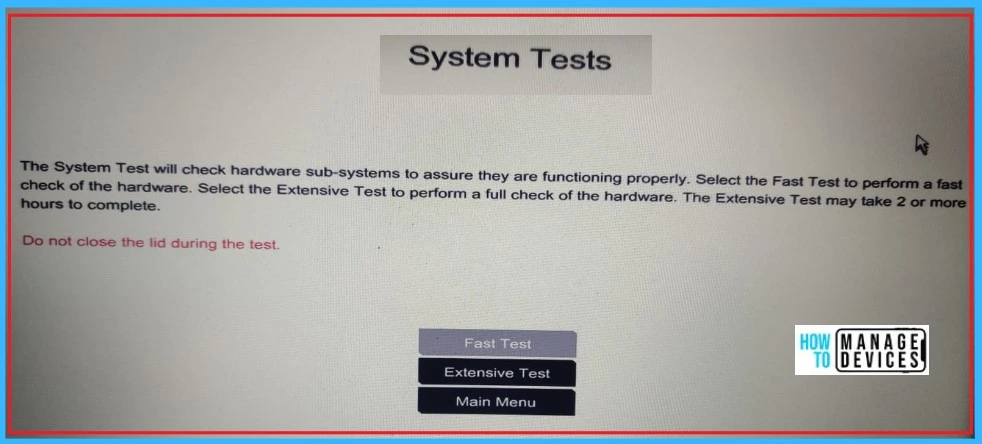
The System Test will check the hardware sub-system to ensure the functioning is running properly. There are 2 tests available fast tests and extensive tests. In the Fast test, it performs a fast check of the hardware. The Extensive check performs a full check of hardware, and the screenshot below will help you.
D. Component Tests
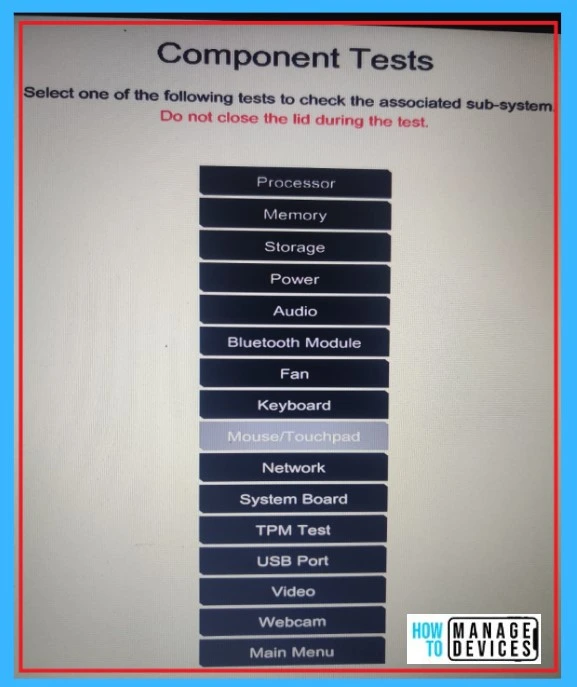
In Component Tests, there are 15 component tests available. You can select any of the components here to check the associated sub-system, and the below list and screenshot show the components.
- Processor
- Memory
- Storage
- Power
- Audio
- Bluetooth Module
- Fan
- Keyboard
- Mouse/Touchpad
- Network
- System Board
- TPM Test
- USB port
- Video
- Web Cam
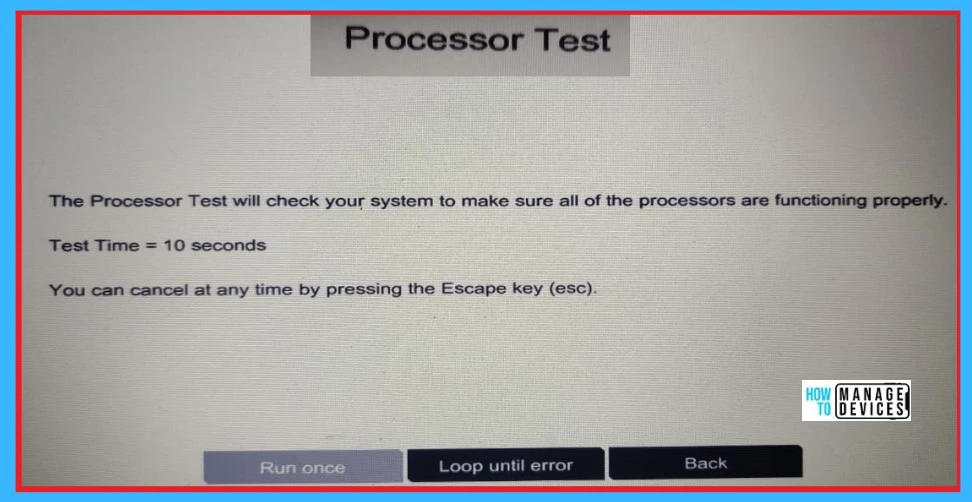
1. Processor
The Processor component test will check your system to ensure all processes are functioning properly. The test time only needs 10 seconds. Also, you can cancel it by clicking the Escape key. The below screenshot shows the Processor test.
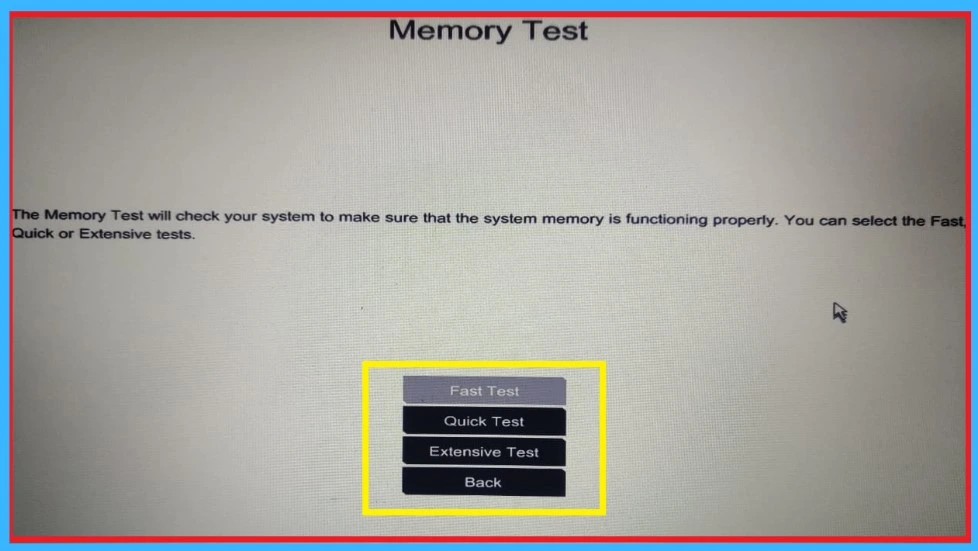
2. Memory
The Memory component test will check your system to ensure that the system memory is functioning properly. You can choose any test method given below, and the table and screenshot show the test methods.
| Test Method | Used to |
|---|---|
| Fast test | It will take 3 minutes or more, depending on the amount of system memory |
| Quick test | It will take 10 minutes or more, depending on the amount of system memory |
| Extensive test | It can be run once, or it can be looped until an error occurs. |
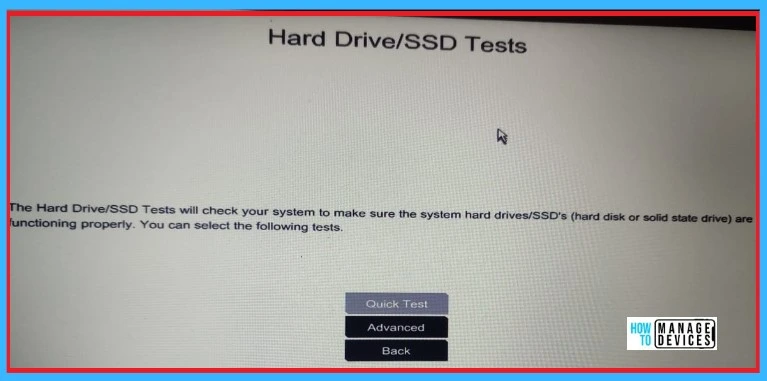
3. Storage
In the Storage test, the Hard drive/SSD test will check your system to make sure the system hard drive is functioning properly. There are some test options, like the memory component section. The screenshot below shows the Storage component.
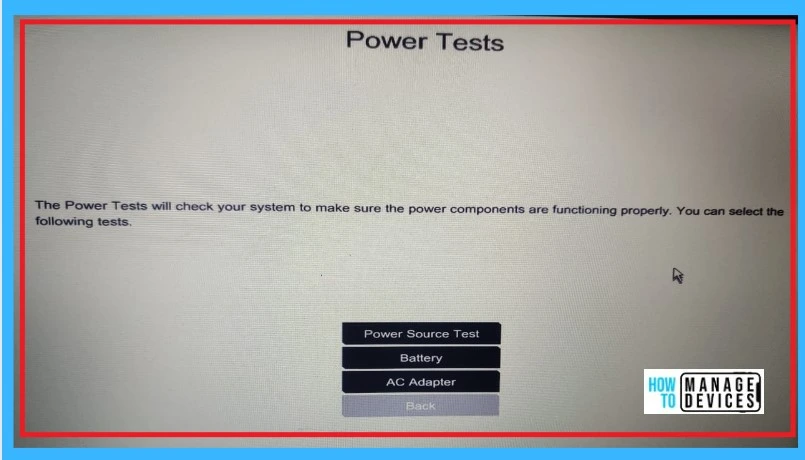
4. Power
The Power component will check the system to ensure the power components are functioning properly, and there are also some test options, like Power source test, battery, and AC adapter. The below screenshot shows the power test page.
| Power Test | Used to |
|---|---|
| Power Source Test | It will check the power source (Battery test, AC adapter) will function properly |
| Battery Test | It will check your battery functioning properly |
| AC Adapter | It will determine whether the AC power Adapter is Running properly |
5. Audio
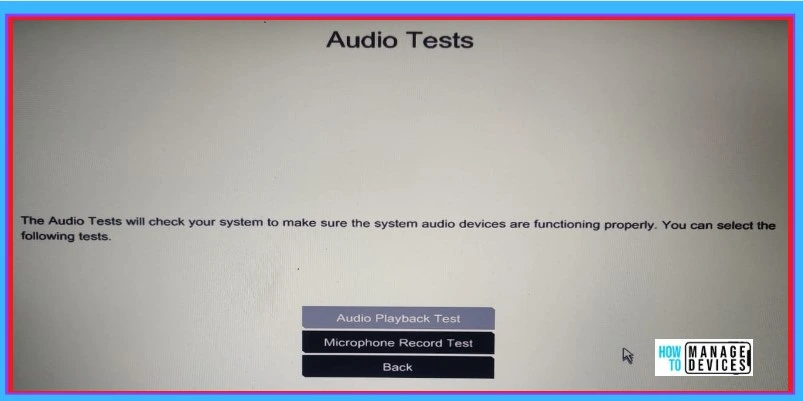
The Audio test will check your system to ensure the system audio devices are running properly. There are 2 tests available: The audio playback test and the Microphone record test. The below screenshot shows the audio test page.
- Microphone Record Test – The test will play a sound file containing a few music notes in sequence and record the sequence with the microphone
- Audio Playback Test – The audio playback test will check your system to ensure the audio device is functioning properly. During the test, a few musical notes will be played in sequence and then repeated
6. Bluetooth Module
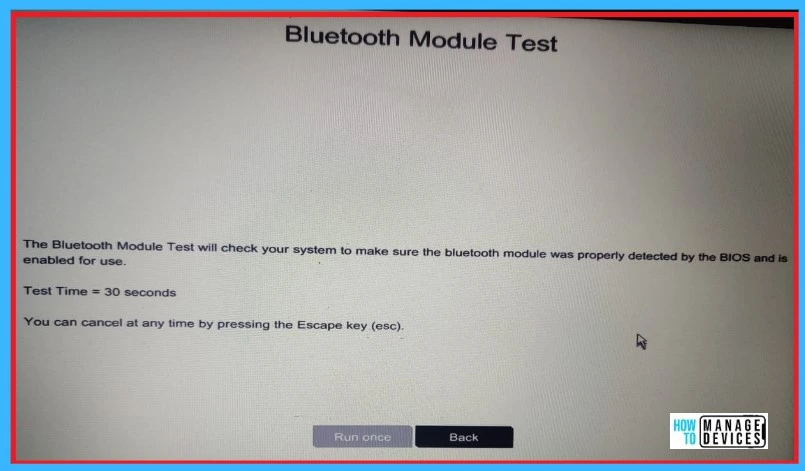
The Bluetooth module test will help you check your system to ensure the BIOS properly detects your Bluetooth module and is enabled for use. This section said that the test will take only 30 seconds, and you can cancel the test at any time by clicking Escape (ESC). The below screenshot shows the Bluetooth module test page.
7. Fan
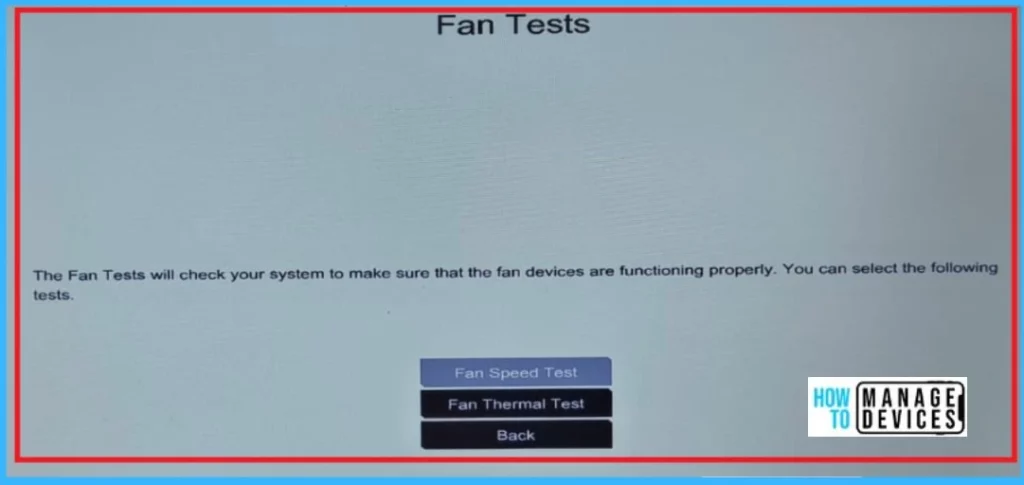
In the Fan speed test, it will check your system to make sure that the fan devices are working properly. Here, you can check the fan speed test and fan thermal test. The below list screenshot below shows the Fan test page.
- Fan Speed Test – This Test will perform a speed test to determine whether the fan is functioning properly by setting and verifying that the speed was set correctly
- Fan Thermal Test– This Test will perform a temperature test to determine whether your CPU fan is functioning properly
8. Keyboard
It will Test the Keyboard and check the Keyboard functionality is working properly. If any problem is detected, it will be identified through this test. It is a powerful test, and it will make the performance better.
9. Mouse/Touchpad
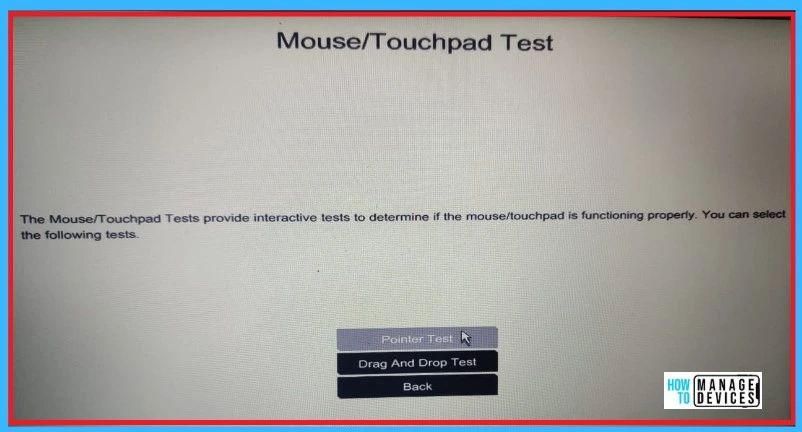
The Mouse/ Touchpad are the other test components in this test; you can check whether the mouse or touchpad test provides an interactive test to determine if the mouse is functioning properly. The below list and screenshot show the Mouse/ touchpad test page.
- Pointer test – It provides an interactive test to determine if the Mouse/Touchpad is functioning properly. Move the cursor to each mouse on the screen
- Drag and drop test -It provides an interactive test to determine whether the Mouse/Touchpad is functioning properly; drag the labelled rectangle in the boxes indicated by the arrows using the corresponding buttons
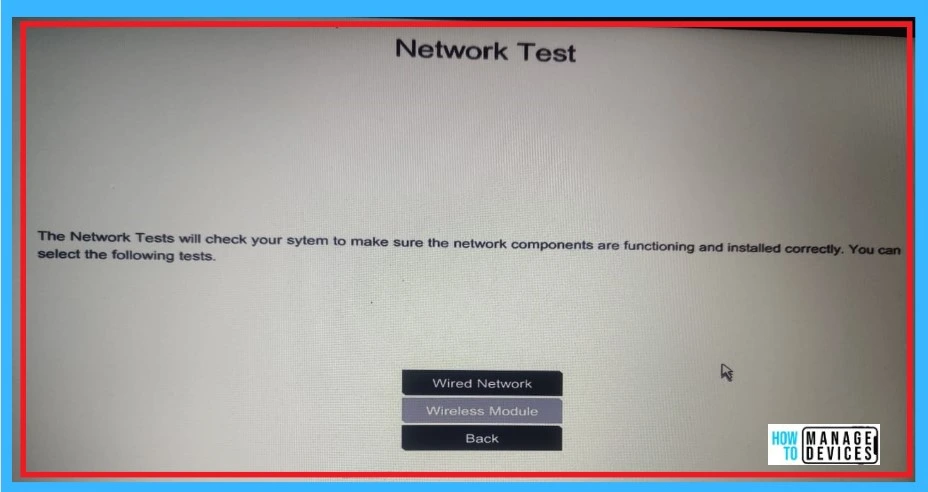
10. Network
In Network component testing, it will check your system to make sure the network components are functioning correctly or not, and you can choose any test from the options like wired network and wireless module. The below screenshot shows the Network Test page.
| Network Test | Used to |
|---|---|
| Wired network | It will help you to make sure the network controller is functioning properly |
| Wireless module network | It will check your system to make sure the wireless module was properly detected by the BIOS and is enabled for use |
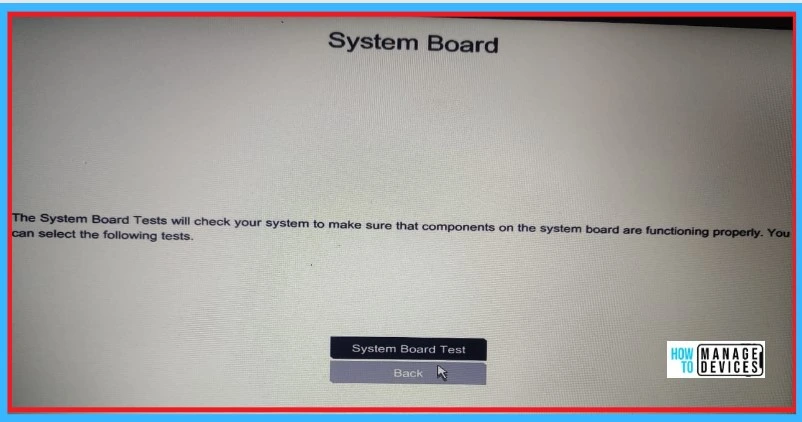
11. System Board
The system board will check the system to ensure that the components on the system board are functioning properly. You can select the system board test here, and the screenshot below shows the system board page.
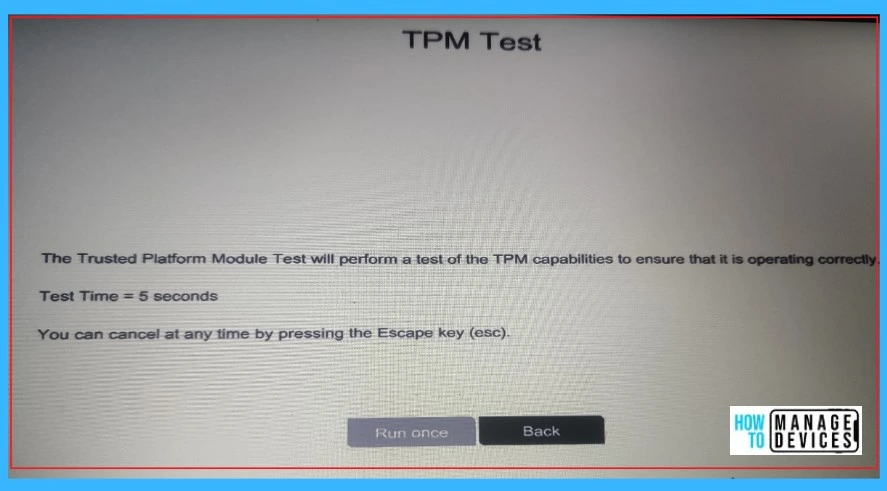
12. TPM Test
TPM test means Trusted Platform Module is the test that will perform a test of the TPM capabilities to ensure that it is operating correctly. The test will take about 5 seconds, and you can cancel the test at any time by clicking the Escape key. The below screenshot shows the TPM Test page.
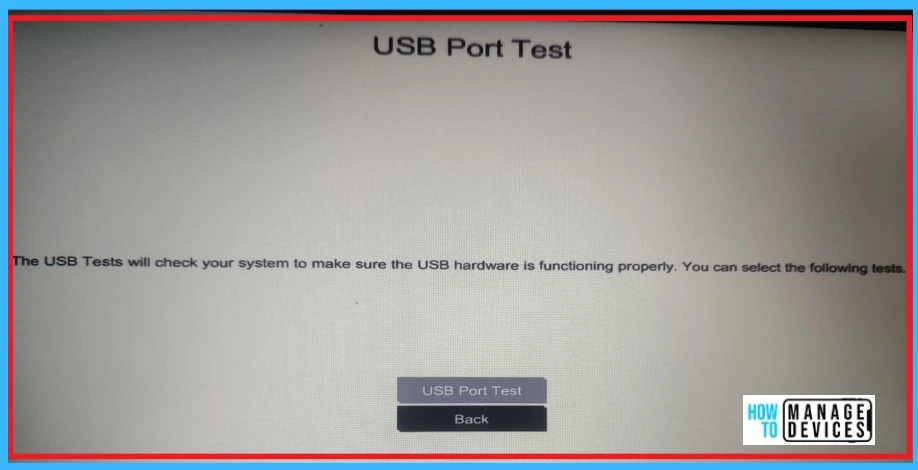
13. USB Port
The USB port will check the system to ensure the USB hardware is working properly. There is an option in testing called a USB port test. The below screenshot shows what the USB Port test looks like.
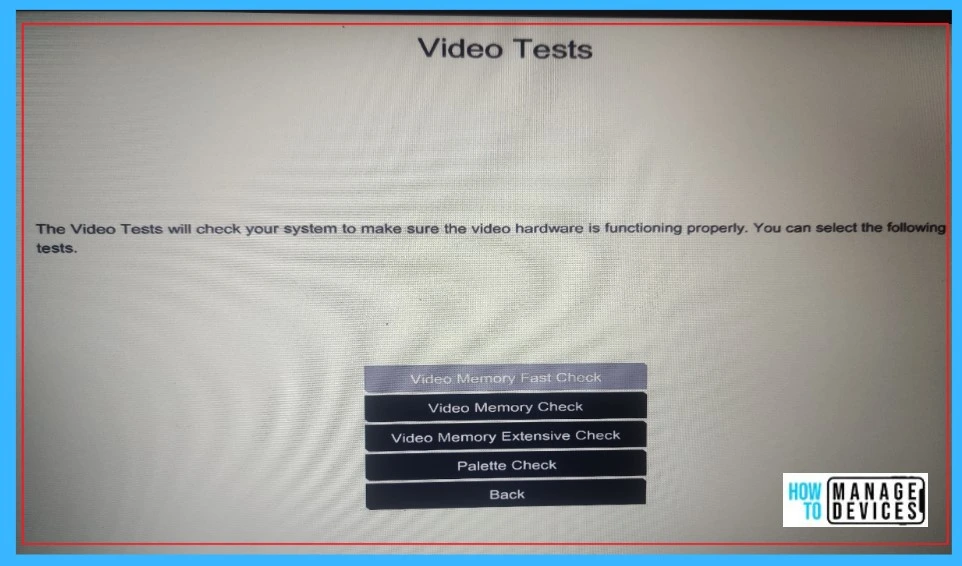
14. Video
Video Components will check the system to ensure the video hardware is functioning properly. There are many tests available for these components that are given below the list and screenshot.
- Video Memory Fast Check
- Video Memory Check
- Video Memory Extensive Check
- Palette Check
15. WebCam
The Webcam test will check your system to ensure the webcam devices function properly. It only has 1 test for Webcam Testing, which is the Webcam connection setting.
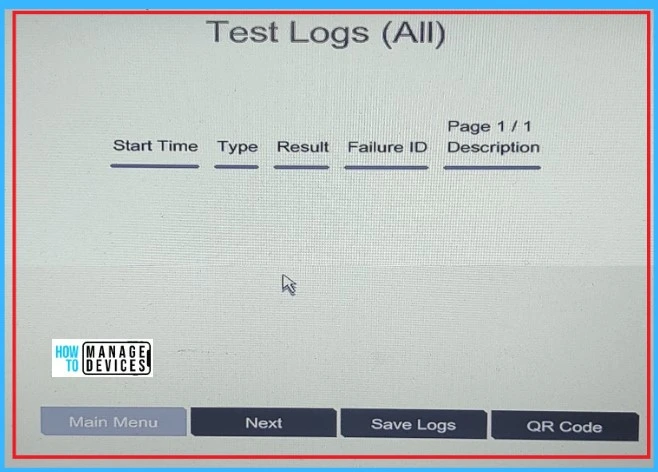
E. Test Logs
The Test log provides a detailed summary of the overall test, which includes runs and indicates the passed and failed tests. It will also show the test start time failure ID and page description. The below screenshot shows the Test Logs (AII)
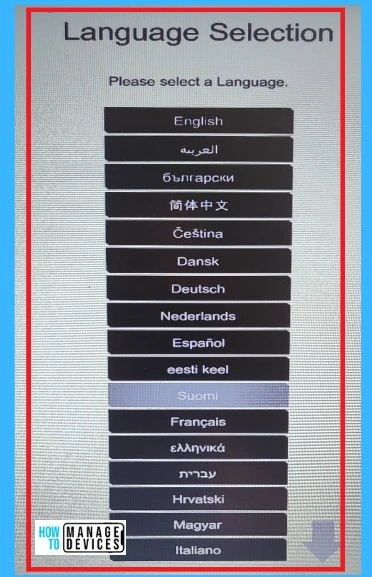
F. Language
In language, the section allows many languages, and you can choose any language setting in this section and also change the language for diagnostic tests. The below screenshot shows the Language available for the test.
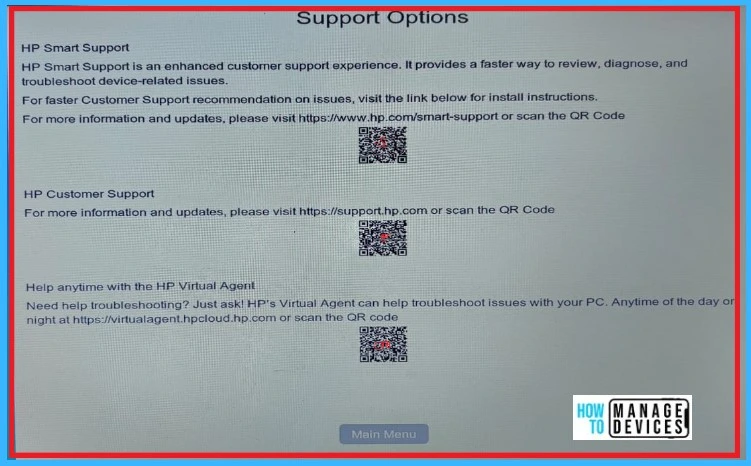
G. Support Options
The support option is the enhanced customer support experience. This section provides a faster way to review, diagnose, and troubleshoot device-related issues. In this section, HP customer support, HP smart support, and Help anytime with the HP virtual agent options are available, and some QR code is also available. The below screenshot will help you.
After all the testing, you can easily exit from the Diagnostic procedure by clicking the Exit option. Then your system will automatically restart, and you can get a fresh start in your system as usual.
Author
Krishna. R is a computer enthusiast. She loves writing on Windows 11 and related technologies. She likes to share her knowledge, quick tips, and tricks with Windows 11 or Windows 10 with the community.

