Most longer Microsoft Word documents have page numbers, but not all of them start page numbering on the first page. That first page might be a cover letter or a title page. In addition, after that first page, the document might contain a table of contents or some other front matter that you don’t want numbered. Starting a Word document’s page numbering scheme after the first few pages isn’t difficult but you must insert a section break. In this Microsoft Word tutorial, I’ll show you how to efficiently start page numbers somewhere after the first few pages.
I’m using Microsoft 365 on a Windows 10 64-bit system, but you can use an earlier version. I recommend that you hold off on upgrading to Windows 11 until all the kinks are worked out. For your convenience, you can download the demonstration .docx and .doc files. You can’t insert section breaks in Word for the web, so you’ll want to use Word desktop. We’ll be working with Word headers, but everything is the same in the footer.
SEE: Software Installation Policy (TechRepublic Premium)
Review your needs
If you’re lucky, you’ll be working with a new Word document; if not, you’ll need to carefully review the existing page numbering scheme, because it’s easy to delete a setting that confuses the entire work. Unfortunately, there’s no silver bullet for existing page numbers, but the following should be comprehensive enough to get you close:
- Check headers and footers for the unnumbered pages in the front matter. Most likely you will find no page numbering settings but check anyway.
- Check headers and footers for the first page in each chapter.
- Check headers and footers on the last page.
- Check headers and footers in all referencing segments: table of contents, table of figures, index and so on.
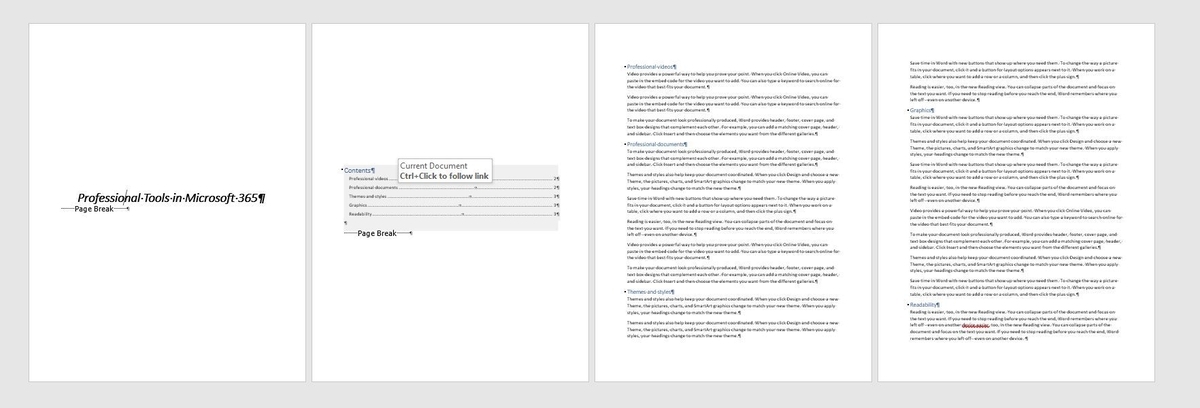
Once you know what you have, you can decide what to keep and what to remove. This is a situation where an article isn’t going to help you. If you’re working with a new document, such as the four-page document shown in Figure A, the planning stage is much simpler. Specifically, we don’t want a page number on the title page or the table of contents, pages 1 and 2, respectively.
One more piece of advice. If you’re working with forced page breaks and sections, turning on Show/Hide will help because it shows page and section break codes. To enable this feature, click the Show/Hide option in the Paragraph group on the Home tab. Click again to turn it off.
SEE: Google Workspace vs. Microsoft 365: A side-by-side analysis w/checklist (TechRepublic Premium)
Step 1: Section breaks
When you don’t want to show pages numbers on the first few pages, you must use section breaks. There’s no way around it. Inserting section breaks allows you to set different formatting for different sections. It’s the backbone of a busy document with lots of formatting requirements.
Reviewing our document’s numbering requirements, we want to start page numbers on page 3. To accomplish this, insert a section break to the bottom of page 2 as follows:
- Select the hard page break on page 2, as shown in Figure B. This is where having Show/Hide enabled helps. The section break we’ll insert includes a page break, so you don’t need the hard break currently there.
- Click the Layout tab.
- In the Page Setup group, click the Breaks option.
- From the dropdown choose Next Page from the Section Breaks section (Figure B).
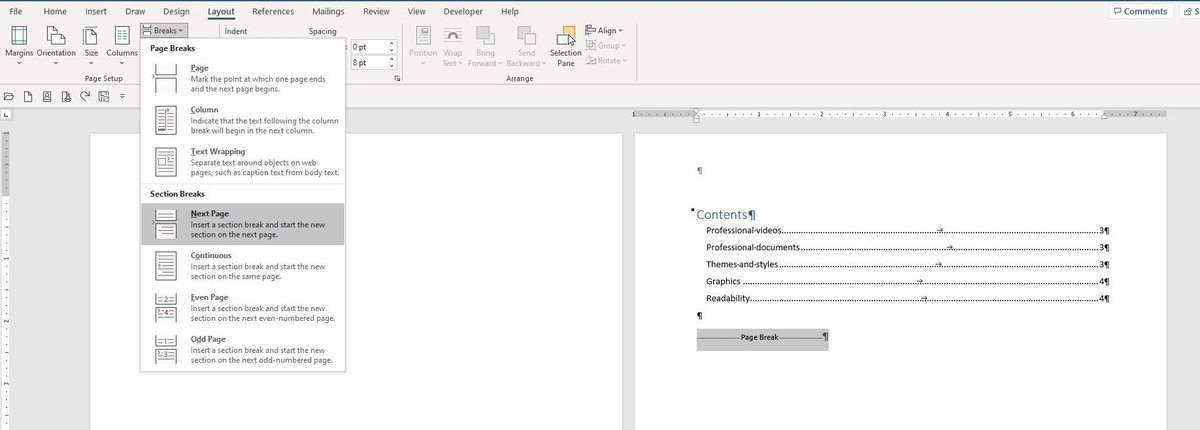
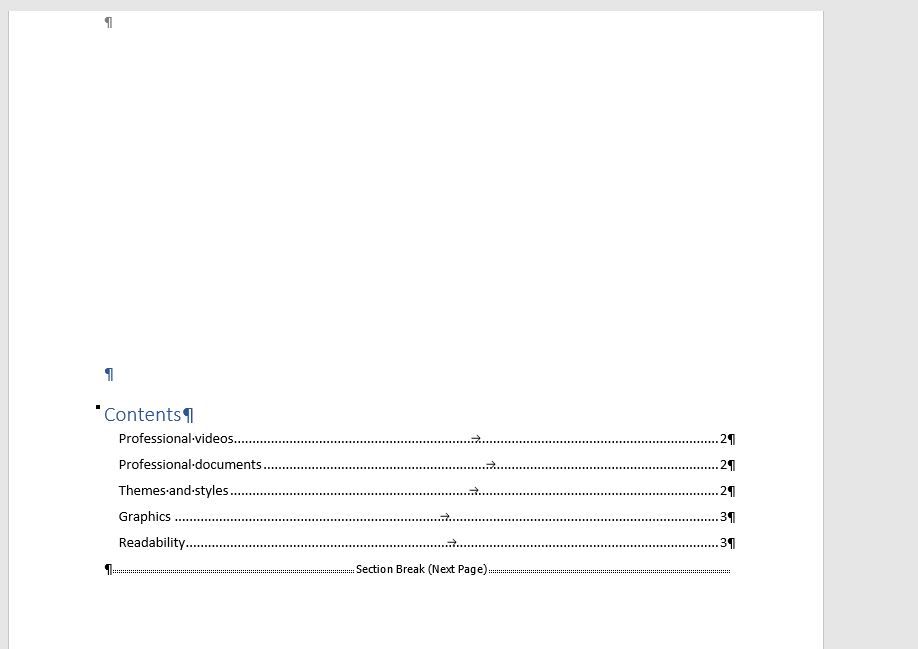
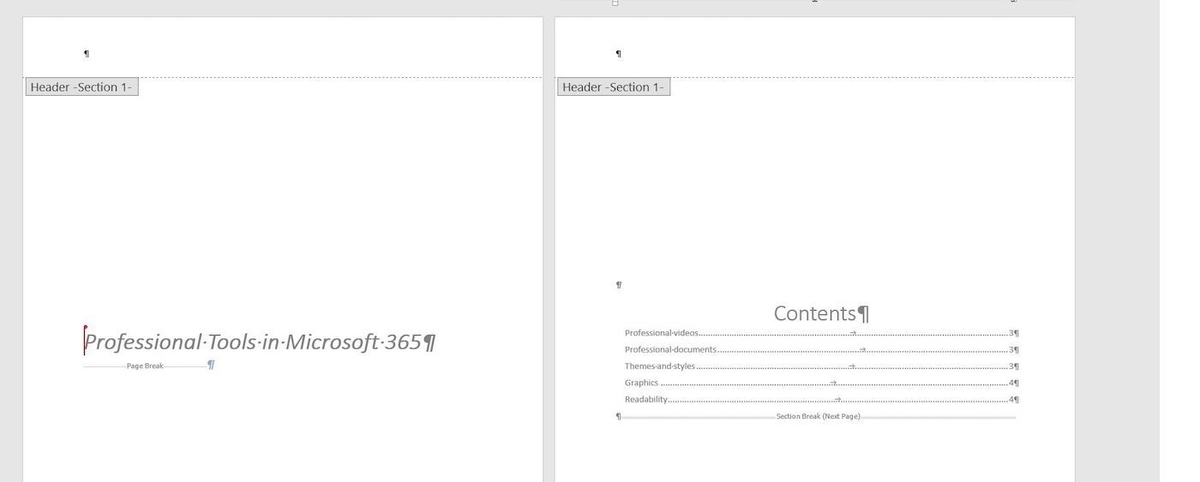
Figure C shows the new section break. As you can see, the forced hard page break has been replaced with a section break, and the text still starts on page 3. If the forced page break shows up at the top of page 3, select it and delete it.
With the section break in place, you’re ready to start numbering pages at page 3.
Step 2: Page numbers
With the section break in place, you can enable page numbering as follows:
- Go to page 3 or 4.
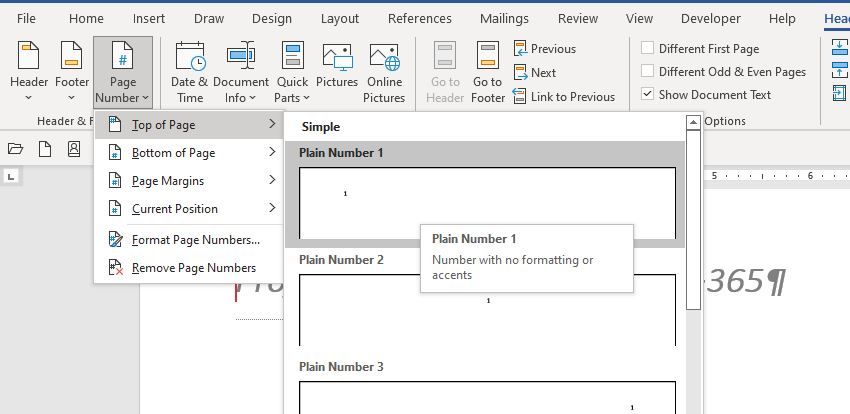
- Double-click the header area to open it in edit mode.
- On the contextual Header & Footer tab, click Page Number in the Header & Footer group.
- Choose Top of Page from the resulting dropdown and then choose Plain Number 1 (Figure D). You can select something else but keep things as simple as possible.
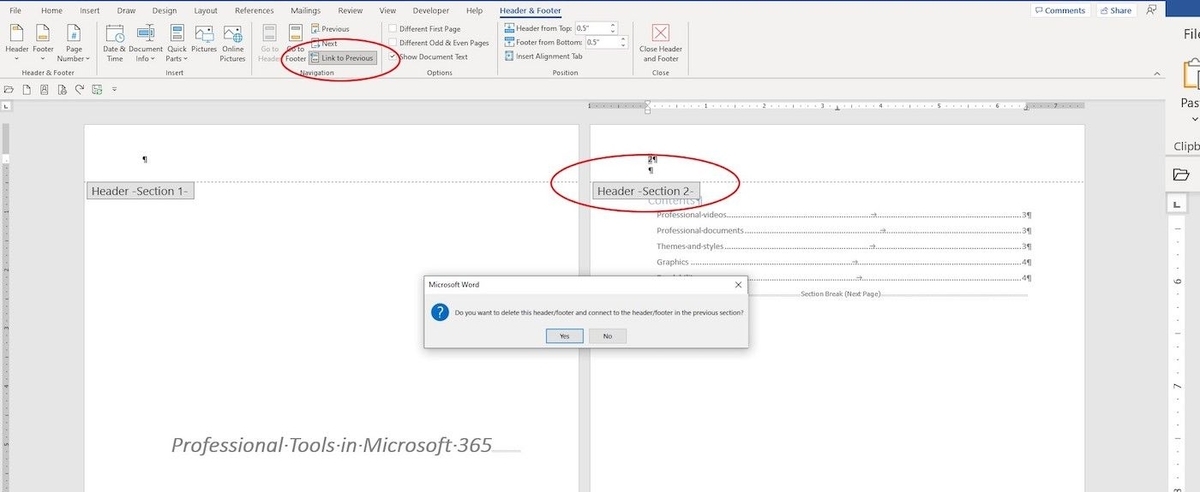
Turning on page numbering, turns it on for pages 3 and 4, but also page 2, which we don’t want. To disable page numbering for page 2, we need to unlink the headers between sections 1 and 2. To that end, click the header tab on page two—the one right under the header that displays “Header-Section 2-.” Then, click the Link to Previous option shown in Figure E in the Navigation group. Doing so unlinks the two sections. As you can see in Figure F, page 2’s number is gone. Page number now start on page 3.
There’s one more step that you might want to take—but it isn’t necessary.
SEE: Windows 11: Tips on installation, security and more (free PDF) (TechRepublic)
Step 3: Change beginning page number
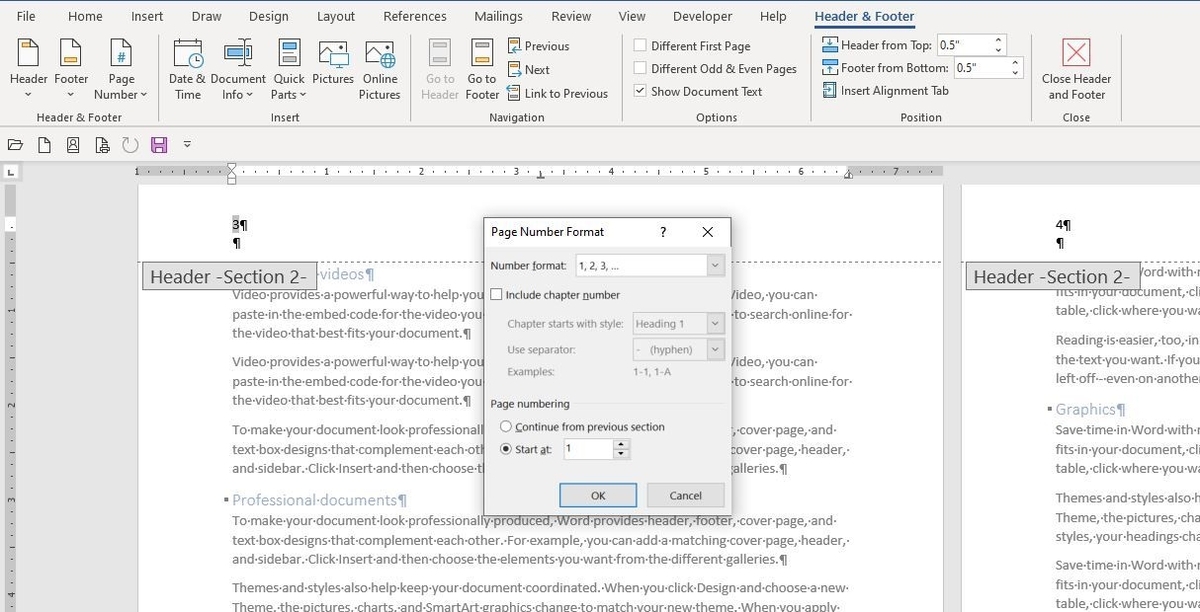
When you turn off page numbering for front matter such as our title page and table of contents, you might want to change the first displayed page number to 1. In our case, it’s really page 3, but that’s inclusive of the front matter. To start page number with page 1, do the following:
- With the header open, select page 3 on page 3.
- Click Page Number in the Header & Footer group.
- Select Format Page Numbers.
- In the Page Numbering section of the resulting dialog, select the Start At option and enter 1, as shown in Figure G.
- Click OK.
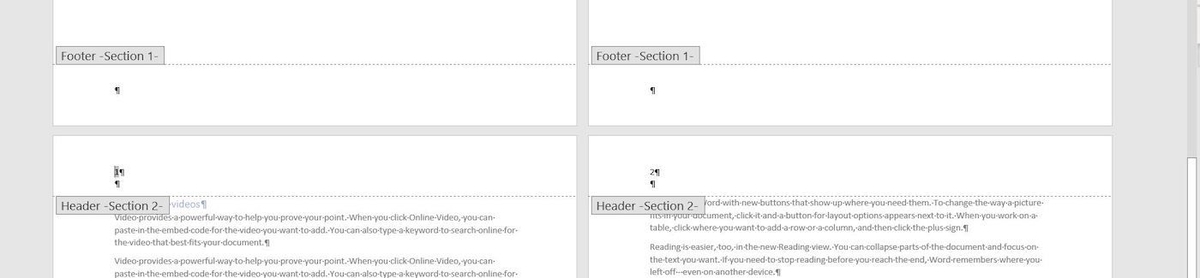
As you can see in Figure H, page number now starts at 1 instead of 3. This is a step you don’t have to take, but it’s good to know that you can.
It’s a simple exercise, but it’s easy to get confused if you insert page numbers before inserting the appropriate section breaks. If you start with the page numbering first, you might go around and around trying to make it all work. If you’re turning off only the first page, use the Different First Page option instead of inserting a section break.